Chicken Troubles

We get 12 to 16 eggs from our 16 chickens every day.  They have been very good and consistent egg layers, so I was very suspicious when we collected only 9 eggs the last 2 days.

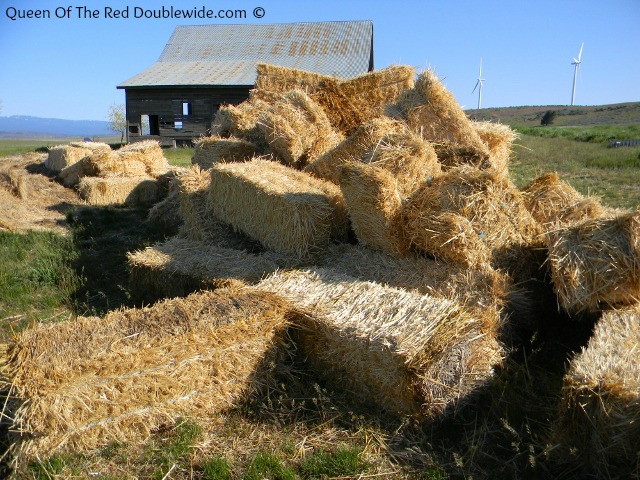
A good friend of ours brought us a HUGE pile of straw bales (for free!!!) which Digger shoved off the trailer with his excavator. The result of this expedited removal left quite a mess…

DSCN6685 (640x480)-1I suspected that the chickens found some great hiding places in the straw to deposit their eggs instead of using the nesting boxes.  This wouldn’t be the first time we’ve had to go egg hunting.  This is a down fall of letting the chickens free range; sometimes they decide not to go back to the coop, and around here there are PLENTY of hiding places.  I figured a quick search through the pile would produce several missing eggs, on my way to search in the straw I heard a weird chicken disturbance in the barn.  I took a little detour to check it out and this is what I found:

DSCN6673 (480x640)
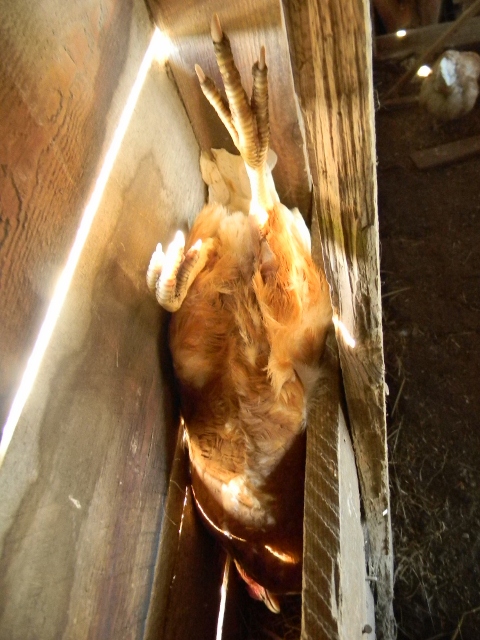
How she ended up upside down in the wall of the barn I will never know!

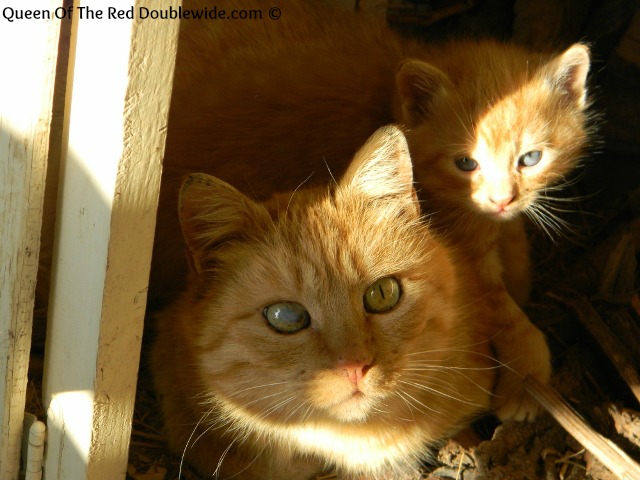
I pried her out of her ridiculous predicament and realized it was Ginger (of course).

DSCN6680 (640x480)-1
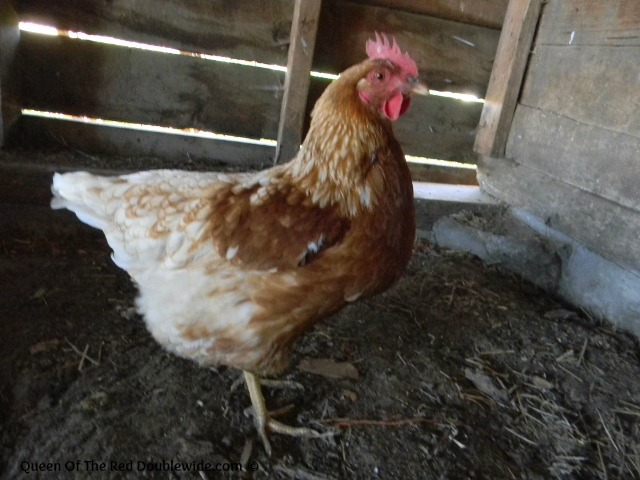
Here she is looking dazed but not hurt.  Ginger is by far the most curious, and I always thought the smartest (but maybe not) of all my chickens.  When I set her down, she ruffled her feathers, glared at me like it was my fault (or maybe she was just mad cause I stopped to take a picture before rescuing her), then went about her business.  I was so glad I went in the barn….I don’t know how long she would have survived squished in there upside down…

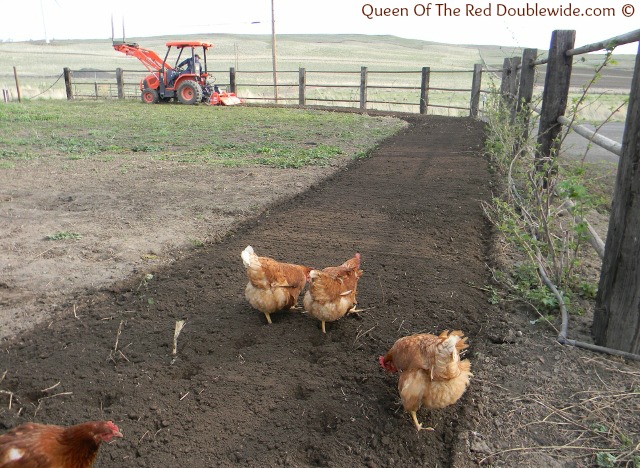
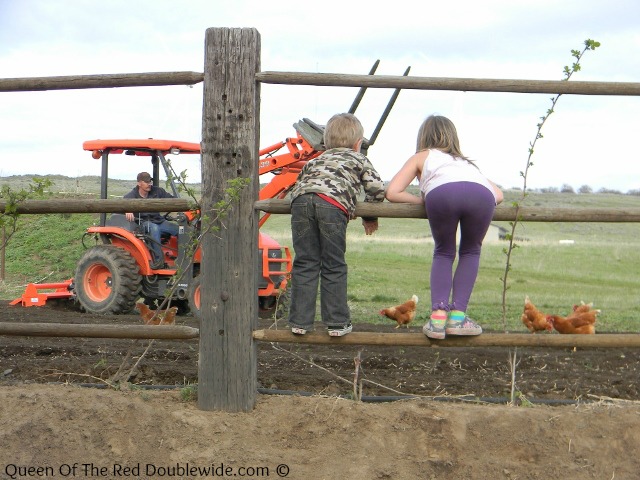
I then proceeded to the straw pile to start my egg hunt.

DSCN6687 (640x480)-1Soon I had help…..lots of help!

As you can see we performed a thorough search, but came up with nothing.  There were several holes we couldn’t see into though, and I wasn’t terribly anxious to move the whole dang pile for some missing eggs!

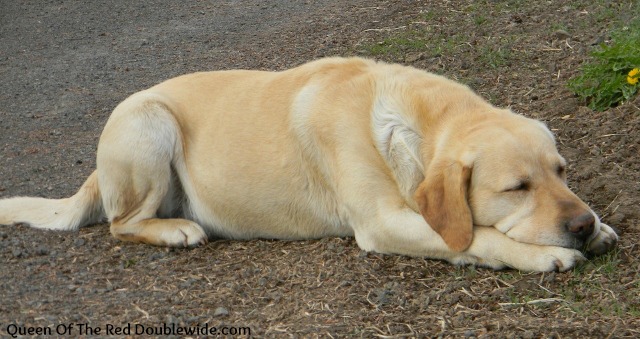
It was time to head back to the house and start school, but I decided to stop by the chicken coop to collect any recent eggs.  When I opened the door our dog “Oddie” was in the coop!  I yelled and she quickly dove for the chicken door.  I had no idea that darn mutt could fit through the chicken door.  I now know where all those eggs went!

Here’s the little egg sucker, still licking her chops and looking shameful.

DSCN6694 (640x480)
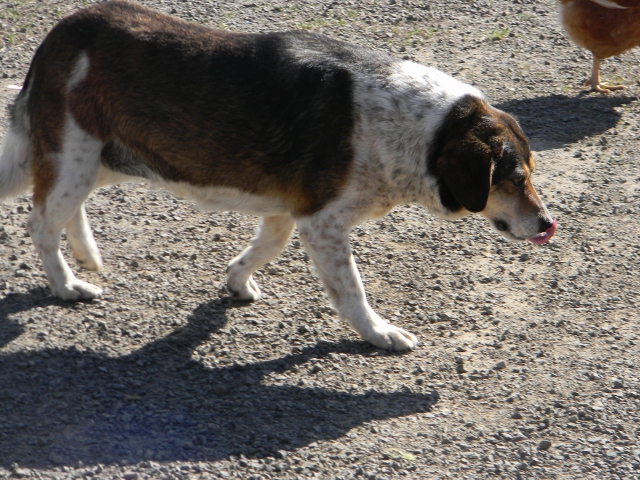
The only way to solve the problem was to make the door smaller so she couldn’t fit through.  We have called her “Houdini Dog” since she was a pup, so I shouldn’t have been surprised that she found her way into the coop.  She has been known to climb 8′ no climb fence to get out of a pen, and she has managed to get out of every collar we’ve ever put on her (that’s what happens when your neck is bigger than your head).

So the lessons for the day are:  Never underestimate the clumsiness of a curious chicken, and always measure your dog before you build a chicken door!

Recycled Potato Bin

We have not had good luck in the past growing potatoes.  With our dense, clay like soil we ended up with very small funny shaped potatoes.  The past few years we haven’t even tried, but this year we are planning to have LOTS of home grown potatoes to store away for the winter.  A potato bin filled with a top soil, sand, and compost mix seems like the best way to go.

If you read about our “Red Neck Art Project” you know that Digger replaced the deck on his trailer last month.  He used the old boards off the deck to made a HUGE potato bin!

DSCN6163 (640x480)-1Here is the finished product.  It’s 4′ wide, 12′ long, and  2′ high and I bet you’re wondering what the pole across the middle is for.

DSCN6782 (640x480)-1Pretty handy, right?  Digger moved it into the garden and the girls and I planted potato starts!  It’s the first thing we’ve planted this year and it felt good to be in the dirt.  We’ll layer several inches of mix every few weeks as they grow which (hopefully) will fill this thing to the top by the end of the season with large, correctly shaped spuds.  In the fall Digger will bring the excavator back and lift the bin off so we can easily harvest them!

DSCN6787 (480x640)So that’s it: Our super cheap, handy dandy, recycled, potato bin, with an excavator handle!

April 2013 – A Month of Photos From the Red Double Wide

I’ve gone a little crazy with my camera lately, so I thought I would share (some of ) my favorite photos from the past month.  Spring time is so beautiful and FUN!

DSCN6124 (640x480)-1
This is one of our raspberry bushes that border our garden….can’t wait for fresh raspberries!
DSCN6103 (640x468)-1
The chickens were in heaven when digger tilled the garden.
DSCN6142 (640x480)-1
“Garden Butts”
DSCN6149 (640x480)-1
“Sleepy Dog” – This is a VERY rare moment, he is usually dropping a ball on our feet, drooling all over our pants, or trying to get the cats and chickens to play.
DSCN6139 (480x640)-1
Hyacinth – Not only my favorite flower but my favorite color too! I need to plant more.
DSCN6601 (480x640)-1
Great Grandma enjoying some snuggles with a barn kitten.
DSCN6491 (640x480)-1
Little Chefs first time mowing with a push mower. She decided she prefers the riding mower! I don’t blame her…I took turns with her and realized how much harder a little labor is after a long winter indoors.
DSCN6618 (640x480)-1
This is Diggers Grandpa….our riding mower broke down so he came out on his 94th birthday with his brand new mower and mowed some of our lawn for us!! (He had a blast and left asking when we might need him again!) What a great guy, we are so blessed to have him and Grandma close to us.
DSCN6552 (640x480)-1
This mama barn cat is blind in one eye, but it doesn’t seem to effect her at all. She is the best mouser we have and a wonderful mommy!!  She has two chunky adorable kittens right now.

     DSCN6157 (640x480)-1DSCN6523 (640x480)-1DSCN6497 (640x480)-1DSCN6628 (640x487)-1Don’t let these pictures deceive you!  We have had some beautiful days in April, but we also had our share of wind, rain, hail, and more wind!  We haven’t yet planted anything in the garden (it’s still getting really cold some nights) but my seed order should be here tomorrow and Digger is working on getting the fence up around the garden.  No use planting until the chickens are fenced out!

Happy Spring Everyone!!

How to Cook and EASILY Peel Farm Fresh Hard Boiled Eggs!

First of all I want to mention that this method is not just for farm fresh eggs.  Store bought or strait from the coop, your end result will be beautiful hard boiled eggs!

Have you ever tried to peel a farm fresh hard boiled egg?  I have, and it’s not a pretty sight. Unlike older, store bought eggs, no matter how hard you try the shell will not let go of the egg, leaving you with a lumpy, broken mess!!  With my new egg laying machines and tons of fresh eggs the only thing I could think to do was hide a dozen eggs in the back of my fridge and wait for them to get old (the older the egg the easier it is to peel).  This works as long as you know two weeks in advance when you are going to want a hard boiled egg.  I don’t know about you, but when I want egg salad, I want it now, not two weeks from now!!

That was not my only problem with hard boiling eggs, I usually over boiled them and ended up with a green ring around the yolk….for some reason greenish colored, lumpy, deviled eggs are not very appetizing.  So I started researching and experimenting, and experimenting, and experimenting…….and this method left me with sun colored yolks and EASILY peel-able eggs!

DSCN5329 (640x480)-1

Start by placing a pot of water on the stove to boil.  Make sure it’s enough water to cover the eggs.  While your waiting for the water to boil take a (clean) thumb tack and poke a small hole in the fat end of each egg.

DSCN5385 (640x480)-1Be careful, you want to make a hole but not push the tack all the way in.  The goal here is to put a tiny hole in the shell where the air sack is and not poke through the membrane inside.  When the water is at a hard boil, and you have a tiny hole in each egg, gently (VERY gently) place the eggs in the boiling water and set the timer for 15 minutes.DSCN5210 (640x480)-1Keep them at a low boil for the entire time.  If you pushed the tack in to far you will see streams of egg white floating in the water.  It’s no big deal, that egg will just not be as pretty as the rest.  After you do this a few times you will get the hang of it.

While they are boiling prepare a bowl of ice water in your sink.  When the timer goes off immediately remove the pan and drain the boiling water.  Then place the hot eggs into the ice water.

DSCN5612 (640x480)-1Wait about 15-20 minutes and take them out one at a time to peel.

DSCN5340 (640x480)-1


These are eggs that were laid this morning….see how nicely they peeled.


DSCN5344 (640x480)-1

This is an egg that I poked the tack in to far and some of the the egg white escaped.  Not a good look for deviled eggs, but will still taste great in egg salad. 🙂


 DSCN5616 (640x480)-1See how nice and pretty the yolk is!!

I’m so glad I can make deviled eggs whenever I want instead of having to plan ahead and hide them in the back of the fridge to get old.  I hope this works as well for you as it has for me.  The tack trick takes a little practice, but if all you have is fresh eggs to peel it’s definitely worth the effort.

I found this method at: Paths of Wrighteousness

Related Posts Plugin for WordPress, Blogger...