Homemade Onion Soup Mix Packets


I’m excited to share this one with you! I’ve made chicken noodle soup many, many times but this one is by far my favorite. I think it’s the homemade noodles and homemade chicken stock…..yummmmm!
Start out by chopping up a medium sized onion and a cup of carrots. Add them to a big pot with olive oil, minced garlic, parsley, basil, and thyme. You can add celery too, somebody in our house doesn’t like celery so I leave it out.
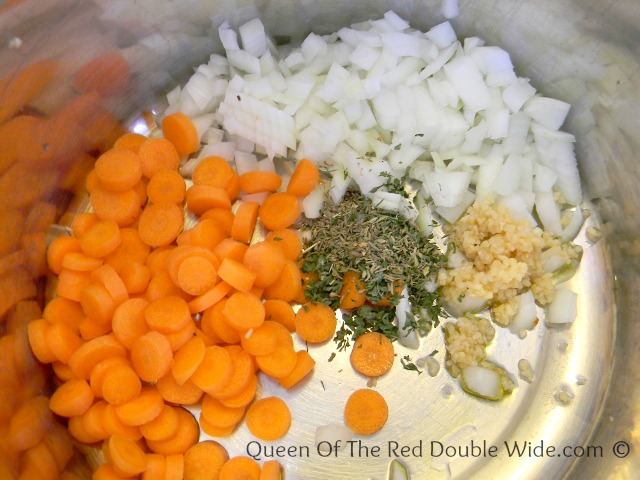 Saute for a few minutes until the onions are cooked. The carrots will not be done yet, but they will finish cooking in the stock. It will smell amazing! Add the chicken stock, shredded chicken, salt, and a bay leaf to the pot.
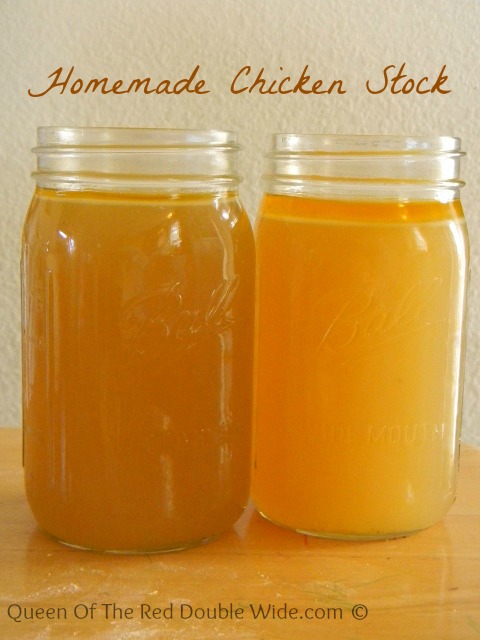 Let it simmer for a half hour or so, while you make the noodles. Here is the recipe for homemade egg noodles. I use about half of that recipe in this soup.
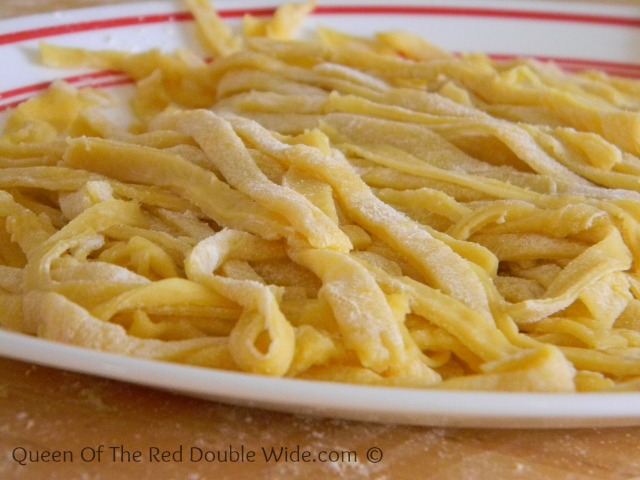 Add the noodles to the simmering pot, the fresh noodles will cook in just a couple minutes. If you made your noodles ahead of time and added them dry, it will take a bit longer. When the noodles are done remove the bay leaf, add salt and pepper to taste and your soup is ready to serve!
 This makes a hearty meal for four people. I usually double it and enjoy leftovers. 🙂


With all the egg recipes I’ve posted you would think I’d have shared a deviled egg recipe a long time ago. The truth is, I never had a recipe before; I just kind of added whatever, and then a little more of whatever until it tasted good. So I decided I needed to take the time and measure everything so I could share the recipe. Little Chef wanted to help as usual, so I let her peel the eggs. While she was doing this I left the kitchen for another chore. When I returned she already had them peeled, washed, cut in half, the yolks were mashed up, and most of the ingredients were in the bowl. When I told her I had wanted to measure the ingredients, she looked at me like I was from Mars. So I explained that I wanted to share the recipe as a blog post. She rolled her eyes…..that happens A LOT since she turned eleven last month. It seems the older she gets, the more ridiculous I get. Anyway, I decided to just look in the bowl and “guess” at how much of what she had put in and go from there. Her eggs turned out VERY yummy, so I was hoping I had “guessed” correctly. The next weekend I made the eggs again using the “new recipe” and took pictures along the way. They tasted just like Little Chefs yummy eggs! Maybe I should have called these “Little Chefs Sweet Relish Deviled Eggs”? Maybe not,… I don’t need the eye roller getting a big head or anything.
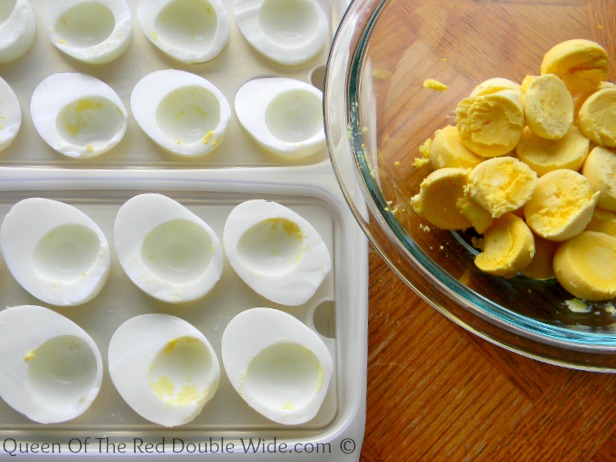
Start off by hard boiling a dozen eggs. Here is my tip on how to boil and EASILY peel farm fresh eggs. It’s a life saver if you have very fresh eggs and you don’t want them mutilated when you peel them. After you have peeled the eggs, wash them, cut them in half and place the yolks into a bowl.
 Mash the yolks with a fork, add the rest of the ingredients and stir well. Then taste it….salt?…pepper?…more relish? It’s all up to you!
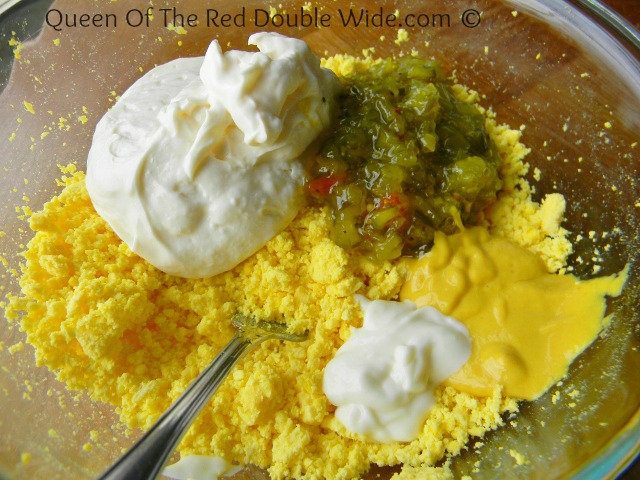 This came out a little lumpy, so I used the immersion blender on it for a few seconds. (Love that thing!)
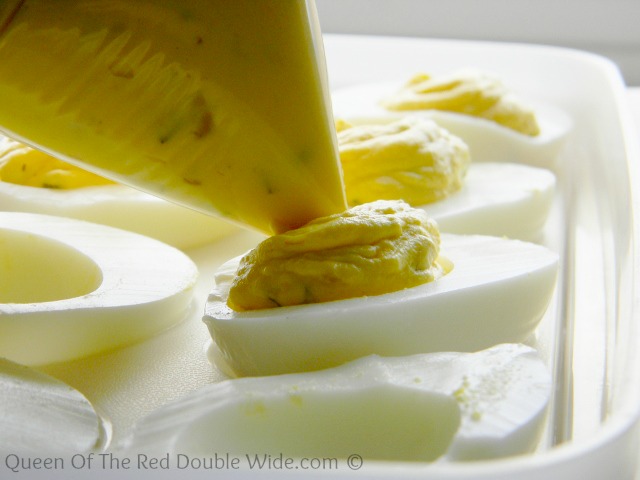
After it’s all mixed up, spoon the filling into a plastic bag, seal the bag, cut a small hole in the bottom corner, and squeeze the yolk filling through the hole into the empty egg whites. For years I would carefully spoon the filling into each egg, the plastic bag method is WAY faster, and much more fun!
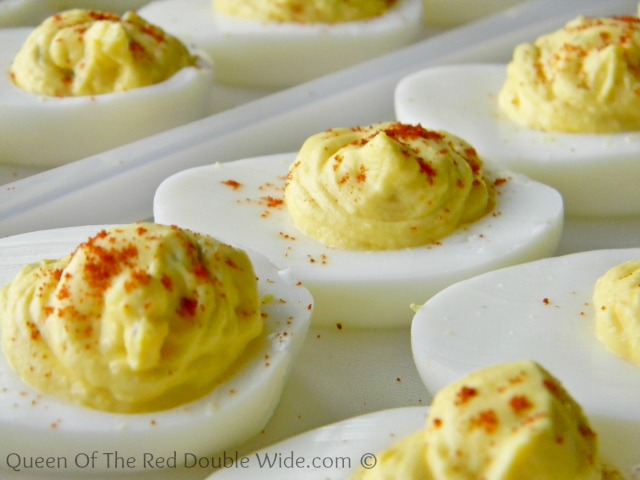
 Sprinkle a little paprika on top and you’re done!
 Here’s Little Chefs recipe for delicious “Sweet Relish Deviled Eggs”:


This recipe has been moved to our new blog: SufficientAcres.com
Click here or on the picture to go to the recipe!

This is the easiest thing EVER. Why have I not been doing this for years!?!? I love easy, yet healthy breakfast foods. The kind that I don’t have to worry about on weekday mornings. Lately when I have the time, I make a HUGE batch of fluffy whole wheat pancakes, or waffles and then freeze whatever is left. When I have bread that’s getting a little old I make french toast and put it in the freezer. (sorry chickens no more stale bread for you)
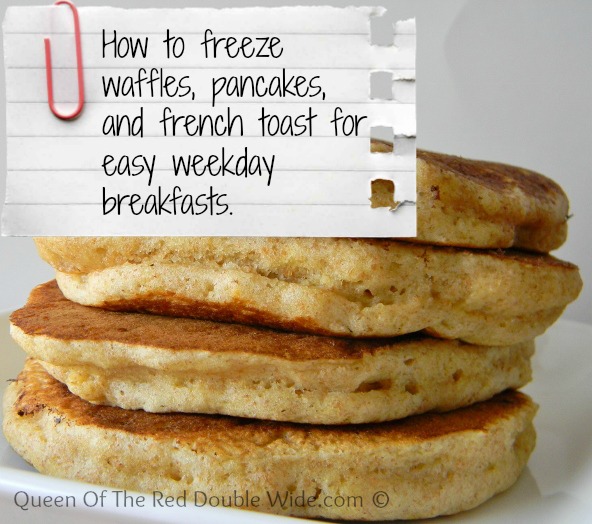 This is how I do it: Take your cooled off leftover pancakes, waffles, or french toast and layer them on a cookie sheet with parchment paper. (I have gone up to 4 layers) Try to make sure they are not touching so you don’t have to hack them apart.
 Place them in the freezer until they are frozen through. The more layers the longer it will take. I just leave mine in over night. When they are frozen through, place them in a dated, resealable, freezer bag and put them back in the freezer.
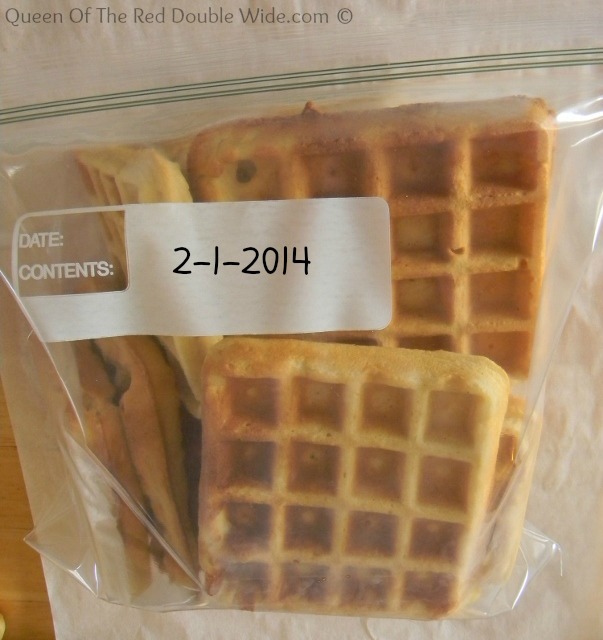 It’s that easy, and now you have a homemade, fast, healthy breakfast on hand.
To reheat them on those crazy weekday mornings, just pop them in the toaster. You may have to adjust the timing or temperature on your toaster so they have time to thaw out and toast. My girls use the toaster for the waffles, pancakes, and french toast, but if you aren’t into crispy pancakes and french toast you can always microwave them for 1 to 2 minutes or preheat the oven or toaster oven to 350 degrees and bake them for 10 to 15 minutes.
It’s sooooo nice to have yummy, healthy options in the morning that don’t come from a box. 🙂


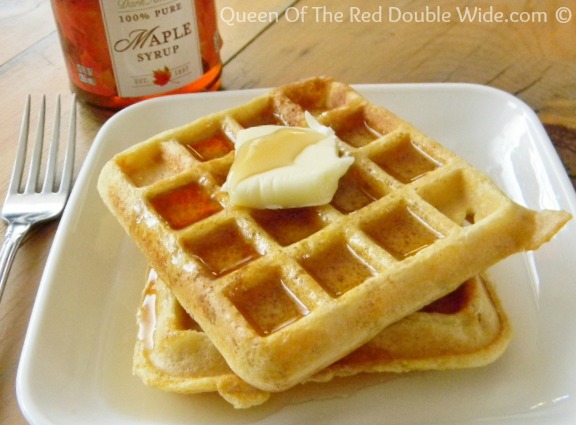
Before a couple weeks ago I had never made waffles from scratch before. In fact I haven’t made waffles at all for about 10 years. I had always used a waffle mix before, but after deciding the mix was to expensive and REALLY time consuming for six people, I put the waffle iron up on the top shelf and forgot about it. Well I tried to forget about it, but the kids would ask every once in a while if we could make waffles and I would distract them with puff pancakes or baked pancakes. ANYTHING but waffles….I even played with the idea of throwing away the waffle iron so I had a good excuse not to make them. (I know, I’m awful!) My poor deprived girls wouldn’t even know what a waffle is if they hadn’t spent the night at grandma’s house 🙂 Anyway, in all my brain wracking trying to come up with healthy, easy breakfasts for those busy week day mornings, waffles came to mind. They aren’t exactly quick, but if I make a quadruple batch on the weekend and freeze them. Tadah!…I have a from scratch breakfast that we can enjoy on the weekdays and still make it out the door by 7:15.
While I said these are not quick for a weekday morning, they are not at all hard to make and the time consuming part is waiting for the waffle iron to do its job.
Start by separating the eggs. Mix together the egg yolks, milk, vanilla, and melted butter. In a separate bowl stir together the flour, baking powder, salt, and sugar. Stir the dry ingredients into the milk mixture, do not over stir.
Now this is the part that makes these light and wonderful! Beat egg whites until they are stiff then fold them into the batter.
 Let the batter sit for a few minutes while the waffle iron preheats. Cook the waffles until they are a golden brown.

This recipe has been moved to our new blog SufficientAcres.com.
Click here or on the pictures to take you to the recipe!
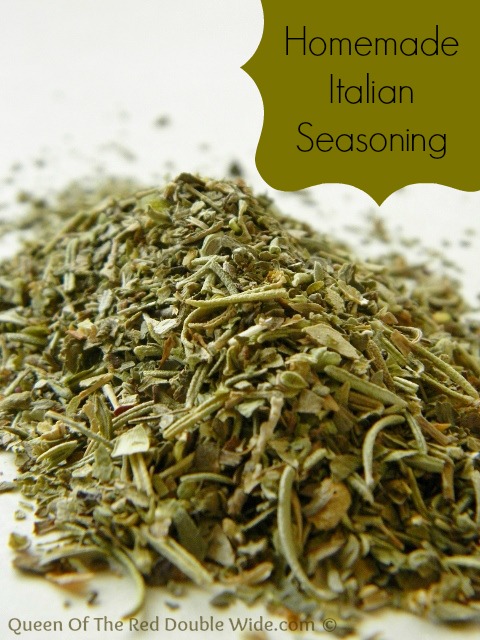
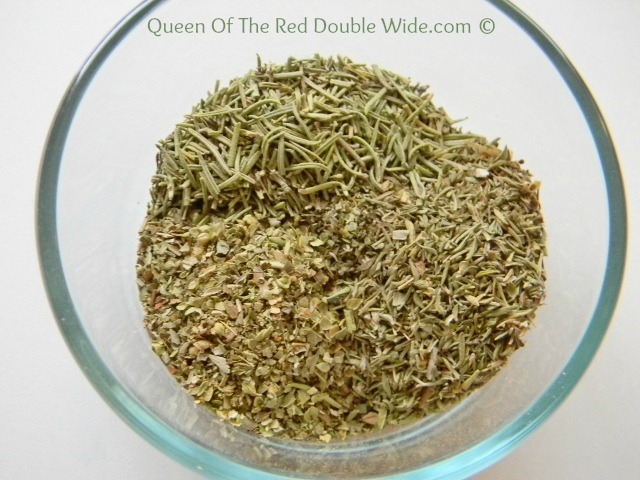 This can be used on any recipe calling for Italian seasoning.

 Over Christmas break I had time to do some long over due deep cleaning in the red double wide. I also did some purging and lots of STUFF went out the door, but when I came across my cast iron skillet I decided it was time to re-season it and put it to work. It was a lot dusty and a little rusty. Here are a couple before and after pics.
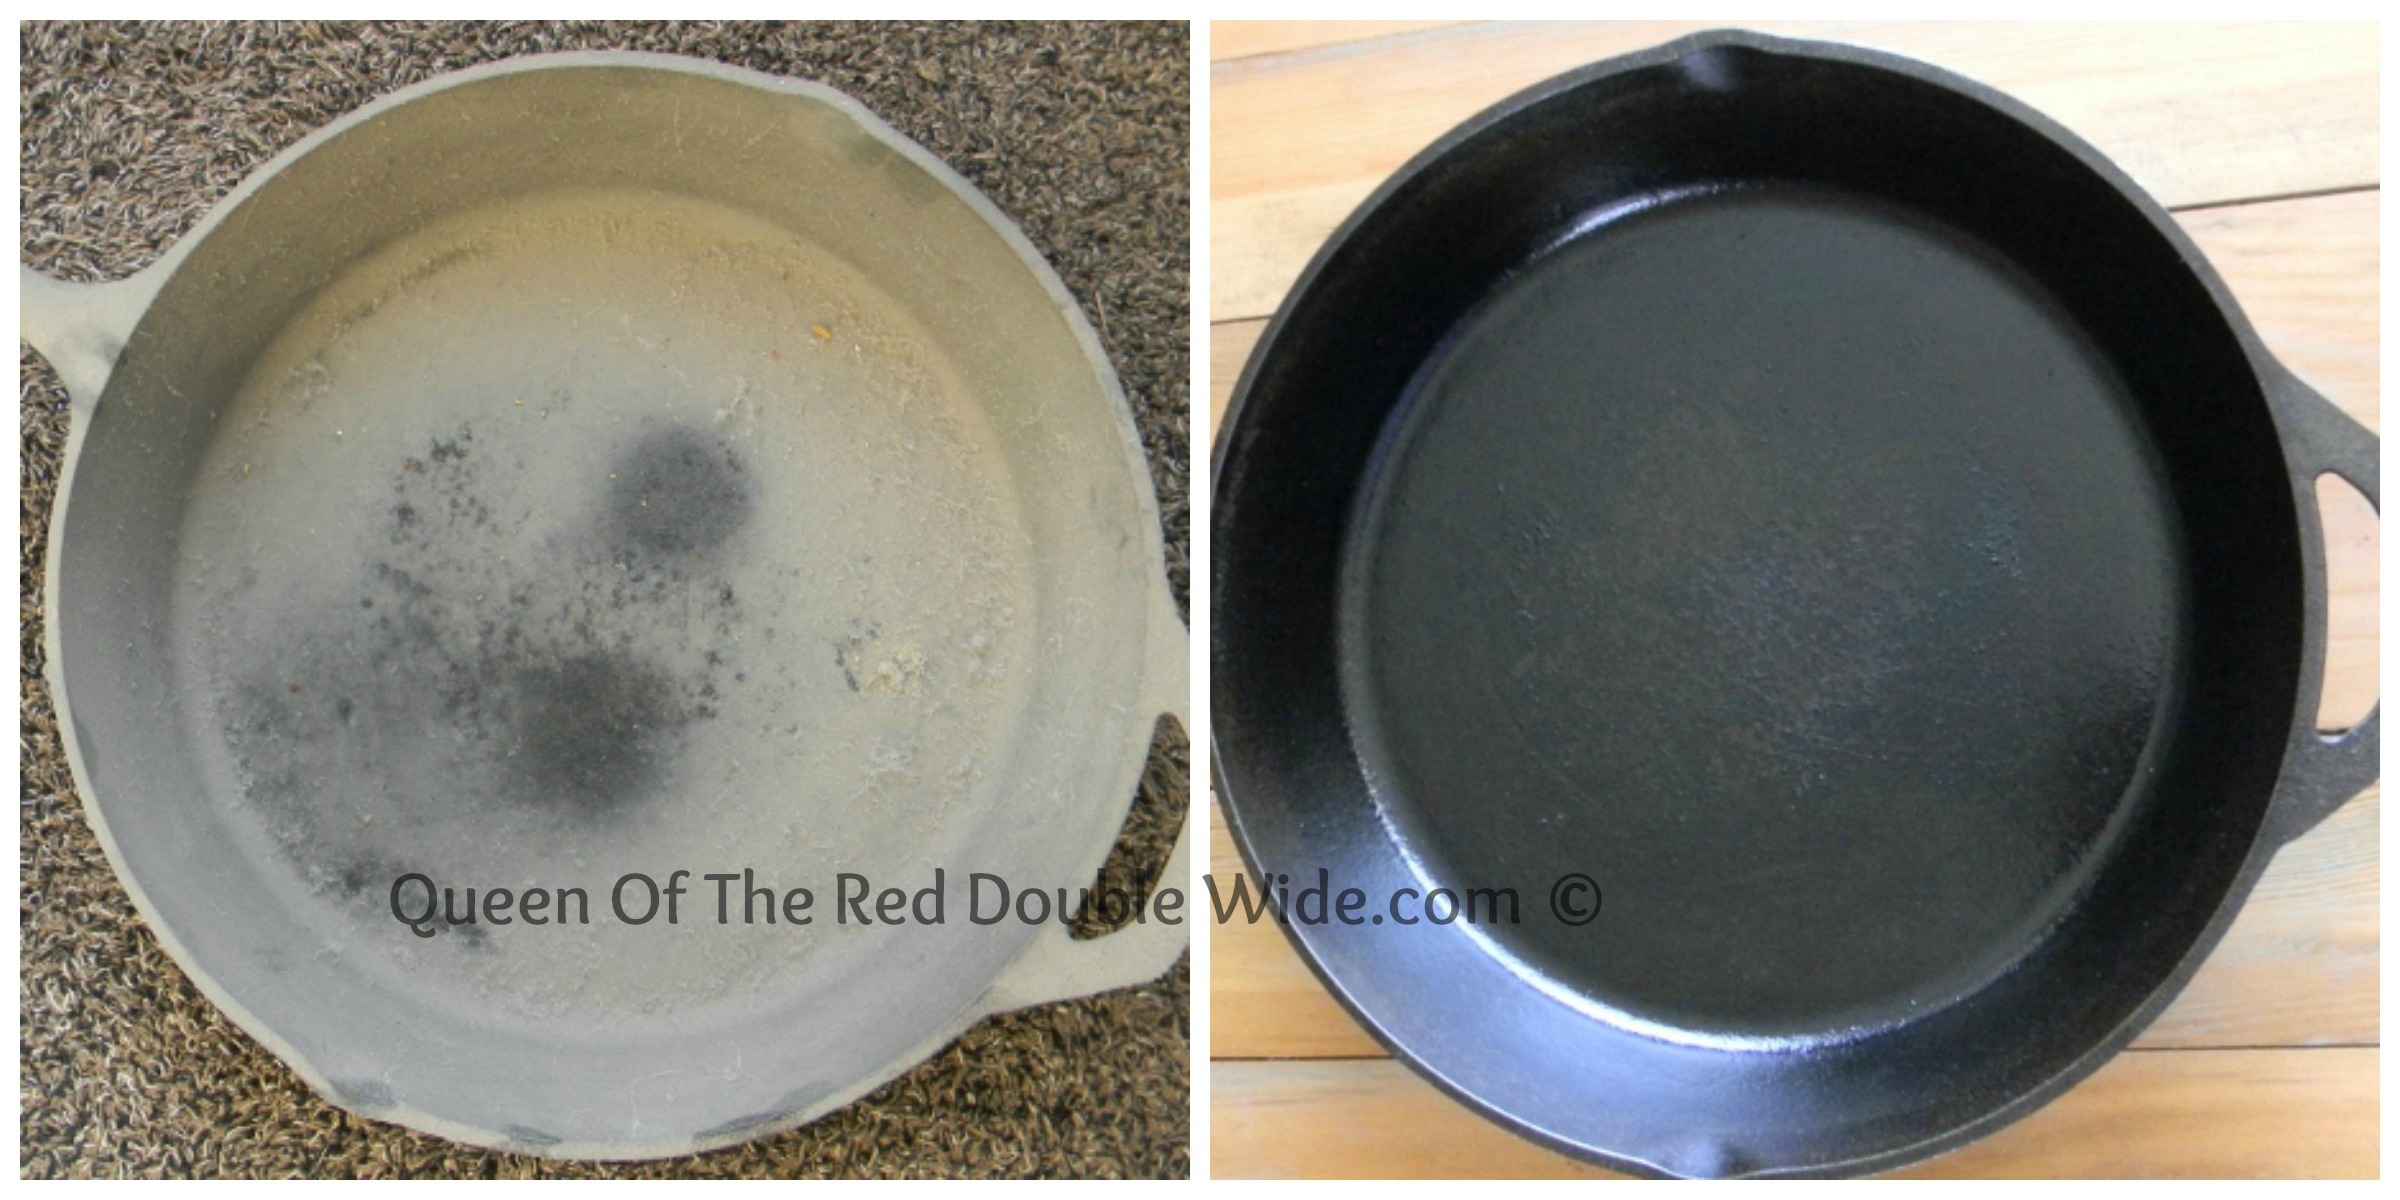
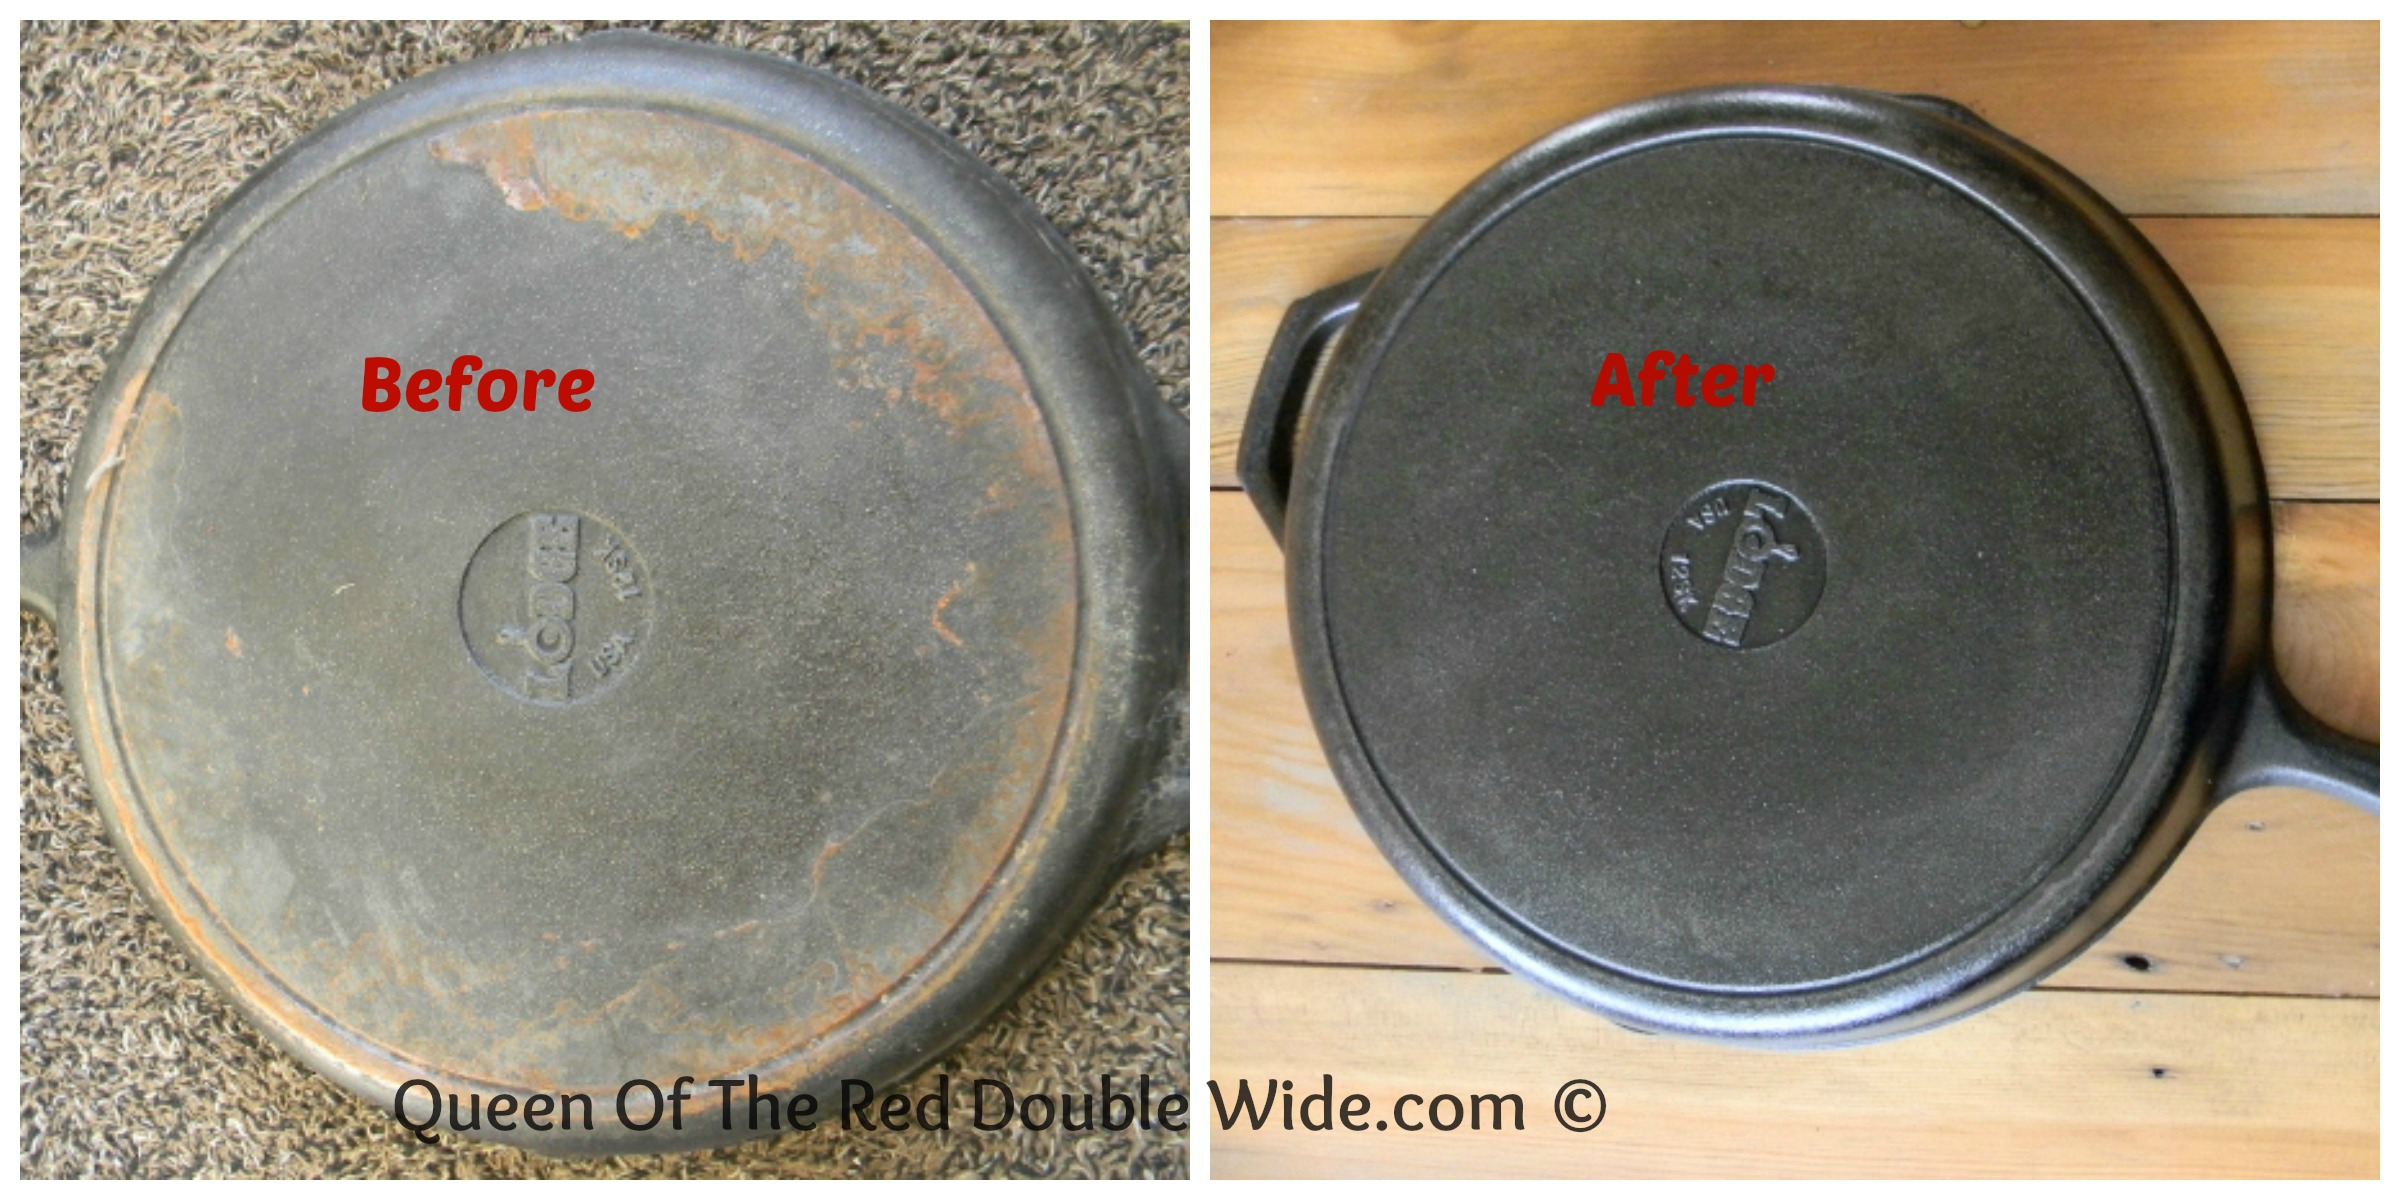 I had put this poor skillet in hiding shortly after my mom gave it to me….Why, you ask? Well I knew nothing about cast iron and the whole seasoning thing kind of intimidated me. Then, the first thing I attempted to cook was eggs……ya, they didn’t turn out so great!! By not so great, I mean a smoking, smelly, skillet with bits of crunchy black eggs. After that the top shelf in the laundry room seemed like a good home for the cast iron skillet. Recently I have come across some blogging posts about caring for your cast iron and some recipes that work well with it. They made it sound easy enough, so I thought I would give it a try. It made me feel a little better to read that though it’s not impossible, eggs are not the easiest thing to cook in cast iron. 🙂 I have decided to stay away from eggs until I am a more seasoned (haha) cast iron cook!
These biscuits are the first thing I made in my skillet. They turned out GREAT. They are light, flavorful, quick, and my favorite EASY!
 Note: This recipe is for a 10 inch skillet and mine is a 12 inch. That’s why the biscuits look so small in the pan. 🙂 If you don’t have a cast iron skillet you can use a cake pan.
This recipe also works using 1 cup of all purpose flour and 1 cup whole wheat flour instead of 2 cups whole wheat pastry flour.


These might possibly be my favorite Christmas cookies. They are so DELICIOUS but the best part is the absolutely wonderful aroma that fills my house while they cook. A Christmas candle or Scentsy Pot can’t even touch the Christmasy (is that a word?) smell from these cookies! My sister told me about this recipe a few years back and I have made them every year since.
The secret to these amazing cookies is Andes Peppermint Crunch Baking Chips.
 These things are creamy, melt in your mouth, goodness! Add them into a cookie with oatmeal and coconut and…….WOW! Or you could just upend the bag into your mouth, that would work too.
 Note: It is a little tricky to figure out when these are done. I check on them at 10 minutes and don’t take them out until they are a little brown around the edges. After they come out of the oven if you let them rest on the cookie sheet for a few minutes they will stiffen up a bit and be much easier to lay on a cooling rack.
This recipe was adapted from tootsie.com. I am in no way being compensated for saying these things about these baking chips, I just think they are delicious and Christmasy!

 A few years ago I inherited my grandma’s cookie press, and now it’s a tradition to make these cookies every December.
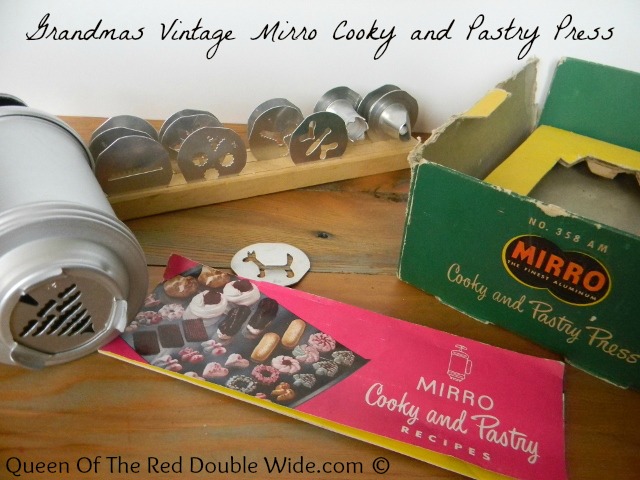 I think she would be so pleased to know that her great grand daughters are using her cookie press. 🙂
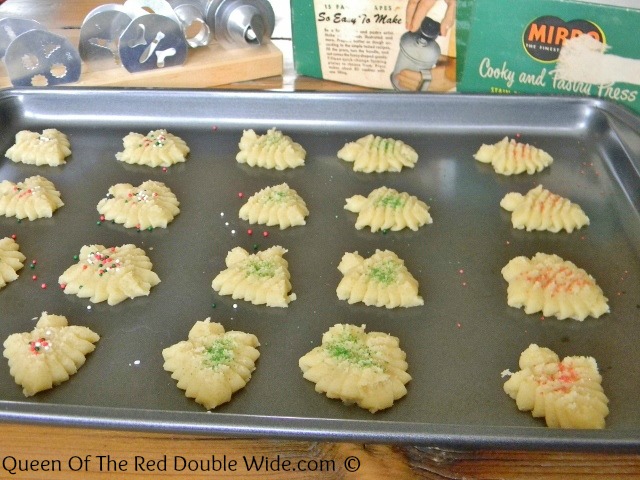 These are a lot of fun, especially for kids and the recipe is really simple. Picking what shape of cookie to make and getting a little crazy with the sprinkles are the best parts….well and eating them too. 😉
 Hope you are enjoying making cookies and memories this Christmas!

© 2013-2024 Queen Of The Red Doublewide All Rights Reserved -- Copyright notice by Blog Copyright