How to Cook and EASILY Peel Farm Fresh Hard Boiled Eggs!

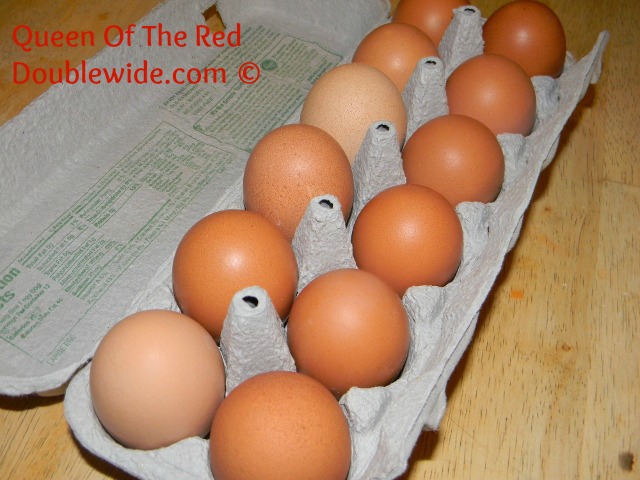
First of all I want to mention that this method is not just for farm fresh eggs.  Store bought or strait from the coop, your end result will be beautiful hard boiled eggs!

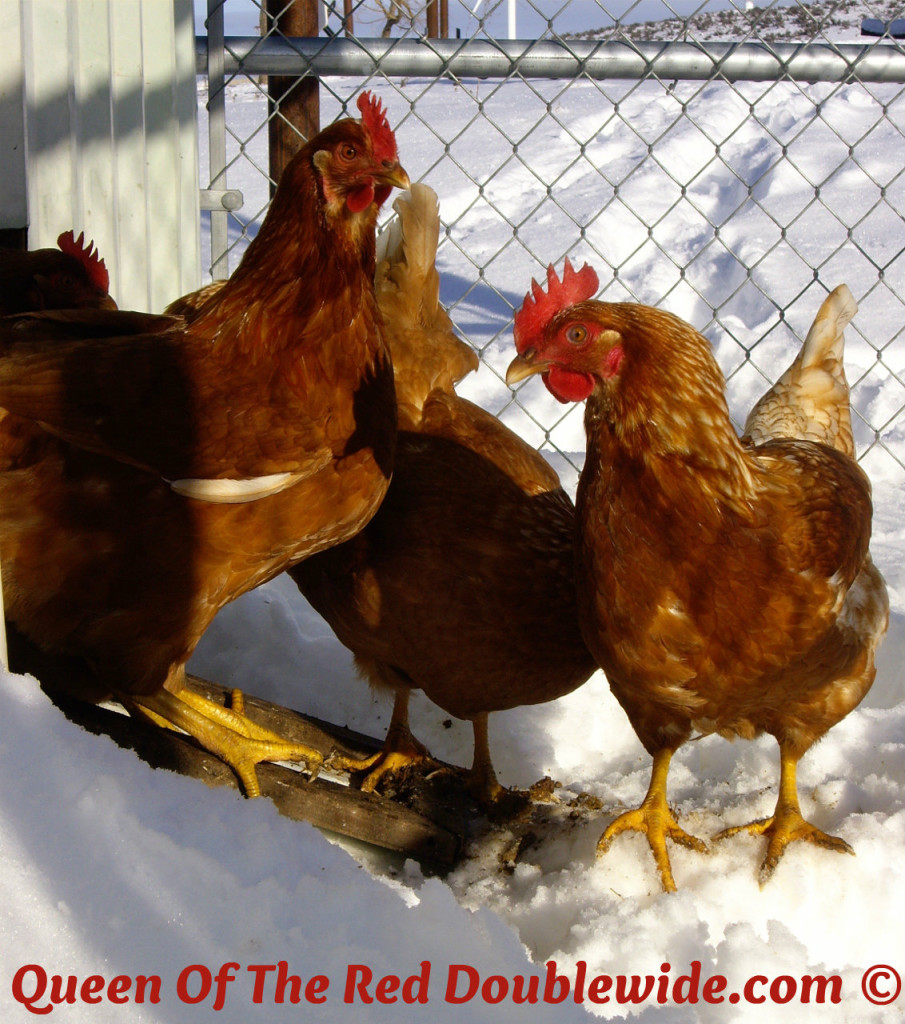
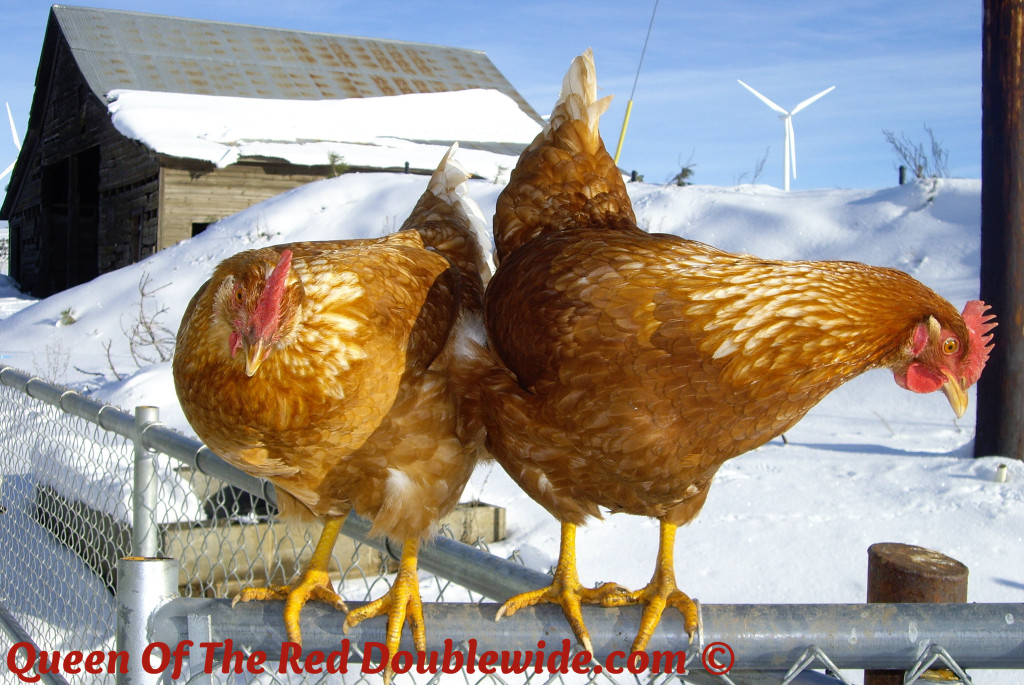
Have you ever tried to peel a farm fresh hard boiled egg?  I have, and it’s not a pretty sight. Unlike older, store bought eggs, no matter how hard you try the shell will not let go of the egg, leaving you with a lumpy, broken mess!!  With my new egg laying machines and tons of fresh eggs the only thing I could think to do was hide a dozen eggs in the back of my fridge and wait for them to get old (the older the egg the easier it is to peel).  This works as long as you know two weeks in advance when you are going to want a hard boiled egg.  I don’t know about you, but when I want egg salad, I want it now, not two weeks from now!!

That was not my only problem with hard boiling eggs, I usually over boiled them and ended up with a green ring around the yolk….for some reason greenish colored, lumpy, deviled eggs are not very appetizing.  So I started researching and experimenting, and experimenting, and experimenting…….and this method left me with sun colored yolks and EASILY peel-able eggs!

DSCN5329 (640x480)-1

Start by placing a pot of water on the stove to boil.  Make sure it’s enough water to cover the eggs.  While your waiting for the water to boil take a (clean) thumb tack and poke a small hole in the fat end of each egg.

DSCN5385 (640x480)-1
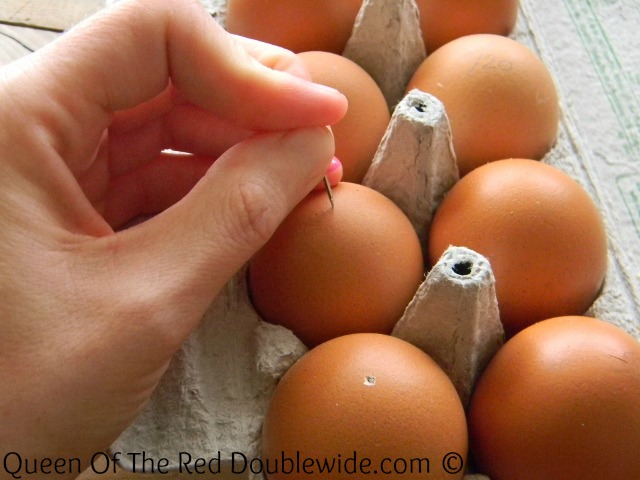
Be careful, you want to make a hole but not push the tack all the way in.  The goal here is to put a tiny hole in the shell where the air sack is and not poke through the membrane inside.  When the water is at a hard boil, and you have a tiny hole in each egg, gently (VERY gently) place the eggs in the boiling water and set the timer for 15 minutes.DSCN5210 (640x480)-1
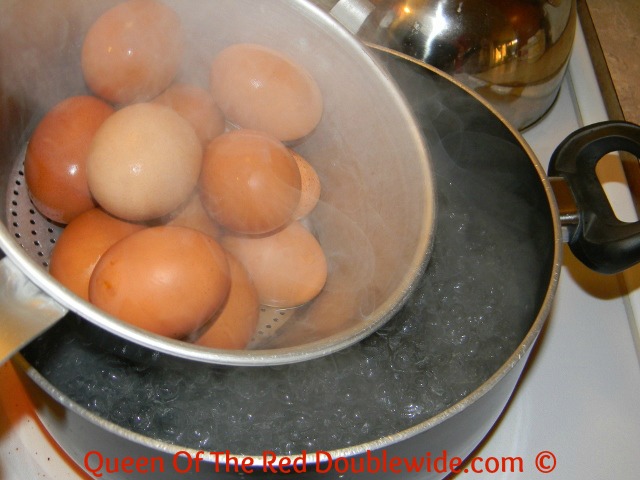
Keep them at a low boil for the entire time.  If you pushed the tack in to far you will see streams of egg white floating in the water.  It’s no big deal, that egg will just not be as pretty as the rest.  After you do this a few times you will get the hang of it.

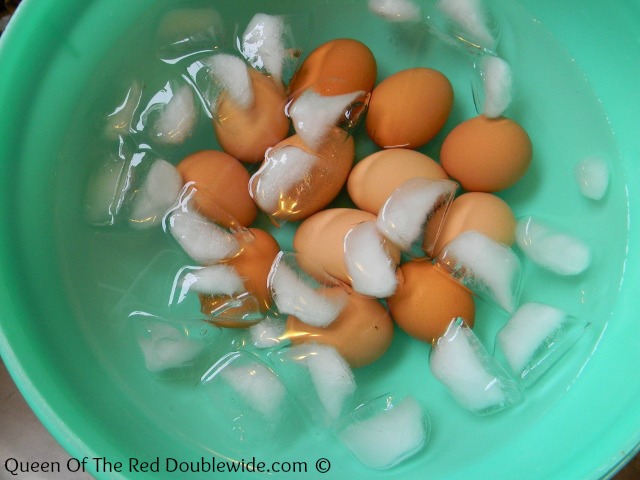
While they are boiling prepare a bowl of ice water in your sink.  When the timer goes off immediately remove the pan and drain the boiling water.  Then place the hot eggs into the ice water.

DSCN5612 (640x480)-1Wait about 15-20 minutes and take them out one at a time to peel.

DSCN5340 (640x480)-1


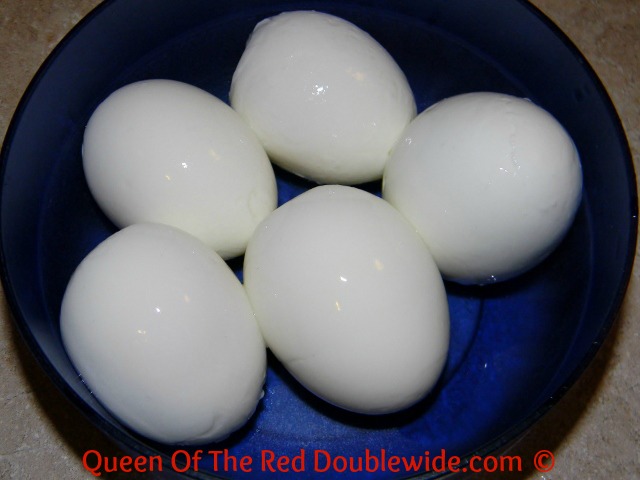
These are eggs that were laid this morning….see how nicely they peeled.


DSCN5344 (640x480)-1

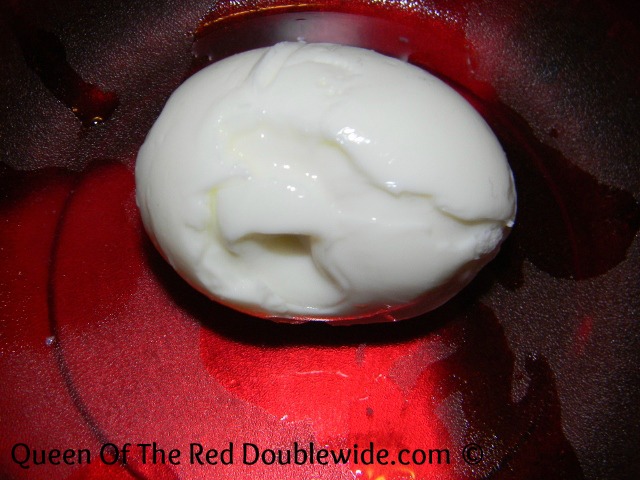
This is an egg that I poked the tack in to far and some of the the egg white escaped.  Not a good look for deviled eggs, but will still taste great in egg salad. 🙂


 DSCN5616 (640x480)-1
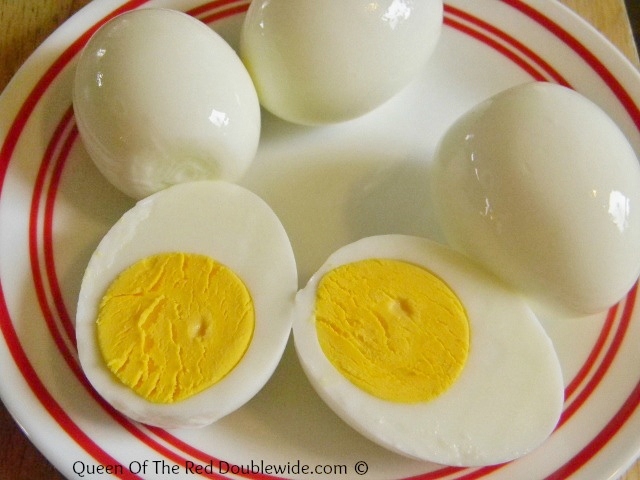
See how nice and pretty the yolk is!!

I’m so glad I can make deviled eggs whenever I want instead of having to plan ahead and hide them in the back of the fridge to get old.  I hope this works as well for you as it has for me.  The tack trick takes a little practice, but if all you have is fresh eggs to peel it’s definitely worth the effort.

I found this method at: Paths of Wrighteousness

German Puff Pancakes – 3 ways

Here’s another recipe to help use all those fresh eggs…well 3 recipes actually.  I love German Puff Pancakes, not just because they taste so good but because you mix up the batter,  throw it in the oven and 20 minutes later….VOILA!!  Everyone’s breakfast is done at the same time and mom (or whoever is cooking) isn’t still standing at the stove flipping pancakes while half of the family is finishing eating and the other half is waiting for seconds!!  Don’t get me wrong, I love pancakes!!  I just like eating more than flipping. 😀  OK, I’m done whining now.

Start by preheating the oven to 400 degrees.

Put the butter into a 13X9 inch pan and put it in the oven to melt the butter.  Keep an eye on it and remove it when the butter is melted.

While the oven is heating and the butter is melting, put the remaining ingredients in a blender and blend until smooth.

Pour the batter from the blender over the melted butter and return the pan to the heated oven for 20 min.

DSCN4970 (640x480)-1How fun is that!!  We top ours with butter and maple syrup or agave nectar.

German Puff Pancake
 
Author:
Ingredients
  • 2 tablespoons butter
  • 6 eggs
  • 1 cup milk
  • 1 cup flour
  • ½ teaspoon salt
Instructions
  1. Preheat oven to 400 degrees
  2. Put the butter into a 13X9 inch baking pan and put it in the oven to melt.
  3. As soon as the butter has melted remove it from the oven and swirl it around to coat the bottom of the pan.
  4. Blend the remaining 4 ingredients in a blender until smooth.
  5. Pour the batter over the melted butter.
  6. Bake for 20 minutes.


Now another version:

German Sausage Puff Pancake

Follow the recipe above but sprinkle cooked sausage (I use 1 pound of breakfast sausage) over the batter in the pan just before baking.

DSCN5099 (640x480)-1 So I’m not sure if this is still a pancake?  Maybe more of a breakfast casserole?  Whatever it is, we usually eat it for dinner with salsa, sour cream, and cheese on top….TASTY!


And another version:

German Blueberry Puff Pancake

Follow the German Puff Pancake recipe above but before baking sprinkle 1 cup of frozen blueberries (fresh blueberries would work too) on top of the batter.  Serve with powdered sugar, or maple syrup.

DSCN5086 (480x640)-2


Avocado Scramble

This recipe is simple, VERY attractive and tastes every bit as good as it looks!!

Start by whisking together eggs and water.

Pour into a pan drizzled with olive oil on medium-low heat.

                           Stir with spatula until eggs are set up. Add salt and pepper.

Top with salsa, avocado and sour cream!!DSCN4676 (640x385)-1I told you it was attractive!!  Don’t you just love those colors??

Here’s a close up…..DSCN4682 (640x480)Oh yeah!!  That’s what I’m talkin’ ’bout!! Yummmmmmmmm!

Here’s the printable version of the recipe:

Avocado Scramble
 
Author:
Ingredients
  • 2 eggs
  • 2 tablespoons water
  • salt and pepper to taste
  • 2 tablespoons of your favorite salsa or Pico de Gallo would be yummy too
  • ¼ of a large avocado
  • A dollop of sour cream
Instructions
  1. Whisk together the eggs and water
  2. Pour egg mixture into a pan drizzled with olive oil on medium-low heat
  3. Use a spatula to stir eggs until done
  4. Place eggs on a plate and add salt and pepper
  5. Top with salsa, avocado, and sour cream


Chickens in the Snow

When I go out to the chicken coop first thing in the morning I open up their little door and they all rush out.  Usually walking and jumping on each other, trying to cram through the door two or three at a time.

IMGP4301 (1132x1280)-1But the other day when it snowed a couple inches, it took them a few hours to wander out and most of them headed strait for the barn so they could take dust baths, dig around in the fire wood for bugs and harass the barn cats.  That night we had to carry a few back to the coop, they didn’t want to walk back through the snow!

IMGP4302-1

On Christmas day we received a foot of snow (we blame this on our 9 year old, she was praying for a white Christmas 😉 ) and it’s not melting off very fast.  The chickens now refuse to come out of the coop.  They will step out, look around, fluff up their feathers and jump right back in the door.  You can’t blame them, that white stuff is cold and deep.

With no free ranging going on they have been going through a LOT of feed and water!!  I highly recommend  that if there is any possibility that your chickens can be let out to forage around….let them!!  I’m guessing it cuts the feed costs by half, if not more. (I am keeping track and will let you know exact numbers later). Not to mention it makes for very healthy, happy chickens and more nutritious eggs.   Anyway, I got worried about the hungry little buggers getting bored all cooped up.  Bored chickens are not a good thing, they will start pecking at each other and if it gets to bad the results could be deadly. 🙁  So I cut open an acorn squash and gave that to them, and they spent hours picking at it; the only part left is a thin layer of peel.  The next day we hung up half of a large cabbage in the coop.  They seemed disinterested at first, but when I went out that night to shut the door most of the cabbage was gone.  We hung up the second half of the cabbage the next day.  This one didn’t last long!!  Hanging them up is purely for the entertainment value, (for the chickens, not us….well maybe for us too).  Watching chickens chase a spinning, bouncing cabbage around the coop WAS very entertaining.

IMGP4316-1These little treats seem to be keeping them happy and occupied during these snow bound days.  To my surprise, being stuck indoors has not affected their egg production at all.

This spring I intend to plant tons of cabbage, pumpkins, and squash just for the chickens to have next winter (and maybe enough for us to have some too).

Egg Laying Machines

I was going to title this post “Waiting for Eggs” but in all honesty, we didn’t have to wait!  Everything I’ve read says most chickens will start laying between 5 and 6 months old.  So I was hoping to have some eggs by Christmas, that would be right at 5 months old (and what a great Christmas present).  It was November, cold out and day light hours were getting shorter and shorter.  Hens need 14 to 16 hours of light a day to lay eggs.  So after Thanksgiving I bought a timer so we could plug in a light to increase their hours of light.  I also bought layer feed for them.  Before I could get the light plugged in or change their feed, they started laying!!

Our first 2 eggs!!  A little splotchy, but we were so proud 😉

We quickly got the light put up in the coop and set it to come on at 3am.  I mixed the layer in with the remaining grower feed and HOLEY COW!!  They turned into egg laying machines.  It is now 5 days before Christmas and we are getting 15 or 16 eggs a day from our 17 hens!!  They don’t seem to mind the freezing weather at all.  They have been laying all these eggs by 7:30am and then they get turned out to free range for the rest of the day.

The only problem we had was when they first started laying.  Some of them would peck their egg, (one little hole or even just a crack)….kind of like they were curious.  Then one hen started eating an egg every day.  I would go out to the coop at about 8:30am and find wet straw and little pieces of shell in a nesting box.  I had NO idea which hen was doing it!  This went on for several days and the only thing I could think to do was just get out to the coop earlier before she had a chance to snatch that egg.  So when it was just barely light enough to see I headed out to the coop.  It worked!  No more broken eggs,…not even any cracks!  On most days we even get a double yolker or two.  Now my only problem is what to do with all these eggs!….I love problems like this. 😀

                          Meet Ginger one of our super egg laying machines!

Related Posts Plugin for WordPress, Blogger...