Click here or on the picture to take you to the recipe!
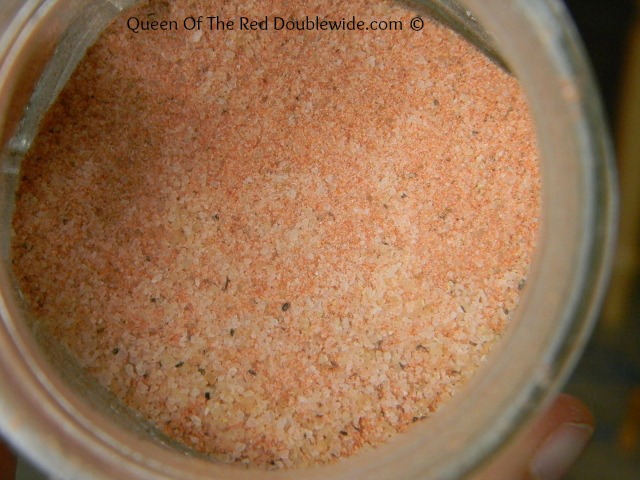
There you have it, homemade seasoning salt! Be sure to shake well before each use. Use sparingly at first, you can always add more but you can’t take it out if you get to much.
This works great on EVERYTHING! Well…..maybe not chocolate cake or ice cream, no definitely not ice cream…but I’m sure it will be great on everything else! 😉
These super fluffy, slightly sweet pancakes are absolutely delicious!
Pancakes are another one of those things I have never made from scratch before recently. I always used the mix that you just add water to. It was easy, but if I had known how good from scratch pancakes could taste I would have never bought those mixes!
My first few attempts at “from scratch” pancakes turned out horrible! I wanted healthy (well at least healthier than the store bought mix) but I also wanted yummy…..and I thought for a while there was no such thing! Then I found this recipe and tweaked it slightly. It takes longer than the store bought mixes, but it’s WELL worth it!
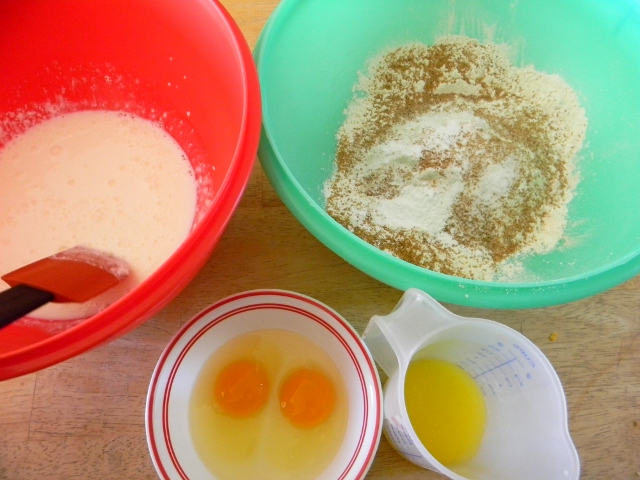
Your first step is to combine the milk and vinegar and let it sit for 10 minutes. This will sour the milk but don’t worry, you won’t be able to taste the vinegar, I promise! Mix together the dry ingredients in another bowl.
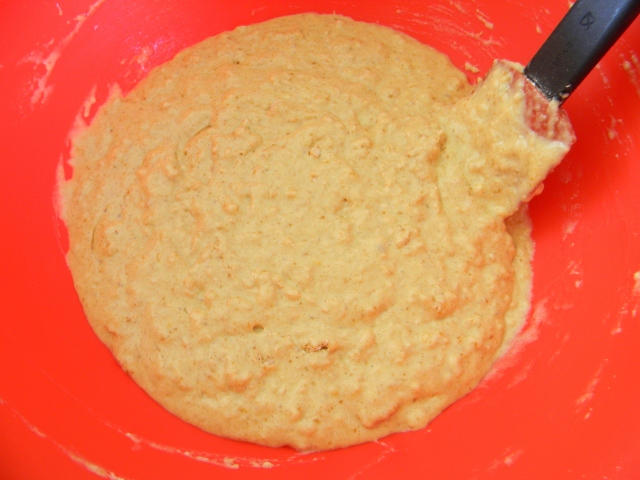
Then whisk the eggs, melted butter, and vanilla into the soured milk. Pour the milk mixture into the dry ingredients and stir well; it will be thick.
Let the batter sit for 10 minute while the pan heats up. Lots of bubbles will form during that time…DON’T stir the batter again, the bubbles will give you super fluffy pancakes.
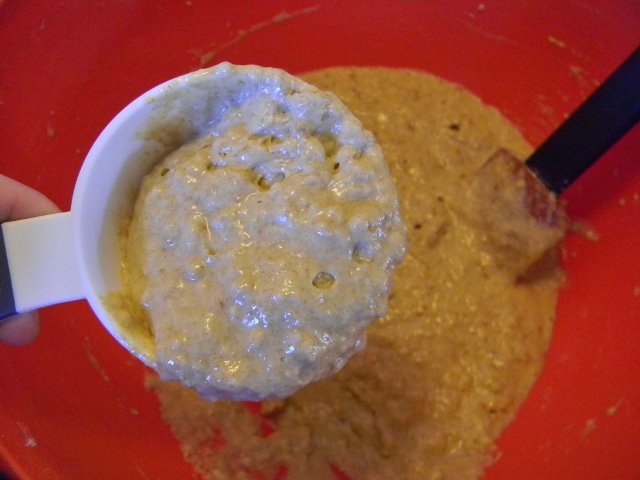
Place 1/4 to a half of a cup of batter in a buttered pan at medium low heat. When you see bubbles appear on the surface of the pancake, flip it over and brown the other side. This recipe made 10 – 6inch pancakes. They are very filling; so if you want, you could easily cut the recipe in half if you don’t need that many.
I haven’t tried it yet but I think these would be wonderful with chocolate chips or blueberries!!
Combine Milk and vinegar and let set for 10 minutes.
In a separate bowl mix together flours, sugar, baking powder, baking soda, and salt.
Whisk together the eggs, melted butter and vanilla then pour into the soured milk.
Stir well and pour mixture into the dry ingredients. Whisk until most of the lumps are gone, but don't over beat it. It will be pretty thick, let it sit for 10 minutes. Bubbles will form during that time, don't stir the batter, you want the bubbles.
Gently dip out ¼ to a half of a cup of batter and place it on a buttered grill preheated to medium low heat. When bubbles form at the surface of the pancake turn it over to brown the other side.
Top with butter and syrup or your favorite pancake topping!
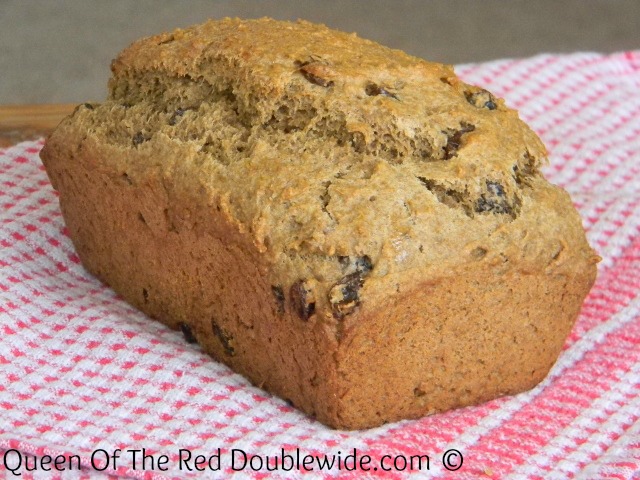
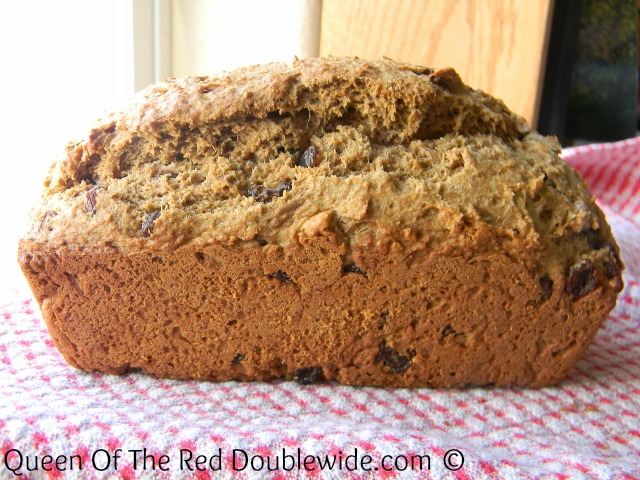
Baking bread is a very new adventure for me. It was one of those things on my “I need to learn how to do that” list, but I kept putting it off (and off and off). You would think that on a journey toward frugality and self sufficiency that baking your own bread would be one of the first things to learn. It should be, BUT patience is one of those fruits of the spirit that I’m lacking. The whole kneading and rising thing sounded heavy in the patience area. I guess I’m afraid of yeast, or rather WAS afraid of yeast… Well ok, I was afraid of KILLING yeast. It just sounded so violent. Every time I looked at a bread recipe or any recipe that had yeast, I would think….WOW that’s a lot of instructions and that will take all day long, and I will probably kill the yeast ending up with rocks after slaving in the kitchen all day!! I’m a banana bread and biscuit kinda girl. Mix it up and throw it in the oven, (no patience required) that’s how I roll. 😀
So lets just say that making my first loaf of bread was a big step for me, (okay it was a HUGE step for me). I set aside a whole day to make two loaves of bread because I really believed it would take all day. I took a deep breath, put on my “patience hat” (sorry, I used to be a preschool teacher) and got out my yeast and flour!
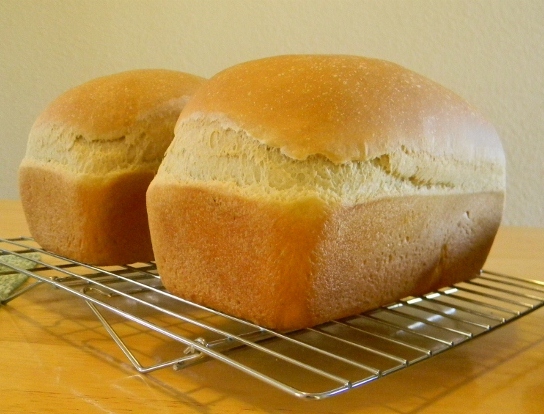
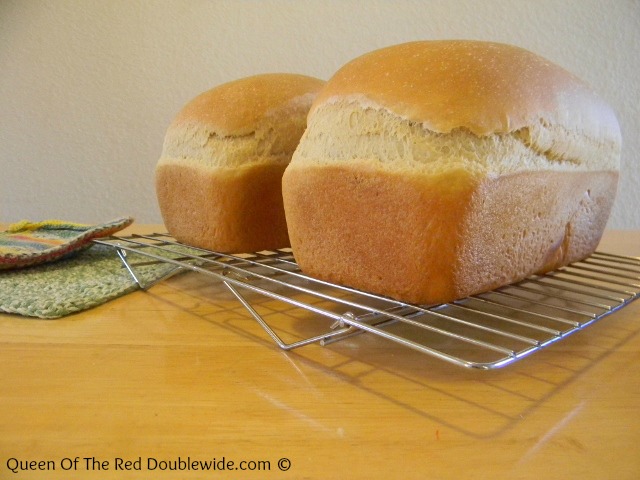
I’m happy to report that my first two loaves of bread were a success, and it didn’t even take all day!! In fact I can’t believe I put this off for so long. It was way easier and less time consuming than I thought. The baking bread made my house smell heavenly and what a sense of accomplishment to pull two plump, golden brown loaves of bread out of the oven just in time for lunch. 😀
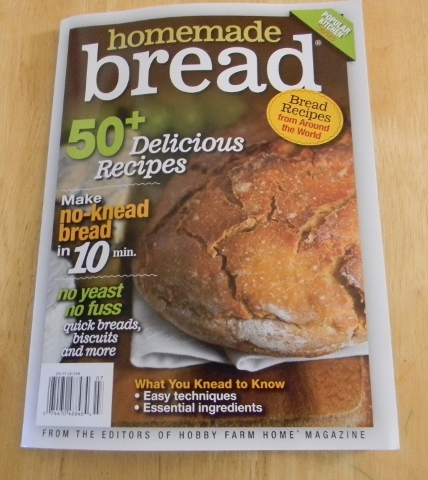
My mother in law gave me this wonderful magazine that’s full of awesome bread recipes with very detailed instructions. I highly recommend it, especially for first time bread makers (you can find it on Amazon). The first recipe in the book is white sandwich bread. It’s a pretty basic recipe and,… well,… my husband eats LOTS of white sandwich bread (I can’t convince him that whole wheat tastes better and is better for him). It’s the recipe I started with, and it turned out so well I thought I would share it with you. I’ve made it several times now and we all like it!
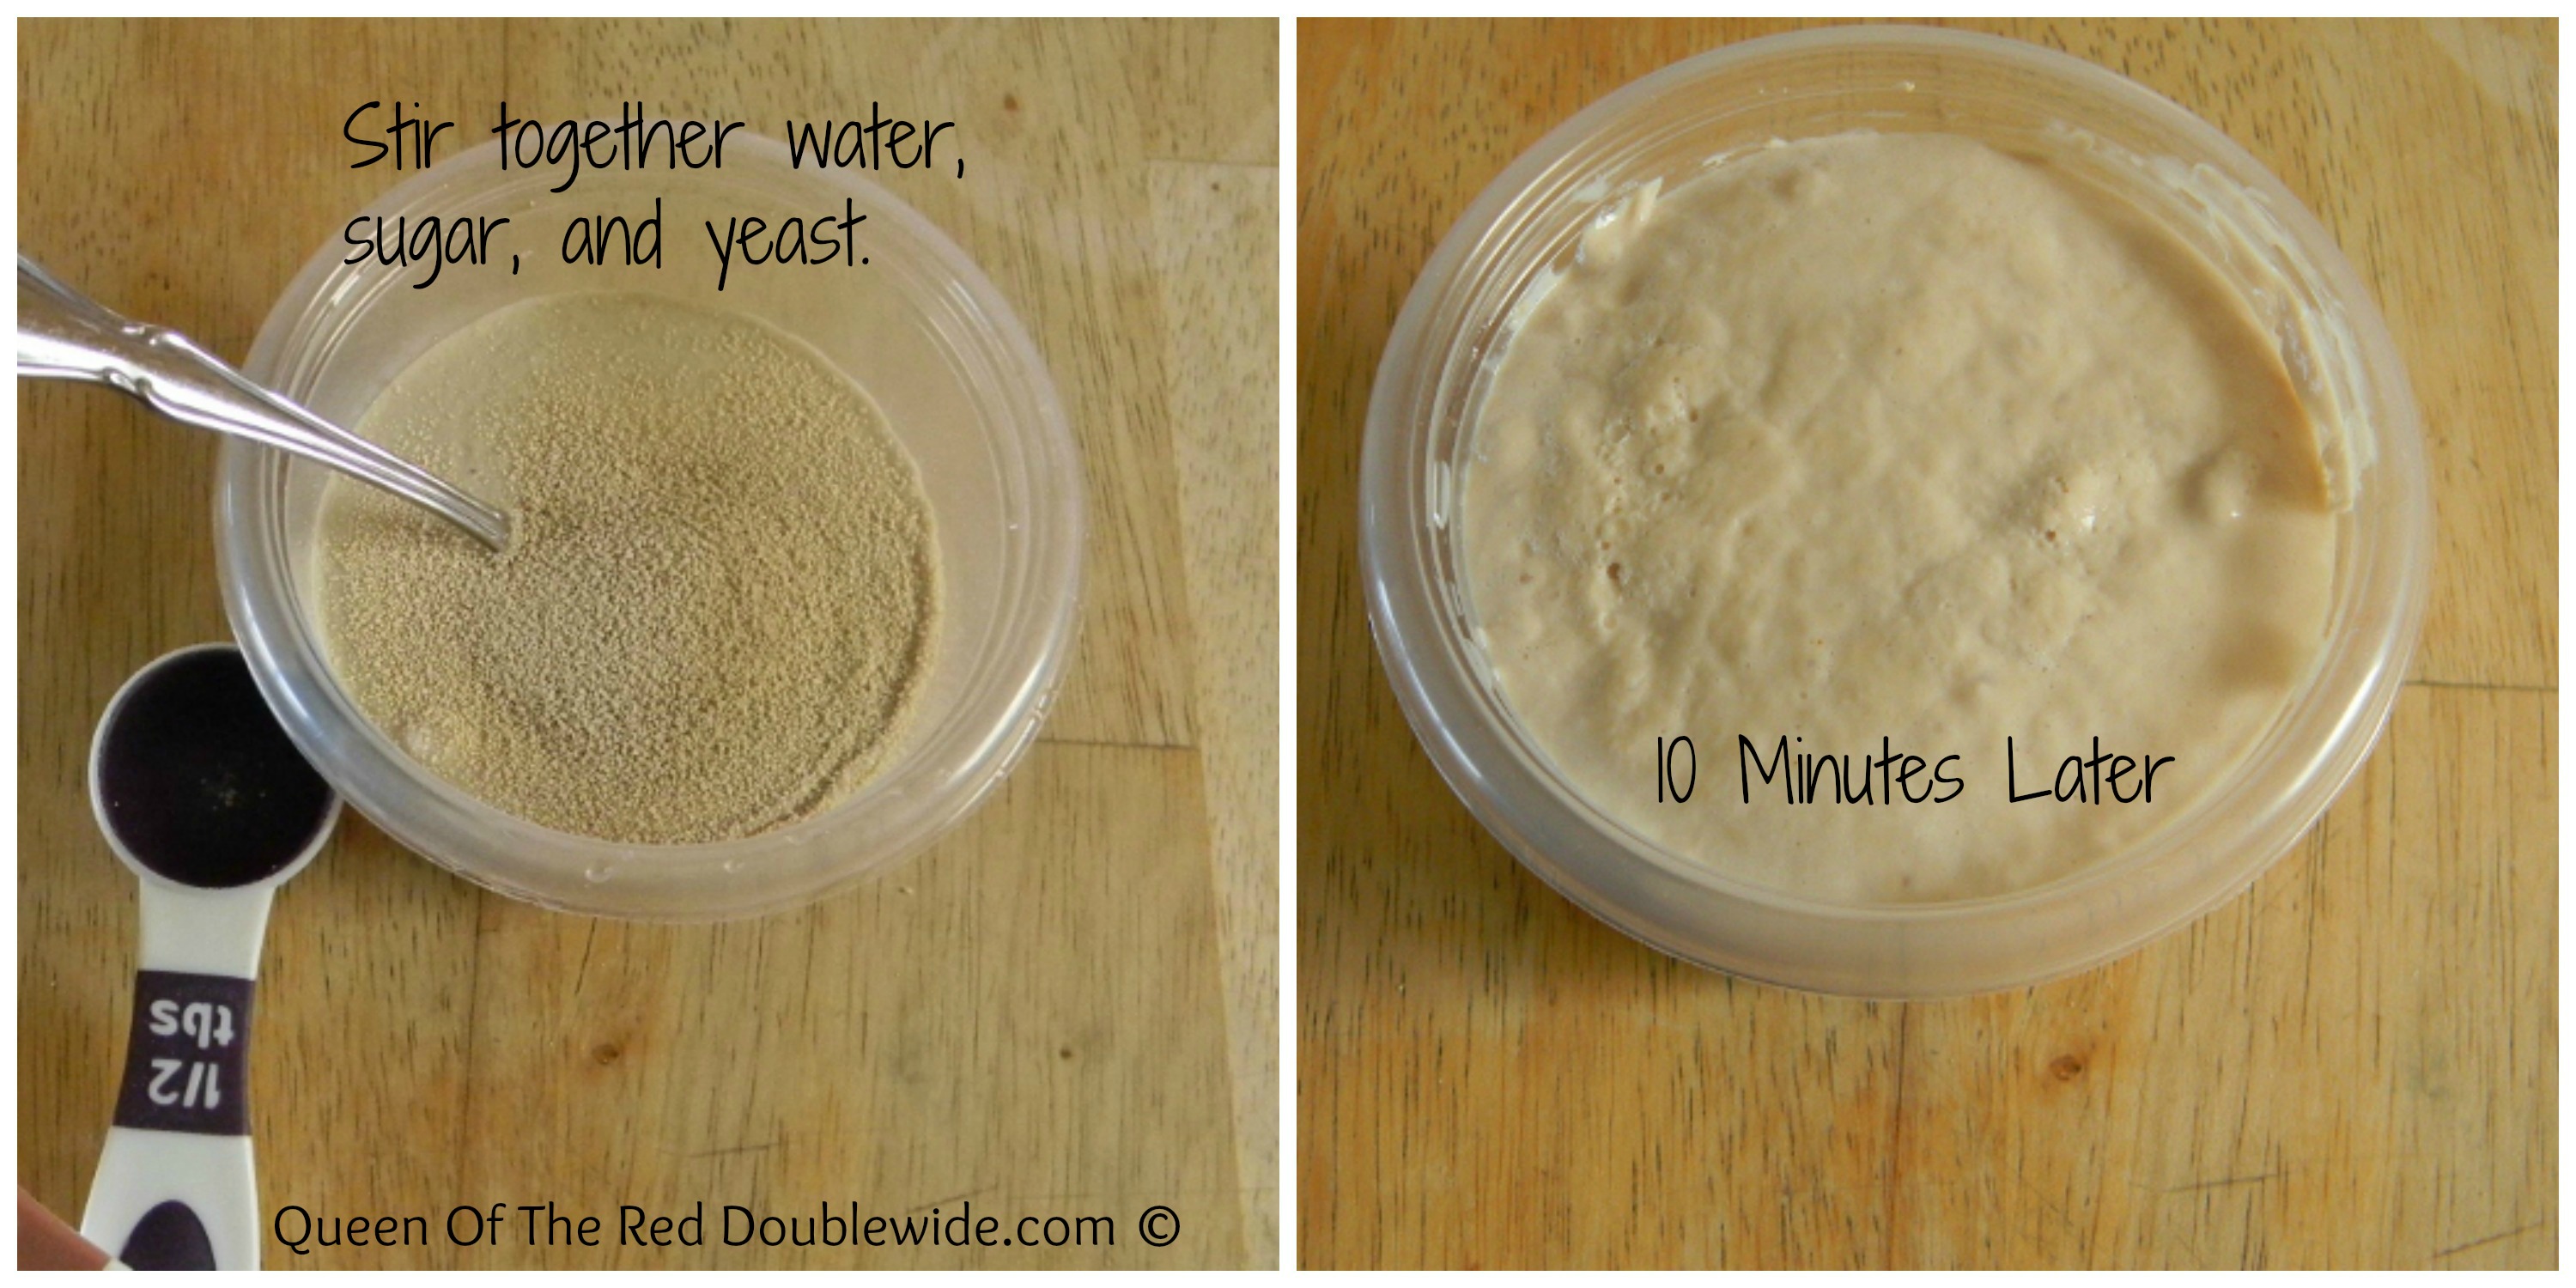
Step 1 – Put 1/2 cup of warm water, yeast and a pinch of sugar to a small bowl. Stir to dissolve the yeast then let the mixture sit for about 10 minutes until foamy.
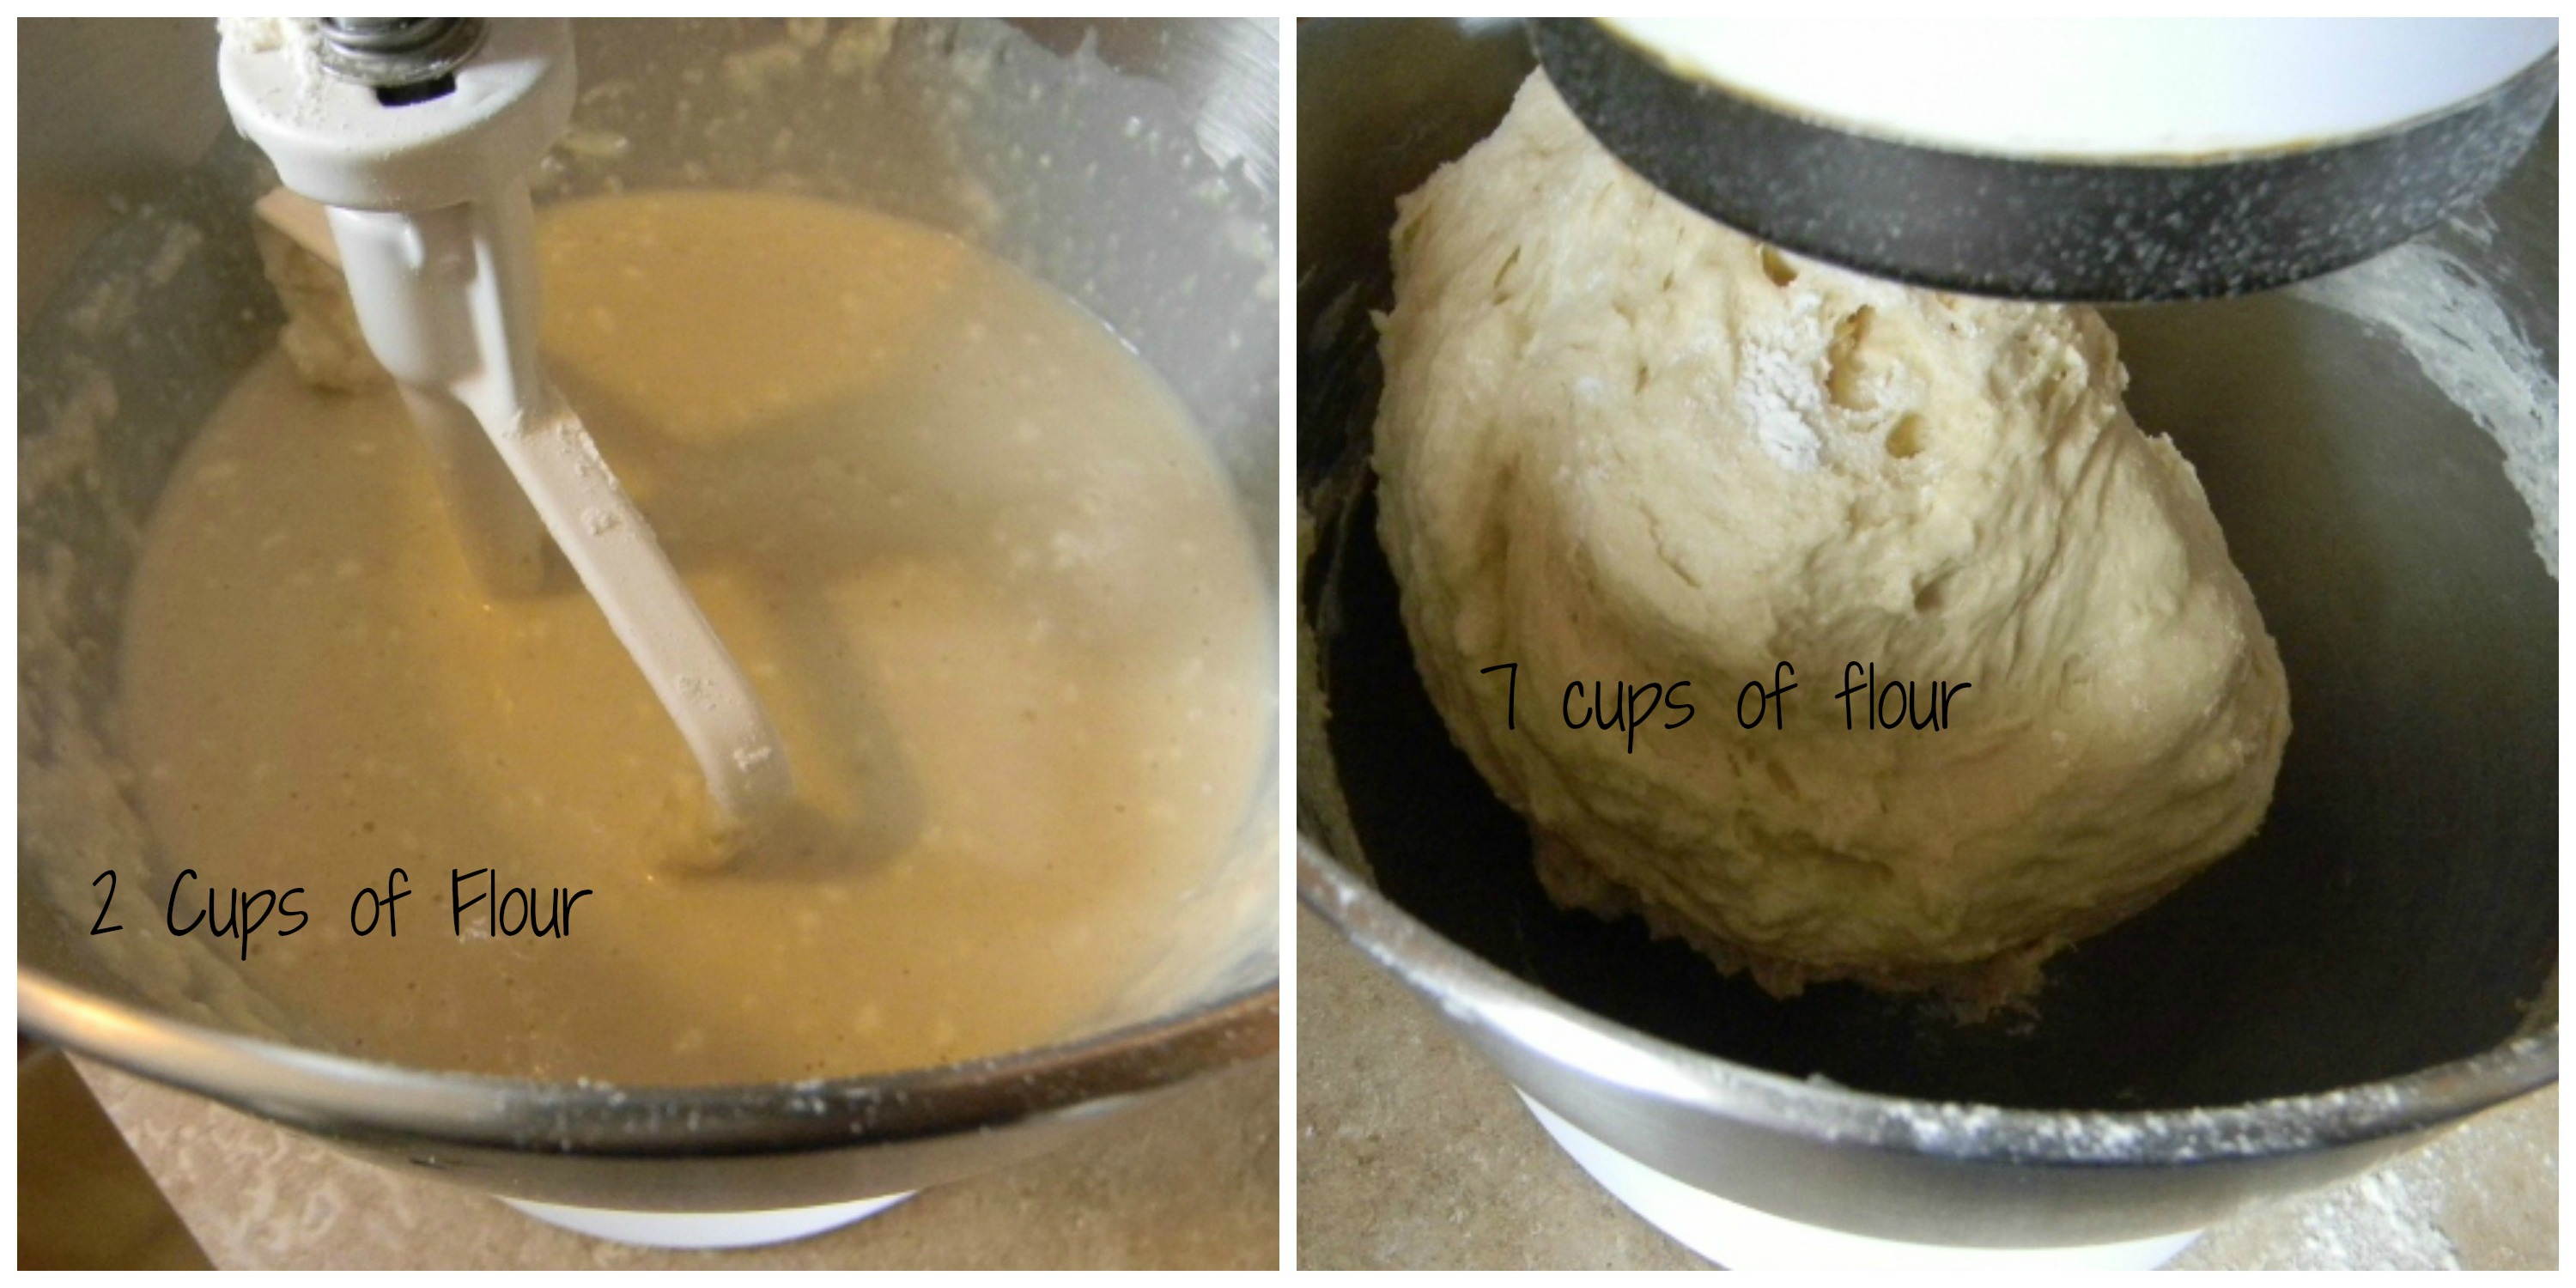
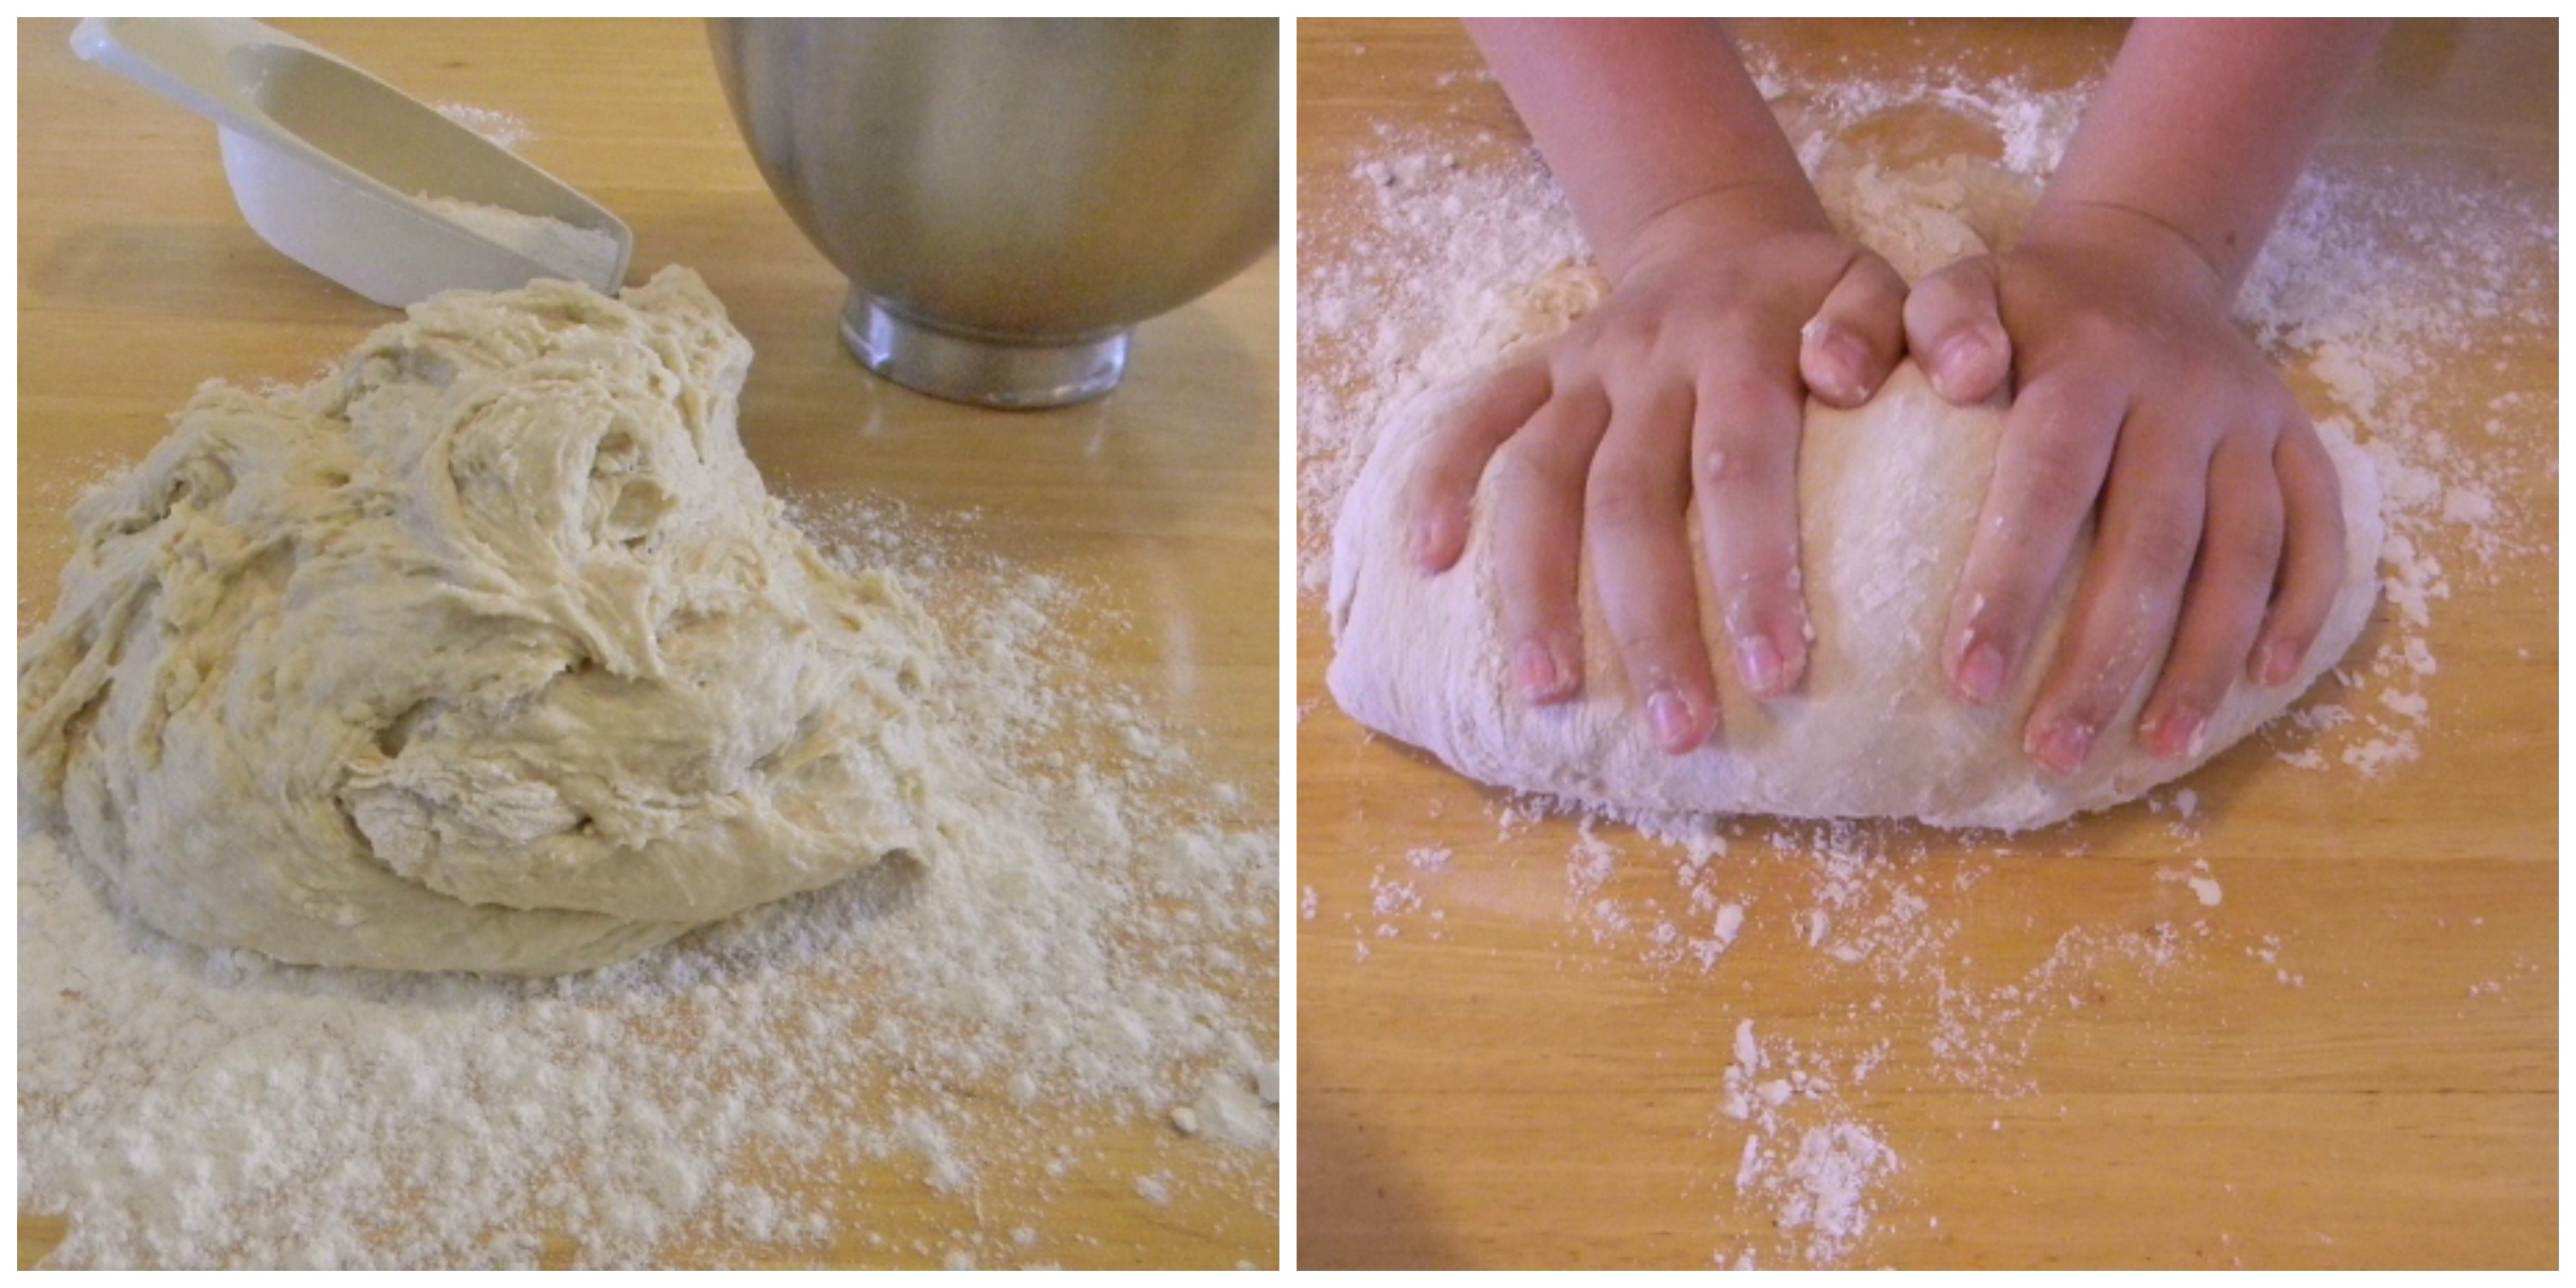
Step 2 – In an electric stand mixer or a large bowl, combine the remaining water, milk, butter, sugar and salt. Add the yeast mixture, and stir until combined. Add 2 cups of the flour, and mix well. Continue to stir the mixture for one or two minutes until smooth and creamy. Add additional flour in 1/2 cup increments, stirring well after each addition until the dough holds together and starts to pull away from the sides of the bowl. Step 3 – Put the dough on a well floured surface, or if you have a dough hook for your stand up mixer you can use that to knead the dough. I think the best part of making dough is kneading with my hands. Knead in the remaining flour, adding a tablespoon or two at a time, until the smooth dough no longer sticks to your hands. It will take about 5 minutes by hand, less if you use the mixer.
My girls love kneading the dough and I’m taking advantage of that while it lasts!
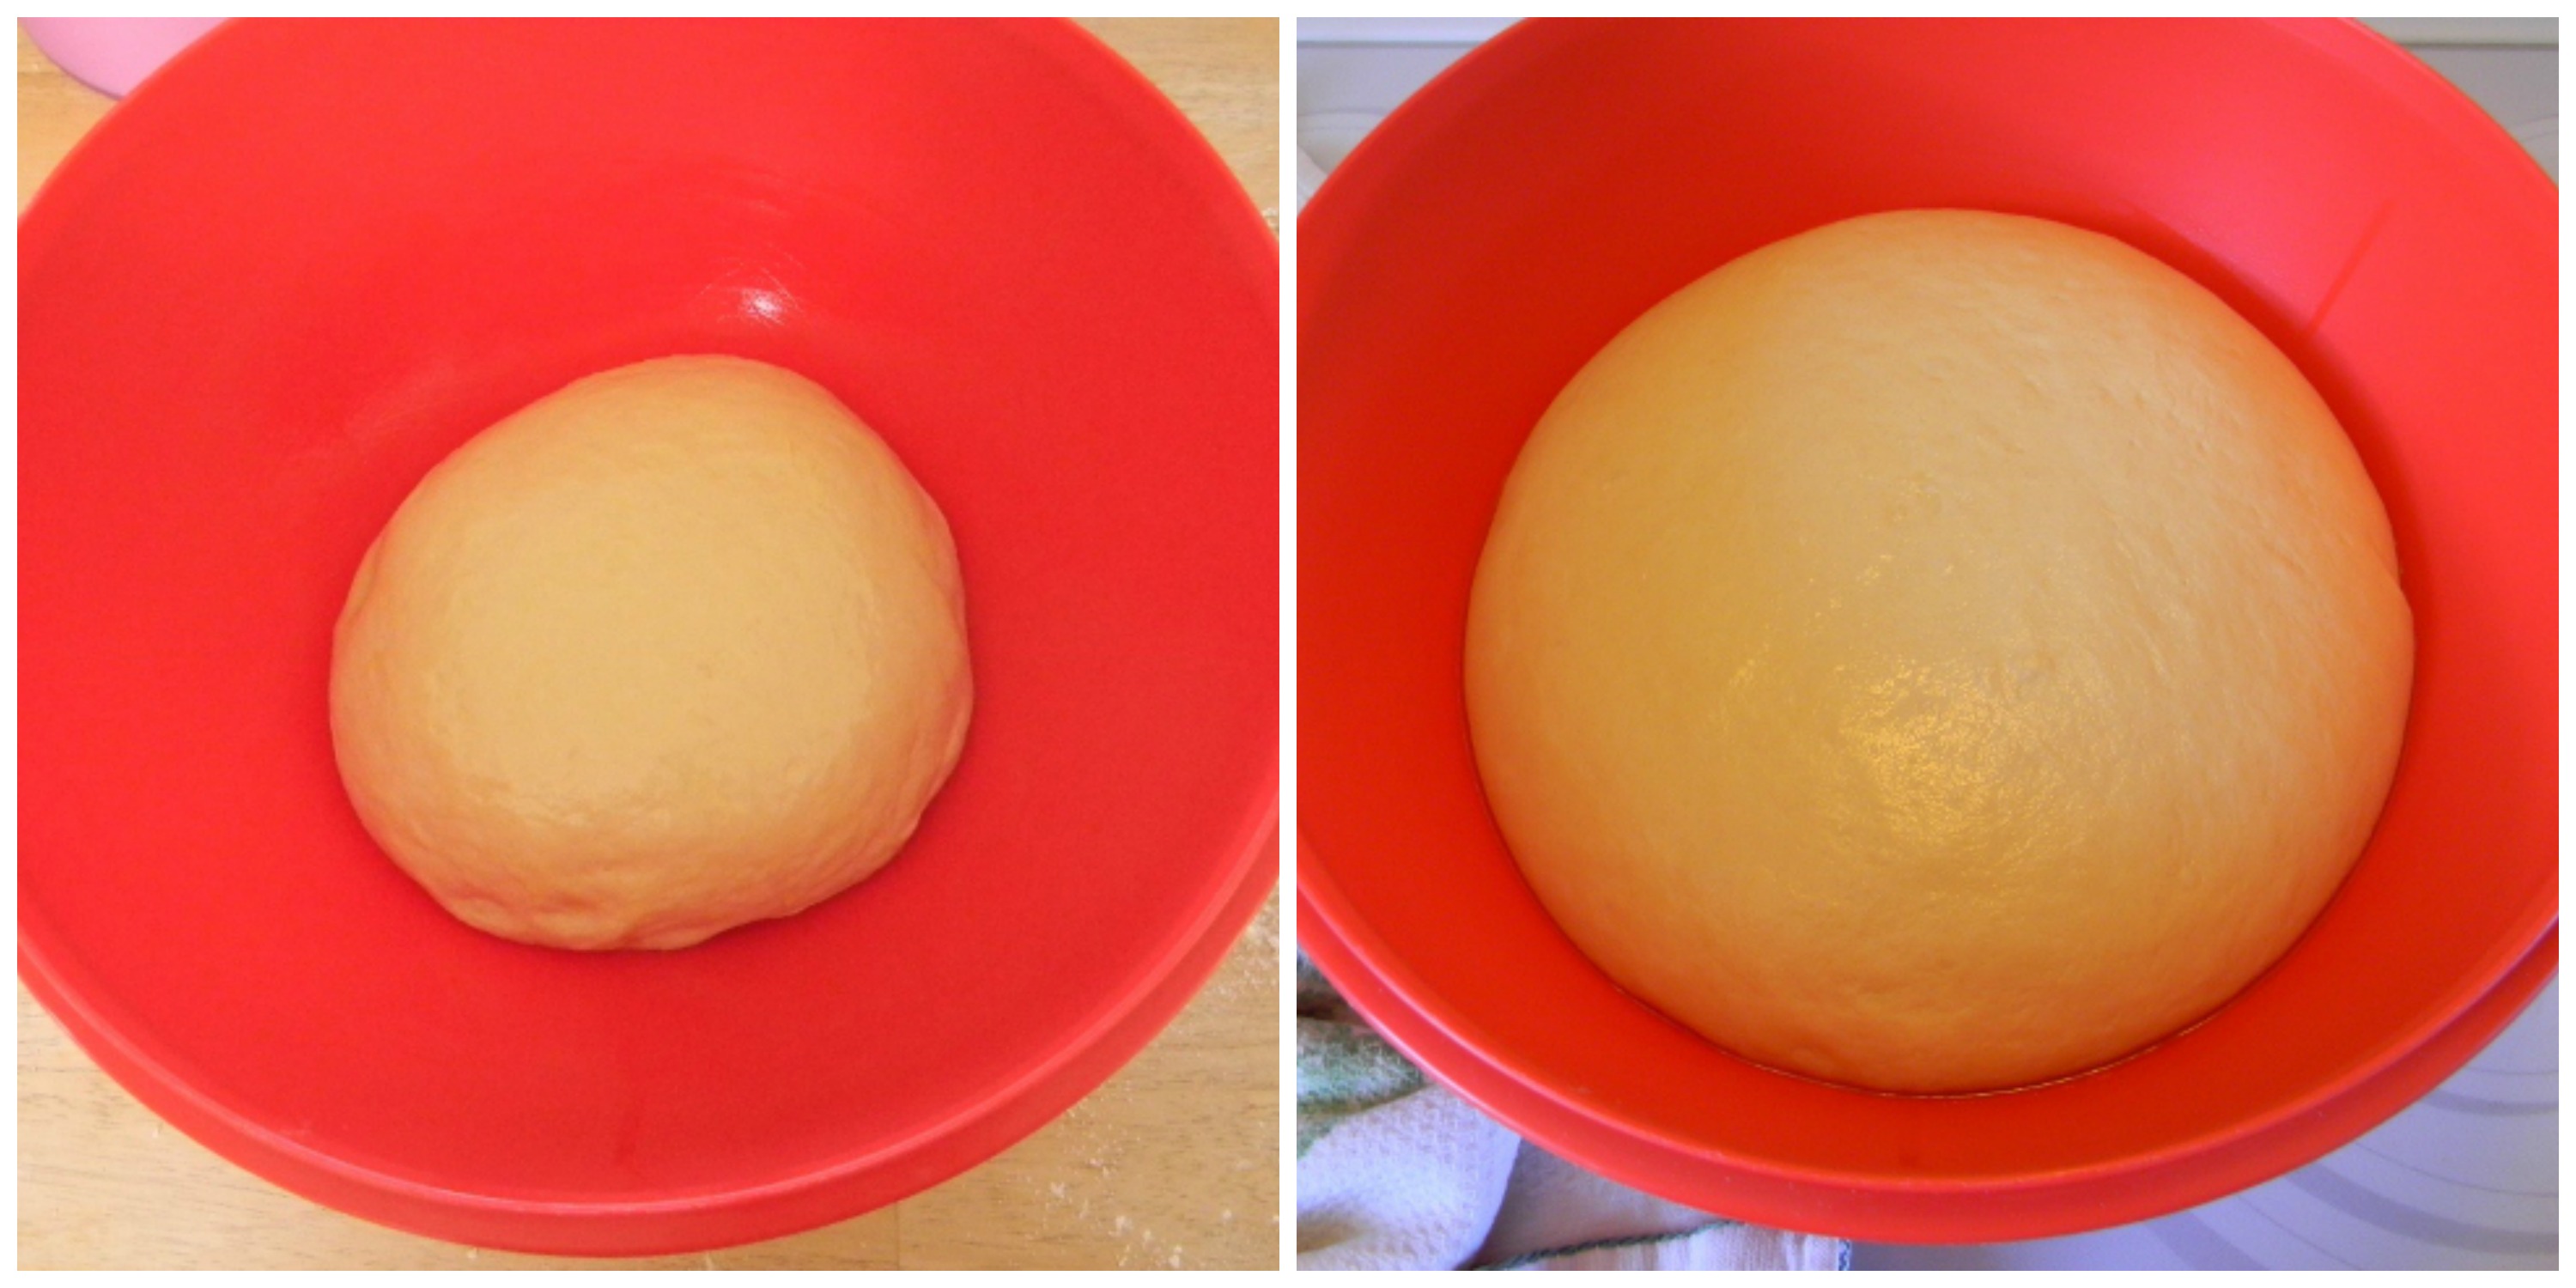
Step 4 – Place the dough into a large greased bowl (I used a little olive oil) turning it over so the dough is coated with oil. Cover the bowl loosely with plastic wrap and let it sit at room temperature until it has doubled in size. It will take about 1 to 1 1/2 hours.
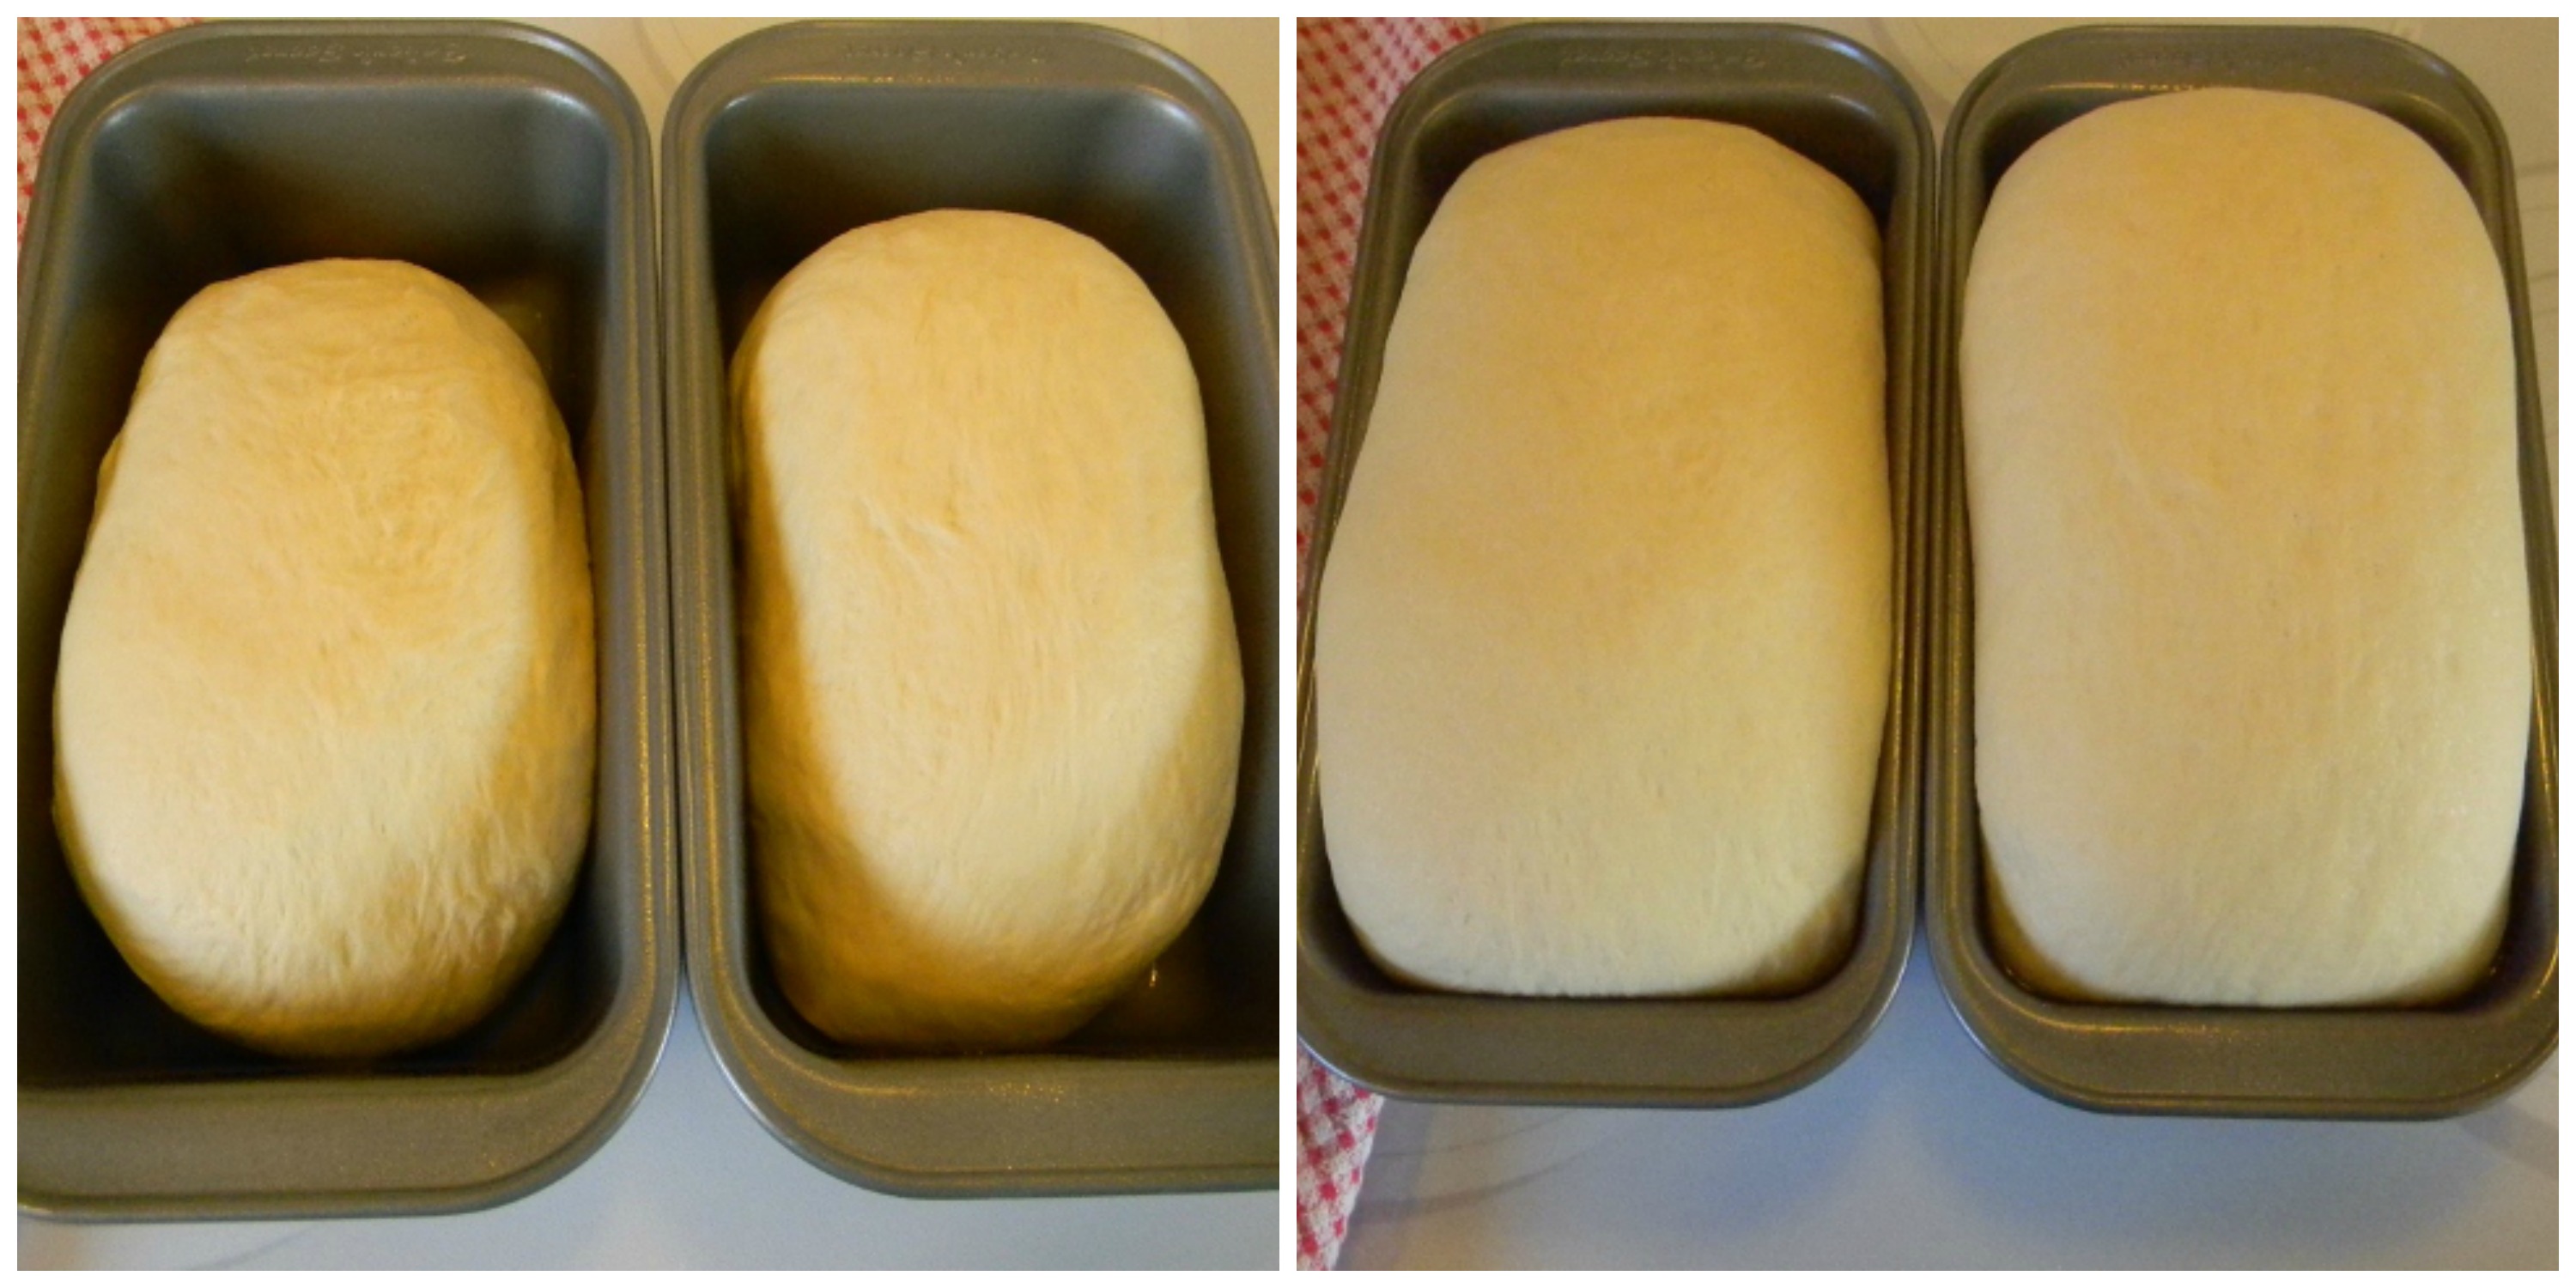
Step 5 – Grease two 9X5 inch loaf pans. Divide the dough equally and shape each piece to fit in the loaf pans, place in the greased loaf pans and cover loosely with plastic wrap. Allow the loaves to rise at room temperature until doubled again. It will take about 30 minutes this time.
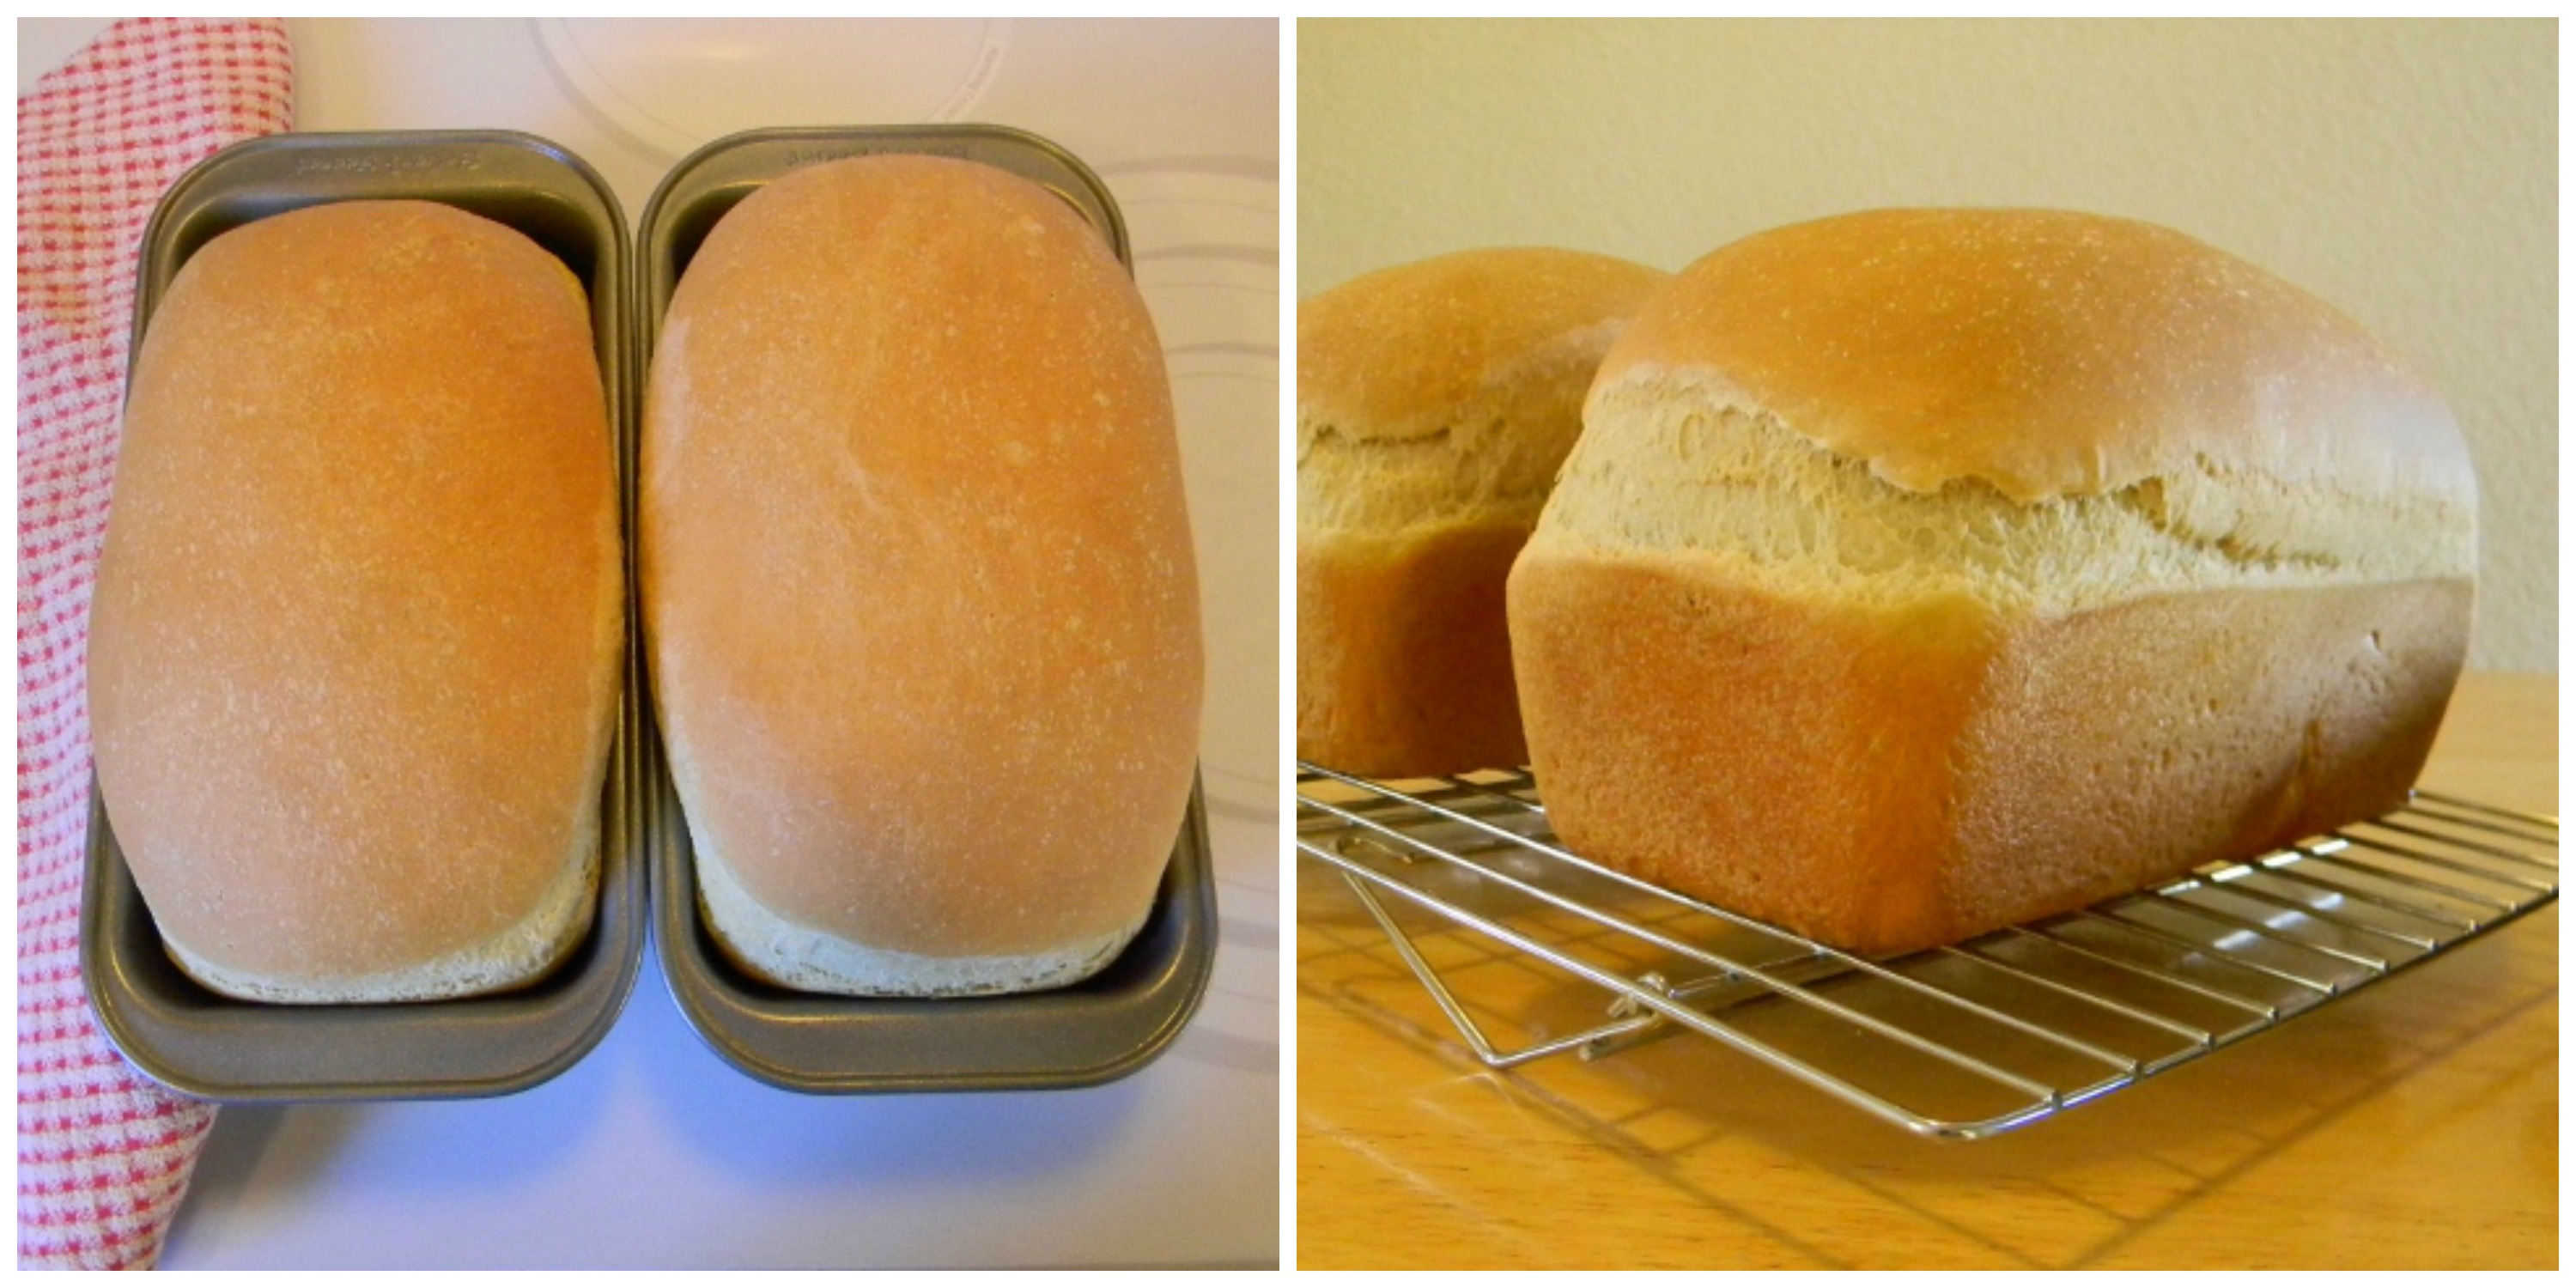
Step 6 – Preheat the oven to 350 degrees while the loaves rise. Bake for 40 to 45 minutes or until golden brown. The loaves should sound hollow when tapped. Allow loaves to cool completely before slicing.
This bread works great for sandwiches, toast and french toast. It is a little crumbly and it goes bad faster than store bought bread, but it tastes better, it’s less expensive and I know exactly whats in it!
This is week six of baking our own bread and I have to admit I’m enjoying it very much! I think it’s time to start experimenting….Hamburger and hotdog buns are next on the list. 😀
Click here or on the pictures to take you to the recipe!
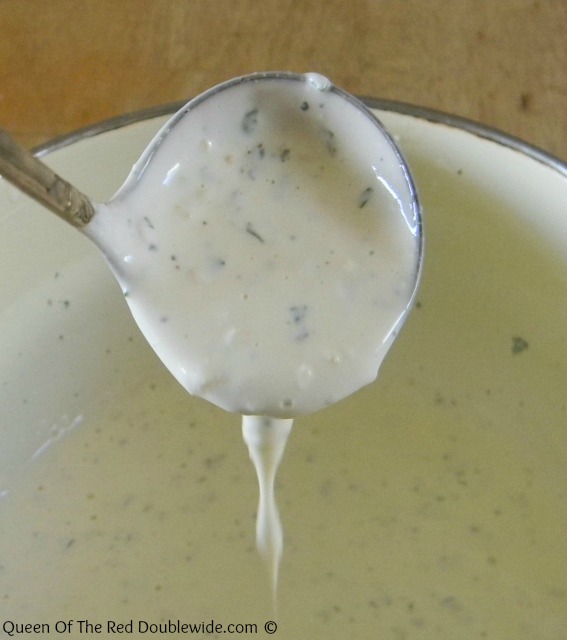
To make ranch dressing: Add 1 homemade ranch seasoning packet to 1 cup of buttermilk and 1 cup of mayo. Stir well with a whisk and refrigerate for a couple hours before serving. If you don’t have buttermilk , mix together 1 cup of milk and 1 tablespoon of lemon juice or vinegar and let it sit for 5 minutes, use that instead of the buttermilk. (I have been meaning to try this with plain yogurt instead of mayo but haven’t yet. If you try, it let me know how it turns out!)
For ranch dip: Add 1 homemade ranch seasoning packet to a 16oz container of sour cream (2 cups) mix well and refrigerate for a couple hours before serving.
Hope you enjoy these as much as we do!! Have a Blessed Day 😀
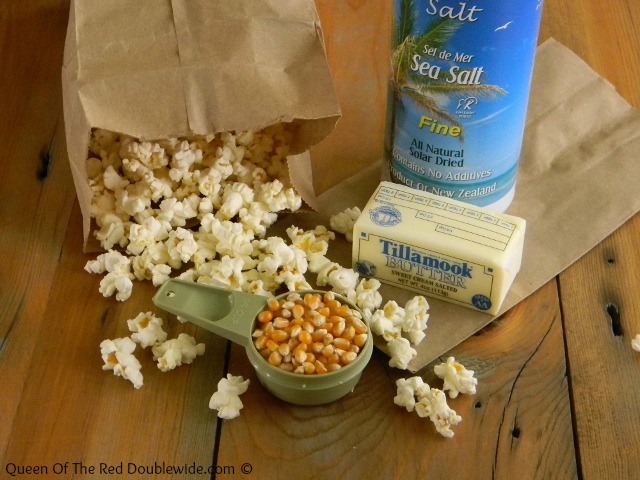
Sunday night is popcorn night at our house! When we started our journey to a more frugal and healthier life style, microwave popcorn was one of the first things to go. I’d bought an air popper a while back (in a moment of nostalgia) but barely used it. My husband didn’t like the air popper popcorn, and I had to agree. For some reason it seemed soggy and wanted to melt between your teeth instead of having that nice crunch. I thought we were stuck with soggy popcorn because I refused to buy the bags of chemicals again. Then a friend told me that you can put popcorn in a paper bag and microwave it. How brilliant!
This is sooooo much cheaper and healthier than store bought microwave popcorn, it has that wonderful crunch and you can control the amount of butter and salt it has on it. I’m ditching my air popper, and freeing up some space in my cupboard!
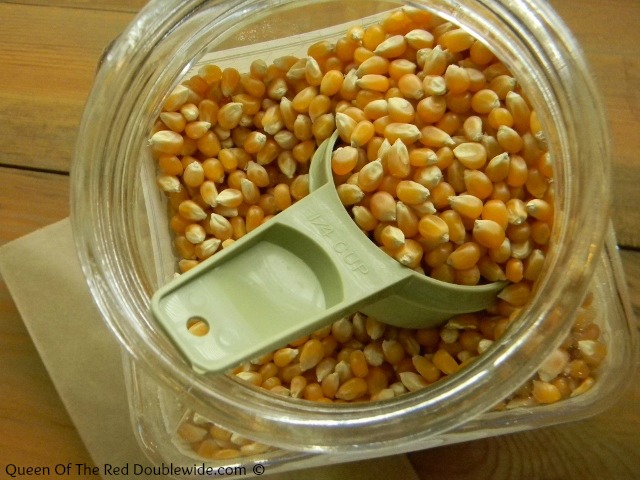
All you need is a paper bag, 1/4 of a cup of popcorn kernels, butter, and salt or what ever seasonings you like.
Put 1/4 of a cup of popcorn kernels into a paper bag and fold down the top. Place the bag right side up in a microwave for ABOUT 2 minutes. I set the timer for 2 1/2 minutes and listen closely. When the popping slows down to 3 to 4 seconds between pops I stop the microwave. Microwaves are different so times will vary. Pour your popped corn into a bowl and season (we like Parmesan cheese on ours). You can use the same bag to pop more than one batch if you want more popcorn. So simple, yummy, healthy, and cheap. 😀
If you’re like us, you have a bunch of these in your fridge right now. 😀
They are absolutely beautiful, but they can’t stay in the fridge forever! Here are three delicious ways to use up those Easter eggs that are taking up space in your fridge.
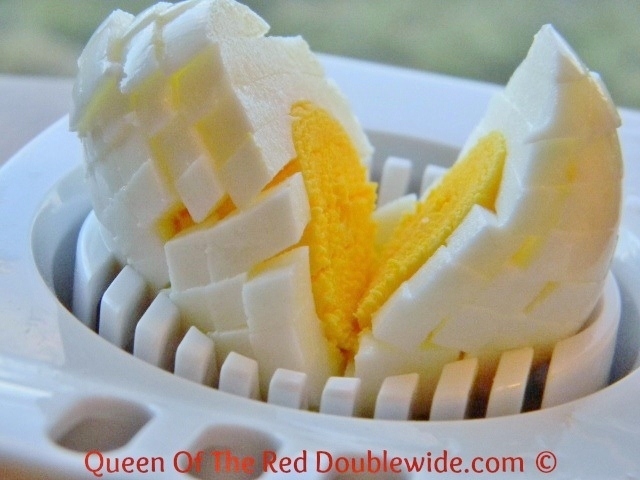
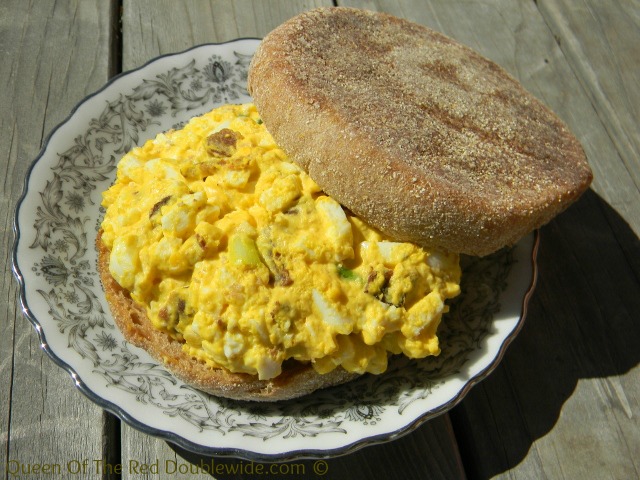
Start with 12 hard boiled eggs, peeled and rinsed. Chop the eggs into little pieces. I use an egg slicer and slice the egg one way and then turn the egg and slice it the other way.
After you have all your eggs chopped up in a bowl add: mayo, mustard, horseradish, and sweet relish. Mix all together real good and give it a taste. Now you will know how much seasoning salt and pepper you want to add. Don’t over do the salt….you can always add more but you can’t take it out!
This is Creamy Egg Salad on Sour Dough Bread…..Yummm!
#2 – “Dill Egg Salad”
This one is my favorite! If you don’t like pickles then skip down to the last recipe ‘cuz this is happy pregnant lady with a pickle craving good!!
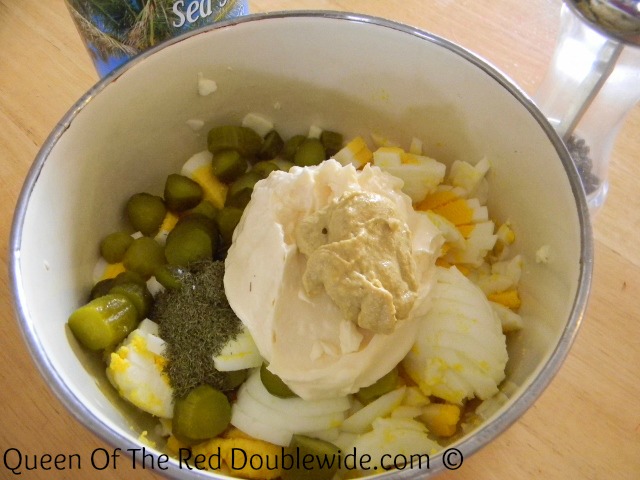
Chop your 12 hard boiled, peeled, and rinsed eggs into a bowl. Add: mayo, dijon mustard, dill, pickle juice, and chopped dill pickles (our favorite dill pickle is – Nalley’s Elites Garlic, Dill & Onion Petites – they are little, crunchy, and absolutely DELICIOUS!).
My mouth is watering just thinking about those pickles….anyway, mix everything up thoroughly and then take a bite….add salt and pepper if or as needed.
#3 – “Bacon and Egg Salad”
Begin by slicing your 12 hard boiled, peeled, and rinsed eggs into small pieces. Add mayo, sour cream, green onions, bacon bits, (here is how I easily cook bacon in the oven) salt, and onion powder to the egg pieces. Stir together well and give it a taste. Add more salt if needed and pepper to taste.
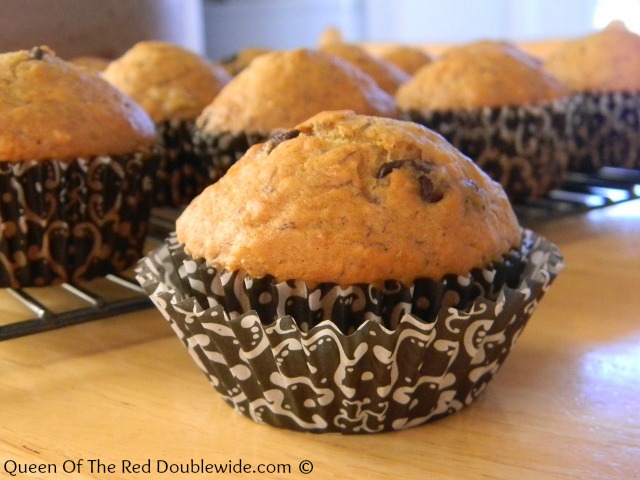
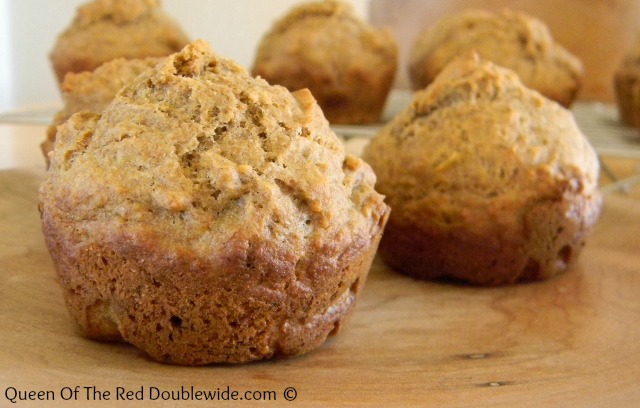
This recipe is very versatile…you can make healthy breakfast muffins, or not quite so healthy dessert muffins. But either way they are nummy, nummy, nummy! Of course I made both kinds, (several times) just to make sure I got the recipe exactly right. Then a few more times to be absolutely sure I wasn’t sharing a recipe that was no good. Then I found myself digging through the bananas at the store to find more over ripe bananas, cause waiting for bananas to get a little over ripe just takes to long!! Did I mention these muffins are good?….really good!
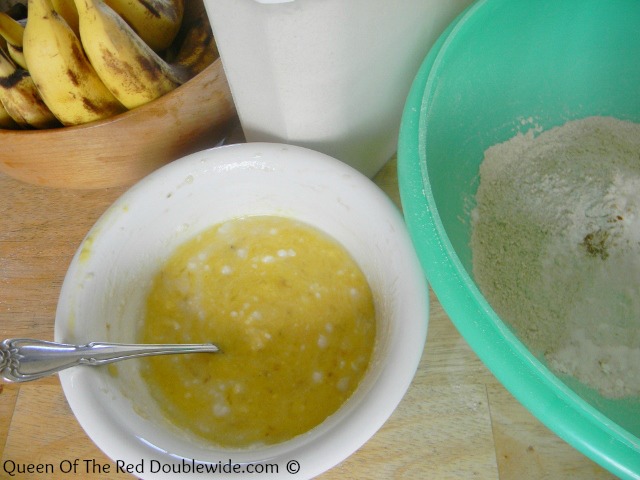
Start by mixing together the dry ingredients: flour, baking soda, baking powder, cinnamon, and salt, and set it aside.
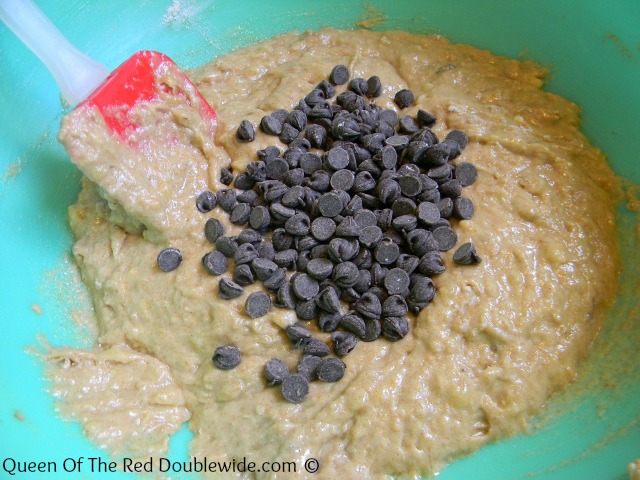
In a separate bowl smash the bananas then add honey, butter, egg, and milk. Stir well and then pour into dry ingredients and stir until moist, then fold in chocolate chips.
Fill sprayed cupcake tins or you can use cupcake liners about 1/2 full and bake at 375 degrees for 15-20 minutes.
½ cup of chocolate chips or more if you like, or you could leave them out if you want a sugar free muffin. 🙂
Instructions
In a mixing bowl stir together flour, baking soda, baking powder, cinnamon, and salt. In a separate bowl smash the bananas and add honey, melted butter, egg, and milk. Stir well and pour into the dry ingredients. Stir until combined then fold in chocolate chips. Put cupcake liners in a cupcake tin or spray the tin with cooking spray. Fill each tin half full with batter and bake at 375 degrees for 15 to 20 minutes. Makes 14 muffins
3.2.1226
Note: If you’re like me and like to cook with stevia, just substitute 3 tsp. spoonable stevia for the honey and add an extra 1/4 cup of milk and a half cup of plain yogurt. Don’t use cup cake liners; they will stick. I sprayed the cupcake tins with Pam and they came out just fine.
I made these this morning with whole wheat, coconut oil, rice milk and didn’t add any chocolate chips. They were a wonderful HEALTHY breakfast!
 There you have it, homemade seasoning salt! Be sure to shake well before each use. Use sparingly at first, you can always add more but you can’t take it out if you get to much.