On New Years Day we managed to slip and slide our way out for a shopping trip. We had a foot of snow and were trying to stay off the roads, but the necessity for dog, cat and chicken feed forced us to venture out. We got to the feed store and to my pleasant surprise they were having a sale! Don’t you just love it when you go to the store for a specific item and it just happens to be on SALE!! (BONUS) With all those red sale signs I COULDN’T just get what I needed and head for the door, so I started to brows. 😀 I soon spotted one of those lovely signs above several racks of newly stalked garden seeds! Oh man! I wanted to start dancing and spinning and giggling and throwing packets of seeds into my cart!!! Pumpkins and cucumbers and beans OH MY!
I purposefully kept my hands on my cart as I ogled the rows and rows of beautiful seeds. Constantly repeating to myself “January, winter time, snow, January, winter time, snow……” That seemed to help, I slowly lost the urge to break into song and dance. Then I spotted the sprout seeds…YEEHAW!! It doesn’t mater if there’s snow outside, we can grow sprouts inside. 🙂
Here’s how to grow nutritious, yummy sprouts ANY time of the year!
What you need:
1 quart size mason jar
Cheese cloth and a rubber band or sprouting lids (pictured below)
Sprout seeds and water
My girls had been given these sprout grower lids as a gift from their Aunt Kate so we used those.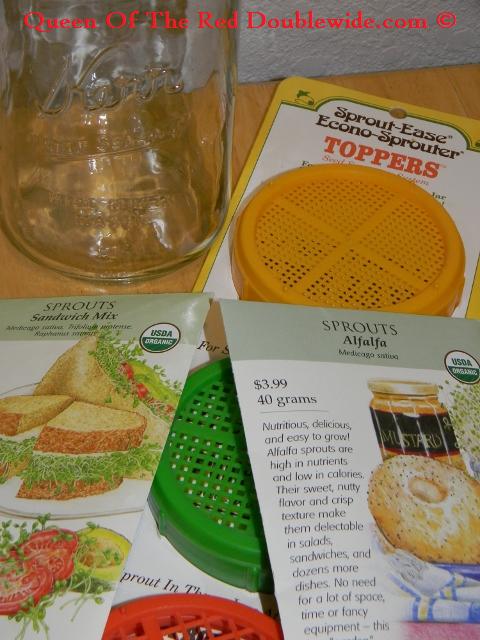 Put 2 tablespoons of sprout seeds into a clean quart size jar. Fill the jar about half way up with water then place the cheese cloth over the top of the jar and secure it with a rubber band or just screw on the sprouting lid with the smallest holes. I do this in the evening so they can soak over night. 8 hours is about right.
In the morning dump the water out through the cheese cloth or sprouting lid. Then pour some water back into the jar, swirl around and dump water out through the sprouting lid again to rinse the seeds. Prop the jar up sideways in a bowl with the lid side down. Like this: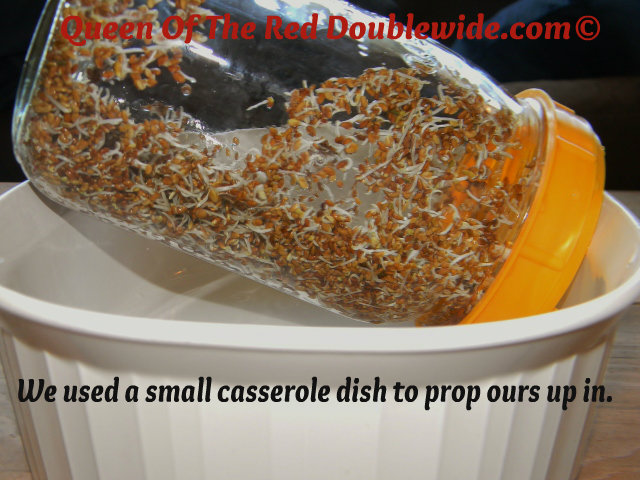 This is so remaining water can drain yet allowing the air to circulate through the jar. Keep them on the counter out of direct sunlight.
Rinse seeds 2 to 3 times a day, always propping the jar lid side down in the bowl. It will take 4 to 5 days for them the reach the desired length. We ate most of ours on day 4 (on sandwiches, wraps, and salads) but if you have any left overs just store them in the fridge. These sprouts were sooooo yummy!! We have our next batch started and now I’m looking forward to growing…red clover, broccoli, mung bean, radish…..and so on. I had no idea there were so many different kinds of sprouts.
Even though we have a while to wait before we see signs of spring outside, it’s wonderful to have a little taste of spring in January!!