Homemade Honey Whipped Cream Cheese

We have been making lots of muffins and quick breads lately.  What goes better with a nice warm muffin than cream cheese?  Honey whipped cream cheese of course!!

This is a great recipe to let the kids help with, it’s very simple.

All you need is an eight ounce package of cream cheese, softened and 3 to 4 tablespoons of honey (depending on how sweet you want it).  Whip the cream cheese in a mixing bowl (I used my KitchenAid).  When it’s nice and smooth gradually add the honey.  Keep whipping until it’s light and fluffy.

DSCN5571 (640x480)-1             This is honey whipped cream cheese on a Chocolate Chip Banana Muffin.

If you don’t want a sweet whipped cream cheese just substitute milk instead of honey.

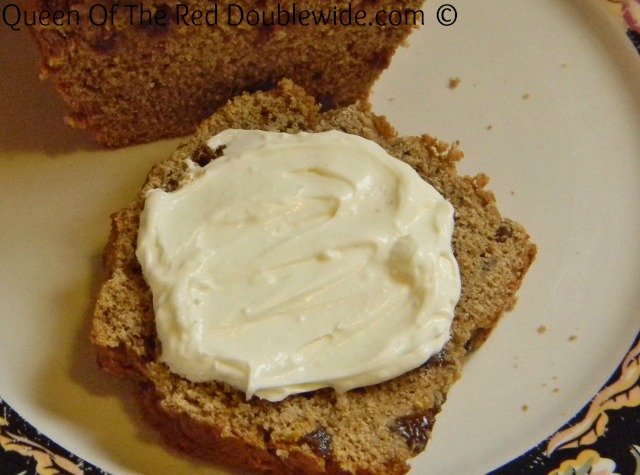
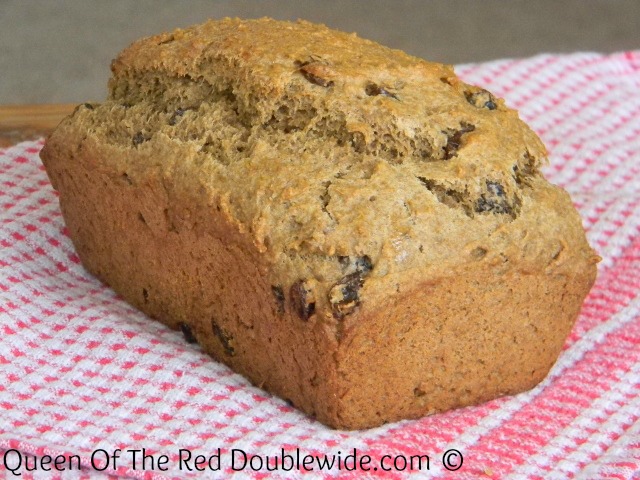
DSCN5542 (640x475)-1This is Whipped Cream Cheese on Applesauce Raisin Quick Bread.

You can also use maple syrup instead of honey.  Either way this spreadable cream cheese makes any breakfast bread even yummier!  I was thinking of trying in on french toast next time?

This is a lot less expensive than a tub of whipped cream cheese at the store especially if you buy a generic brand package of cream cheese. 🙂

How to Cook and EASILY Peel Farm Fresh Hard Boiled Eggs!

First of all I want to mention that this method is not just for farm fresh eggs.  Store bought or strait from the coop, your end result will be beautiful hard boiled eggs!

Have you ever tried to peel a farm fresh hard boiled egg?  I have, and it’s not a pretty sight. Unlike older, store bought eggs, no matter how hard you try the shell will not let go of the egg, leaving you with a lumpy, broken mess!!  With my new egg laying machines and tons of fresh eggs the only thing I could think to do was hide a dozen eggs in the back of my fridge and wait for them to get old (the older the egg the easier it is to peel).  This works as long as you know two weeks in advance when you are going to want a hard boiled egg.  I don’t know about you, but when I want egg salad, I want it now, not two weeks from now!!

That was not my only problem with hard boiling eggs, I usually over boiled them and ended up with a green ring around the yolk….for some reason greenish colored, lumpy, deviled eggs are not very appetizing.  So I started researching and experimenting, and experimenting, and experimenting…….and this method left me with sun colored yolks and EASILY peel-able eggs!

DSCN5329 (640x480)-1

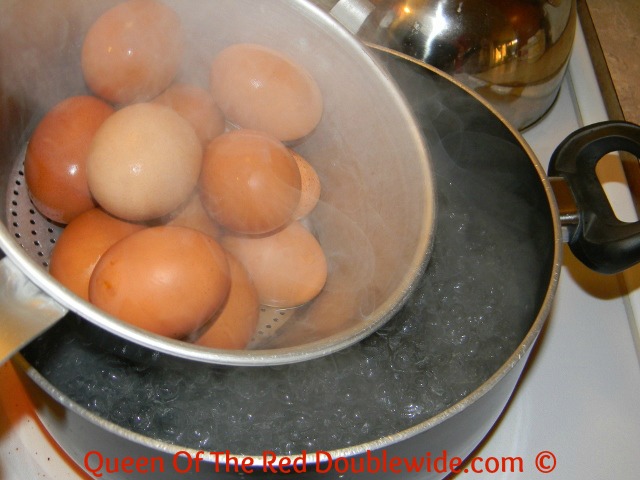
Start by placing a pot of water on the stove to boil.  Make sure it’s enough water to cover the eggs.  While your waiting for the water to boil take a (clean) thumb tack and poke a small hole in the fat end of each egg.

DSCN5385 (640x480)-1Be careful, you want to make a hole but not push the tack all the way in.  The goal here is to put a tiny hole in the shell where the air sack is and not poke through the membrane inside.  When the water is at a hard boil, and you have a tiny hole in each egg, gently (VERY gently) place the eggs in the boiling water and set the timer for 15 minutes.DSCN5210 (640x480)-1Keep them at a low boil for the entire time.  If you pushed the tack in to far you will see streams of egg white floating in the water.  It’s no big deal, that egg will just not be as pretty as the rest.  After you do this a few times you will get the hang of it.

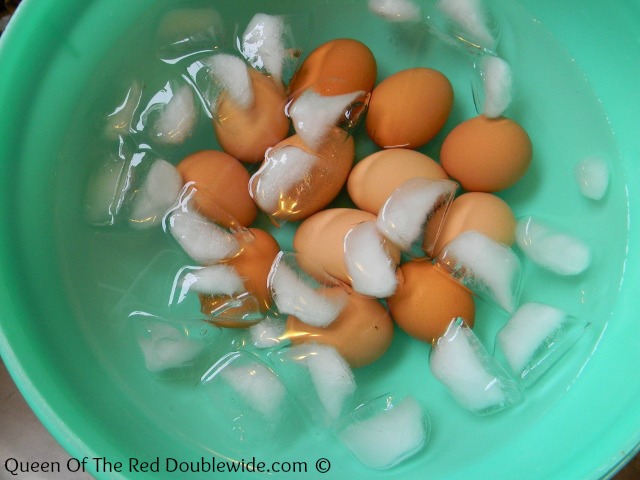
While they are boiling prepare a bowl of ice water in your sink.  When the timer goes off immediately remove the pan and drain the boiling water.  Then place the hot eggs into the ice water.

DSCN5612 (640x480)-1Wait about 15-20 minutes and take them out one at a time to peel.

DSCN5340 (640x480)-1


These are eggs that were laid this morning….see how nicely they peeled.


DSCN5344 (640x480)-1

This is an egg that I poked the tack in to far and some of the the egg white escaped.  Not a good look for deviled eggs, but will still taste great in egg salad. 🙂


 DSCN5616 (640x480)-1See how nice and pretty the yolk is!!

I’m so glad I can make deviled eggs whenever I want instead of having to plan ahead and hide them in the back of the fridge to get old.  I hope this works as well for you as it has for me.  The tack trick takes a little practice, but if all you have is fresh eggs to peel it’s definitely worth the effort.

I found this method at: Paths of Wrighteousness

Cooking Bacon in the Oven

Bacon, bacon, bacon, I love bacon!!

Oven roasted bacon is the best.  The bacon cooks evenly and clean up is super easy.  But the best part is you don’t have to stand over a sizzling pan while splatters of hot grease hit you in the face.  😀

All you need is a baking sheet lined with foil and BACON.

First place as much bacon as you can possibly fit onto the foil lined baking sheet….well maybe just as much as you need.  But I put as much as I can fit…cause I can never have to much bacon!!

DSCN5595 (640x480)-1Then put the pan in a cold oven.  Turn the oven on to 375 degrees and set the timer to 20 minutes.

Now, instead of getting whacked in the eye ball with hot grease you get to do something fun….like the dishes, or fold the laundry that has been building up on the couch.  Okay, maybe not so fun, but better than hot grease in the eye….right?

When the timer goes off, your kitchen will smell wonderful and the bacon should be done.  If you like yours a little crispier leave it in for a couple more minutes.

DSCN5604 (640x480)-1

Signs of Spring

I can’t say that spring has arrived, but I can see signs that it’s just around the corner!!  Here are 6 Signs of Spring that I’ve seen so far:

1) Cranky Girls

Yep this is my #1 sign that spring is coming.  Well maybe it’s just my hopeful thinking that the reason the 8 year old, the 10 year old, and the mom that live in this house are at each others throats because WE NEED SOME OUTSIDE TIME!!!!!!!  The winter has to end soooooon RIGHT??

Okay, it’s really not that bad, but cabin fever has taken its toll. 🙂

2) Robins

DSCN5254 (640x480)-1Yes, my little chef looked out the window yesterday and there where several robins perched in the tree outside our window.  A sure sign that things are warming up a little.

3) Garden Clean up

DSCN5267 (640x480)-1We have recently had a couple of days that where just warm enough for us to bundle up and head to the garden for some clean up.  It felt really good to play in the dirt again. 😀 As you can see the chickens enjoyed playing in the dirt too…well,.. they enjoyed all the worms.

4) Wind

DSCN5251 (640x290)-1In our neck of the woods, spring equals wind, or maybe that’s, wind equals spring??         I’m not talking about a little breeze, I’m talken about, batten down the hatches, hold your hat on, and don’t even think about taking an umbrella outside (even if it’s pouring rain) unless you want to Mary Poppins into the next county, kinda wind!  So I’m not necessarily glad to see the wind, but I am happy to see the signs of spring that come with it.

5) Longer Days and Happy Chickens

DSCN5248 (640x480)-1The days are now getting noticeably longer!  I even had to change the timer for the light in the chicken coop the other day.  Chickens need at least 14 hours of light to keep laying eggs in the winter, the longer the days get the less artificial light they need. Longer, warmer days make for happy chickens.

6) Sun Bathing Cats

DSCN5290 (603x640)-1I love all the very distinct seasons that God has given us here in the Gorge.  But I have to say that Spring is my favorite and these little signs of spring have made me so thankful and excited for what lies ahead.

Bacon Fried Rice

For our family it doesn’t get much better then Bacon Fried Rice!

Frugal, simple, yummy, uses lots of our fresh eggs, and how can you go wrong with BACON?

You will need 4 cups of cooked rice.  It doesn’t matter what kind, I prefer brown organic rice (it’s much healthier than white), but I ran out and needed to use up this white rice so that’s what you will see pictures of.  I put 2 cups of rice and 3 cups of water in my rice cooker and it was perfect about 20 minutes later.  Cook your rice how ever you prefer.

While the rice is cooking, chop up LOTS of bacon.

This was 3 cups of uncooked bacon pieces.  After it was cooked and drained it was 2 cups of bacon bits.  I buy the big packages of ends and pieces (they are cheaper than sliced) and freeze them until I need them.

DSCN5227 (640x480)-1I only use 1 pan for this recipe, so you will need a big one.  While the bacon is filling your house with that heavenly aroma, chop a large onion and green pepper.

DSCN5222 (640x480)-1You will also need six eggs, scrambled.

DSCN5223 (620x640)-1Yes, that’s a gargantuan bowl of eggs shells. 🙂  We save all our egg shells and grind them up for the compost pile and to feed back to our chickens for calcium.  If you would like to recycle your eggs shells, here is a link to a post about 30+ things to do with egg shells on the Prairie Homestead Blog.

When the bacon is done(crispy) place it on a plate with a paper towel to drain, and pour some of the lovely bacon grease into a small glass bowl or coffee cup.  Leave some of it in the pan to saute the onion and green pepper in.

Then look outside and see that it’s dark….and realize that you didn’t close the chicken coop doors yet.  Then turn off the burner so you can run outside to do that.  Grab a flash light, slip on your sexy clogs…. then remember that you are going outside for a couple minutes and leaving warm bacon bits on the counter with serious bacon snatchers in the house….slip off the sexy (chicken poopy) clogs and head back to the kitchen and hide the bacon bits in the cupboard.  Slip sexy clogs BACK on, run out to the chicken coop, count 17 chickens, chase a cat out of the coop, close the doors, and run back to the house.

Warm the pan back up to medium heat (or just leave the pan on if you don’t have chicken issues) and saute the onion and green pepper, in the bacon grease until transparent.  If they start to stick to the pan add more bacon grease.

DSCN5231 (640x480)-1

Add the cooked rice to the pan. Stir the rice and veggies together and add a few more tablespoons of bacon grease (still on medium heat).

Pour the scrambled eggs over the rice mixture.  Keep stirring while its cooking, when the eggs are almost set…pull the bacon out of its hiding place in the cupboard and add to the pan, stir in while the eggs finish cooking.  When the eggs are completely done pull the pan off the burner, add salt and pepper to taste.

DSCN5237 (640x432)-1Four of us ate this for dinner last night with plenty of leftovers.  Well I thought there was leftovers??  When I went to put them in the fridge I couldn’t find them…after making a few circles around the kitchen, I looked in the living room and this is what I saw:

DSCN5242 (640x480)-1 Digger watching “Fringe” and eating leftover Fried Rice like popcorn. 😆

German Puff Pancakes – 3 ways

Here’s another recipe to help use all those fresh eggs…well 3 recipes actually.  I love German Puff Pancakes, not just because they taste so good but because you mix up the batter,  throw it in the oven and 20 minutes later….VOILA!!  Everyone’s breakfast is done at the same time and mom (or whoever is cooking) isn’t still standing at the stove flipping pancakes while half of the family is finishing eating and the other half is waiting for seconds!!  Don’t get me wrong, I love pancakes!!  I just like eating more than flipping. 😀  OK, I’m done whining now.

Start by preheating the oven to 400 degrees.

Put the butter into a 13X9 inch pan and put it in the oven to melt the butter.  Keep an eye on it and remove it when the butter is melted.

While the oven is heating and the butter is melting, put the remaining ingredients in a blender and blend until smooth.

Pour the batter from the blender over the melted butter and return the pan to the heated oven for 20 min.

DSCN4970 (640x480)-1How fun is that!!  We top ours with butter and maple syrup or agave nectar.

German Puff Pancake
 
Author:
Ingredients
  • 2 tablespoons butter
  • 6 eggs
  • 1 cup milk
  • 1 cup flour
  • ½ teaspoon salt
Instructions
  1. Preheat oven to 400 degrees
  2. Put the butter into a 13X9 inch baking pan and put it in the oven to melt.
  3. As soon as the butter has melted remove it from the oven and swirl it around to coat the bottom of the pan.
  4. Blend the remaining 4 ingredients in a blender until smooth.
  5. Pour the batter over the melted butter.
  6. Bake for 20 minutes.


Now another version:

German Sausage Puff Pancake

Follow the recipe above but sprinkle cooked sausage (I use 1 pound of breakfast sausage) over the batter in the pan just before baking.

DSCN5099 (640x480)-1 So I’m not sure if this is still a pancake?  Maybe more of a breakfast casserole?  Whatever it is, we usually eat it for dinner with salsa, sour cream, and cheese on top….TASTY!


And another version:

German Blueberry Puff Pancake

Follow the German Puff Pancake recipe above but before baking sprinkle 1 cup of frozen blueberries (fresh blueberries would work too) on top of the batter.  Serve with powdered sugar, or maple syrup.

DSCN5086 (480x640)-2


Homemade Whole Wheat Biscuits

Our family has been a “biscuit from a can” kinda family for 11 years.  They are pretty good….well,  If you don’t think about what a home made biscuit tastes like, and if you don’t read the ingredients on the can.  Yep, I looked…..then, I said “yuck!”  Then I started experimenting.

This is what I came up with:

DSCN5130 (640x480)-1Light, Fluffy, Healthy, Yumminess!!

Start by stirring together the flour, baking powder, cream of tarter, and salt.

Then cut in the butter until crumbly. Here’s a little tip…instead of standing at the counter (forever) with a fork to cut in the butter.  I put mine in my kitchen aid and let it mix for a minute (I cubed the butter first).  It worked l great, but be careful not to over mix!  Over mixing equals tough biscuits.

DSCN5117 (640x480)-1Combine the egg and milk; stir it into crumb mixture until moist.  Turn onto a floured surface and knead about 10 times.  Then roll out to 1/2 inch thickness and cut biscuits out with a cup or cookie cutter.

This is the fun part!

DSCN5121 (480x640)-1Bake at 450 degrees for 10 to 15 minutes.

This made about 16 biscuits.

No more biscuits from a can for us!!

5.0 from 1 reviews
Homemade Whole Wheat Biscuits
 
Author:
Ingredients
  • 3 cups whole wheat flour
  • 4½ teaspoons baking powder
  • ¾ teaspoon cream of tarter
  • ½ teaspoon sea salt
  • ¾ cup cold butter
  • 1 egg
  • 1 cup milk
Instructions
  1. Mix together first four ingredients then cut in butter until crumbly.
  2. Combine the egg and milk; stir into crumb mixture until moistened.
  3. Turn onto a floured surface; knead about 10 times then roll out to ½ inch thickness.
  4. Cut out biscuits with a cup or a round cookie cutter and place on a baking sheet. Bake at 450 degrees for 10-15 minutes.


10th Birthday Cupcakes!

Little Chef turns 10 today and she decided to make cupcakes so she could take them to AWANA and share with all her friends.  So we got some super cute cupcake liners and found some yummy looking recipes at Your Cup of Cake.

DSCN4990 (480x640)-1This is why we call her “Little Chef”

DSCN5012 (480x640)-1She LOVES to cook and like her mama, she loves to eat!!

DSCN5021 (408x640)-1DSCN5023 (640x480)-1We are so thankful for our Little Chef and can’t believe how grown up she is!

Hoar Frost

For several weeks we have been under a THICK blanket of freezing fog with temperatures hovering around 20 degrees.  Ordinarily we have a beautiful view from our living room windows, but I’ve been considering it a good day if I can look out and see my car parked in the driveway!  In the last three weeks we have had two days that the sun has shone and illuminated our winter wonder land!!  The freezing weather and fog left behind  “hoar frost” that is absolutely beautiful when the sun shines on it!!

DSCN4767 (640x480)-1

DSCN4795 (480x640)-1DSCN4760 (640x480)-1Isn’t it wonderful how God can use some not so pleasant weather conditions to produce something so beautiful!!

DSCN4875 (640x480)-1DSCN4791 (640x345)-2                                            Told you we (usually) have a nice view!

DSCN4886 (640x480)-1          This is not snow, it’s all frost!  Some of the branches got so heavy they broke.

DSCN4894 (480x640)-1It is amazing how we take so many things for granted until they’re gone…..like sunshine, blue skies, and a view!!  Today I am very thankful for all these things. (including the beautiful frost!)

“We tend to forget that happiness doesn’t come as a result of getting something we don’t have, but rather of recognizing and appreciating what we do have.”                     – Fredrick Koeing

Related Posts Plugin for WordPress, Blogger...