Fluffy Whole Wheat Pancakes From Scratch

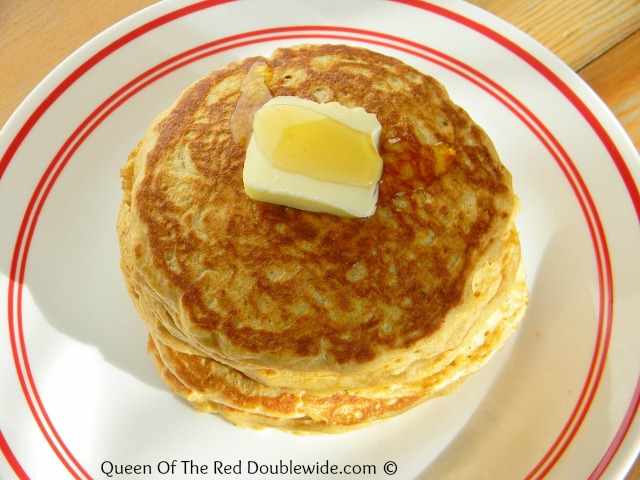
These super fluffy, slightly sweet pancakes are absolutely delicious!

DSCN7229 (640x480)-1Pancakes are another one of those things I have never made from scratch before recently.  I always used the mix that you just add water to.  It was easy, but if I had known how good from scratch pancakes could taste I would have never bought those mixes!

DSCN7239 (640x480)-1My first few attempts at “from scratch” pancakes turned out horrible!  I wanted healthy (well at least healthier than the store bought mix)  but I also wanted yummy…..and I thought for a while there was no such thing!  Then I found this recipe and tweaked it slightly.  It takes longer than the store bought mixes, but it’s WELL worth it!

Your first step is to combine the milk and vinegar and let it sit for 10 minutes.  This will sour the milk but don’t worry, you won’t be able to taste the vinegar, I promise!  Mix together the dry ingredients in another bowl.

DSCN7217 (640x480)
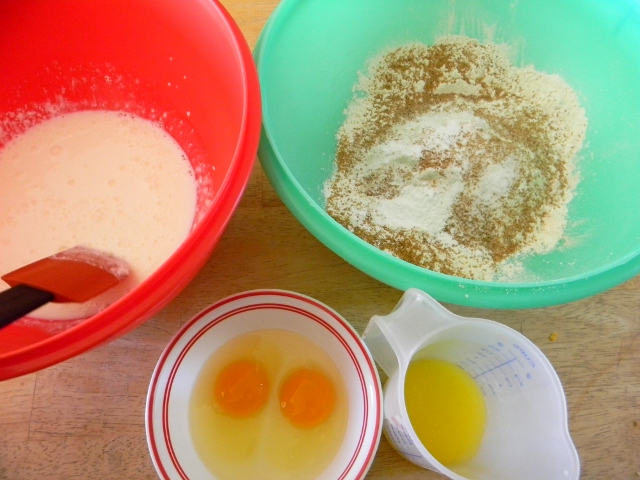
Then whisk the eggs, melted butter, and vanilla into the soured milk.  Pour the milk mixture into the dry ingredients and stir well; it will be thick.

DSCN7222 (640x480)
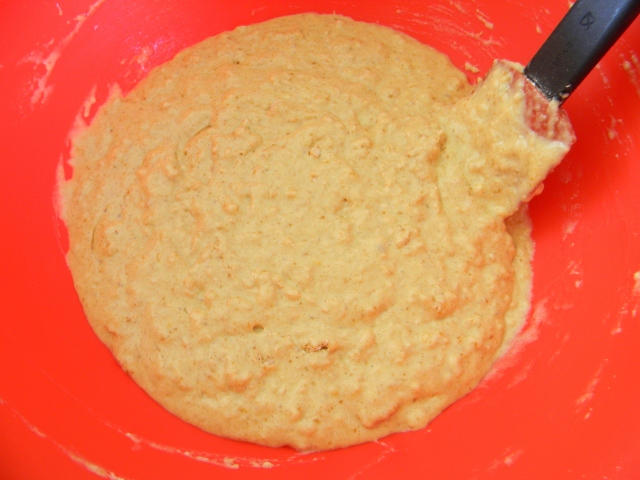
Let the batter sit for 10 minute while the pan heats up.  Lots of bubbles will form during that time…DON’T stir the batter again, the bubbles will give you super fluffy pancakes.

DSCN7227 (640x480) (2)
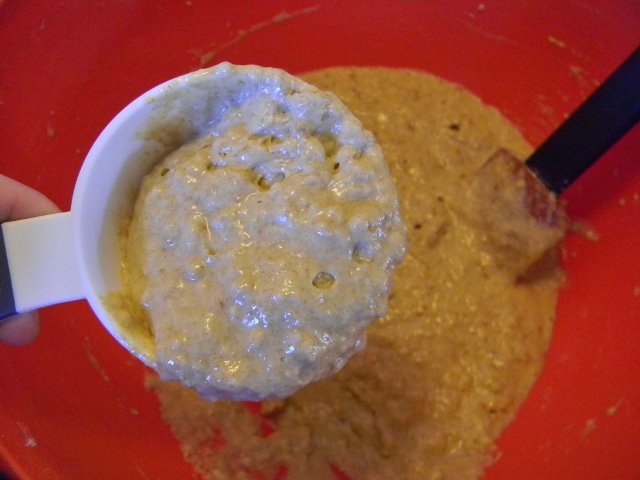
Place 1/4 to a half of a cup of batter in a buttered pan at medium low heat.  When you see bubbles appear on the surface of the pancake, flip it over and brown the other side.  This recipe made 10 – 6inch pancakes.  They are very filling; so if you want, you could easily cut the recipe in half if you don’t need that many.

DSCN7236 (640x480)-1I haven’t tried it yet but I think these would be wonderful with chocolate chips or blueberries!!

4.9 from 11 reviews
Fluffy Whole Wheat Pancakes
 
Makes 10 fluffy pancakes
Author:
Cuisine: Breakfast
Ingredients
  • 1½ cups milk
  • ¼ cup vinegar
  • 1 cup whole wheat flour
  • 1 cup all purpose flour
  • ¼ cup sugar - I use sucanat or organic sugar
  • 2 teaspoons baking powder
  • 1 teaspoon baking soda
  • 1 teaspoon sea salt
  • 2 eggs
  • 4 tablespoons melted butter
  • 2 teaspoons vanilla extract
Instructions
  1. Combine Milk and vinegar and let set for 10 minutes.
  2. In a separate bowl mix together flours, sugar, baking powder, baking soda, and salt.
  3. Whisk together the eggs, melted butter and vanilla then pour into the soured milk.
  4. Stir well and pour mixture into the dry ingredients. Whisk until most of the lumps are gone, but don't over beat it. It will be pretty thick, let it sit for 10 minutes. Bubbles will form during that time, don't stir the batter, you want the bubbles.
  5. Gently dip out ¼ to a half of a cup of batter and place it on a buttered grill preheated to medium low heat. When bubbles form at the surface of the pancake turn it over to brown the other side.
  6. Top with butter and syrup or your favorite pancake topping!


May 2013 – A Month of Photos From the Red Double Wide

Another month gone by!  Here are some of my favorite photos from May.

DSCN6817 (640x469)-1
Moving straw into the barn….the easy way!
DSCN6755 (640x480)-1
Poor chicken!
DSCN7012 (640x480)-1
The lilacs in the front yard were beautiful and smelled wonderful.
DSCN7026 (640x480)-1
This is my niece in the garden. Playing in the dirt is always fun!
DSCN7080 (518x640)-1
Jo’s cat had three kittens….this one is Marshmallow. 🙂
DSCN6843 (640x480)-1
The kids found many “wooly worms” aka caterpillars.
DSCN7163 (640x457)-1
This is Digger working on the new garden fence with help from the chickens.

DSCN7165 (640x480)-1The potatoes are growing that we planted in the recycled potato bin!

PicMonkey Collage-2This is Stinky she is guarding Diggers truck and trailer.  To read Stinky and Diggers story click here.

DSCN7200 (640x320)-1
This picture really didn’t do this sunset justice….absolutely gorgeous!

May was a good month, the first couple weeks were warm and beautiful.  They involved LOTS of mowing and weed control.  The last couple weeks were cooler and wet, we found ourselves indoors quite a bit.  Everything is nice and green now and I’m looking forward to a nice warm June!

Homemade White Sandwich Bread

DSCN7130 (640x480)-1Baking bread is a very new adventure for me.  It was one of those things on my “I need to learn how to do that” list, but I kept putting it off (and off and off).  You would think that on a journey toward frugality and self sufficiency that baking your own bread would be one of the first things to learn.  It should be, BUT patience is one of those fruits of the spirit that I’m lacking.  The whole kneading and rising thing sounded heavy in the patience area.  I guess I’m afraid of yeast, or rather WAS afraid of yeast… Well ok, I was afraid of KILLING yeast.  It just sounded so violent.  Every time I looked at a bread recipe or any recipe that had yeast, I would think….WOW that’s a lot of instructions and that will take all day long, and I will probably kill the yeast ending up with rocks after slaving in the kitchen all day!!  I’m a banana bread and biscuit kinda girl.  Mix it up and throw it in the oven, (no patience required) that’s how I roll. 😀

So lets just say that making my first loaf of bread was a big step for me, (okay it was a HUGE step for me).  I set aside a whole day to make two loaves of bread because I really believed it would take all day.  I took a deep breath, put on my “patience hat” (sorry, I used to be a preschool teacher) and got out my yeast and flour!

I’m happy to report that my first two loaves of bread were a success, and it didn’t even take all day!!  In fact I can’t believe I put this off for so long.  It was way easier and less time consuming than I thought. The baking bread made my house smell heavenly and what a sense of accomplishment to pull two plump, golden brown loaves of bread out of the oven just in time for lunch. 😀

DSCN6230 (640x480)My mother in law gave me this wonderful magazine that’s full of awesome bread recipes with very detailed instructions.  I highly recommend it, especially for first time bread makers (you can find it on Amazon).  The first recipe in the book is white sandwich bread.  It’s a pretty basic recipe and,… well,…  my husband eats LOTS of white sandwich bread (I can’t convince him that whole wheat tastes better and is better for him).  It’s the recipe I started with, and it turned out so well I thought I would share it with you.  I’ve made it several times now and we all like it!

5.0 from 2 reviews
Homemade White Sandwich Bread
 
Author:
Ingredients
  • 1 cup warm water (105-115 Degrees F)
  • 11/2 tablespoon yeast
  • 13/4 cups milk
  • ¼ cup melted butter
  • 3 tablespoons sugar (I used sucanat)
  • 1 tablespoon sea salt
  • 61/2 to 71/4 cups flour
Instructions
  1. Follow steps 1-6 below

Step 1 – Put 1/2 cup of warm water, yeast and a pinch of sugar to a small bowl.  Stir to dissolve the yeast then let the mixture sit for about 10 minutes until foamy.

PicMonkey Collage-1 yeastStep 2 – In an electric stand mixer or a large bowl, combine the remaining water, milk, butter, sugar and salt.  Add the yeast mixture, and stir until combined.  Add 2 cups of the flour, and mix well.  Continue to stir the mixture for one or two minutes until smooth and creamy.  Add additional flour in 1/2 cup increments, stirring well after each addition until the dough holds together and starts to pull away from the sides of the bowl. PicMonkey Collage-1Step 3 – Put the dough on a well floured surface, or if you have a dough hook for your stand up mixer you can use that to knead the dough.  I think the best part of making dough is kneading with my hands.  Knead in the remaining flour, adding a tablespoon or two at a time, until the smooth dough no longer sticks to your hands.  It will take about 5 minutes by hand, less if you use the mixer.

PicMonkey Collage-3
My girls love kneading the dough and I’m taking advantage of that while it lasts!

Step 4 – Place the dough into a large greased bowl (I used a little olive oil) turning it over so the dough is coated with oil.  Cover the bowl loosely with plastic wrap and let it sit at room temperature until it has doubled in size.  It will take about 1 to 1 1/2 hours.

PicMonkey Collage-1Step 5 – Grease two 9X5 inch loaf pans.  Divide the dough equally and shape each piece to fit in the loaf pans, place in the greased loaf pans and cover loosely with plastic wrap.  Allow the loaves to rise at room temperature until doubled again.  It will take about 30 minutes this time.

PicMonkey CollageStep 6 – Preheat the oven to 350 degrees while the loaves rise.  Bake for 40 to 45 minutes or until golden brown. The loaves should sound hollow when tapped.  Allow loaves to cool completely before slicing.

PicMonkey Collage-2This bread works great for sandwiches, toast and french toast.  It is a little crumbly and it goes bad faster than store bought bread, but it tastes better, it’s less expensive and I know exactly whats in it!

DSCN7145 (640x480)-1This is week six of baking our own bread and I have to admit I’m enjoying it very much!  I think it’s time to start experimenting….Hamburger and hotdog buns are next on the list.  😀

Chicken Troubles

We get 12 to 16 eggs from our 16 chickens every day.  They have been very good and consistent egg layers, so I was very suspicious when we collected only 9 eggs the last 2 days.

A good friend of ours brought us a HUGE pile of straw bales (for free!!!) which Digger shoved off the trailer with his excavator. The result of this expedited removal left quite a mess…

DSCN6685 (640x480)-1I suspected that the chickens found some great hiding places in the straw to deposit their eggs instead of using the nesting boxes.  This wouldn’t be the first time we’ve had to go egg hunting.  This is a down fall of letting the chickens free range; sometimes they decide not to go back to the coop, and around here there are PLENTY of hiding places.  I figured a quick search through the pile would produce several missing eggs, on my way to search in the straw I heard a weird chicken disturbance in the barn.  I took a little detour to check it out and this is what I found:

DSCN6673 (480x640)How she ended up upside down in the wall of the barn I will never know!

I pried her out of her ridiculous predicament and realized it was Ginger (of course).

DSCN6680 (640x480)-1Here she is looking dazed but not hurt.  Ginger is by far the most curious, and I always thought the smartest (but maybe not) of all my chickens.  When I set her down, she ruffled her feathers, glared at me like it was my fault (or maybe she was just mad cause I stopped to take a picture before rescuing her), then went about her business.  I was so glad I went in the barn….I don’t know how long she would have survived squished in there upside down…

I then proceeded to the straw pile to start my egg hunt.

DSCN6687 (640x480)-1Soon I had help…..lots of help!

As you can see we performed a thorough search, but came up with nothing.  There were several holes we couldn’t see into though, and I wasn’t terribly anxious to move the whole dang pile for some missing eggs!

It was time to head back to the house and start school, but I decided to stop by the chicken coop to collect any recent eggs.  When I opened the door our dog “Oddie” was in the coop!  I yelled and she quickly dove for the chicken door.  I had no idea that darn mutt could fit through the chicken door.  I now know where all those eggs went!

Here’s the little egg sucker, still licking her chops and looking shameful.

DSCN6694 (640x480)The only way to solve the problem was to make the door smaller so she couldn’t fit through.  We have called her “Houdini Dog” since she was a pup, so I shouldn’t have been surprised that she found her way into the coop.  She has been known to climb 8′ no climb fence to get out of a pen, and she has managed to get out of every collar we’ve ever put on her (that’s what happens when your neck is bigger than your head).

So the lessons for the day are:  Never underestimate the clumsiness of a curious chicken, and always measure your dog before you build a chicken door!

Recycled Potato Bin

We have not had good luck in the past growing potatoes.  With our dense, clay like soil we ended up with very small funny shaped potatoes.  The past few years we haven’t even tried, but this year we are planning to have LOTS of home grown potatoes to store away for the winter.  A potato bin filled with a top soil, sand, and compost mix seems like the best way to go.

If you read about our “Red Neck Art Project” you know that Digger replaced the deck on his trailer last month.  He used the old boards off the deck to made a HUGE potato bin!

DSCN6163 (640x480)-1Here is the finished product.  It’s 4′ wide, 12′ long, and  2′ high and I bet you’re wondering what the pole across the middle is for.

DSCN6782 (640x480)-1Pretty handy, right?  Digger moved it into the garden and the girls and I planted potato starts!  It’s the first thing we’ve planted this year and it felt good to be in the dirt.  We’ll layer several inches of mix every few weeks as they grow which (hopefully) will fill this thing to the top by the end of the season with large, correctly shaped spuds.  In the fall Digger will bring the excavator back and lift the bin off so we can easily harvest them!

DSCN6787 (480x640)So that’s it: Our super cheap, handy dandy, recycled, potato bin, with an excavator handle!

The Perfect Eggs for Breakfast Sandwiches

DSCN5058 (578x640)-1I know, I know, you’ve all seen this trick of cooking eggs in muffins tins.  It’s a great idea, don’t you think?  Our family has been enjoying these allot!  The only thing I do differently is cook them in a JUMBO muffin tin.  They are bigger around and fit PERFECTLY on English muffins and biscuits.

DSCN5064 (640x480)-1Crack eggs into jumbo muffin cups (grease them first) add salt and pepper and bake at 350 degrees for 10-15 minutes and you have the perfect eggs for those yummy breakfast sandwiches.

Here are some that we’ve been enjoying….the possibilities are endless!!

DSCN5115 (640x480)-1This is a toasted, sour dough English muffin with cheddar cheese, bacon and a perfect egg!

Click here for an easy, mess free way to cook bacon!


DSCN5070 (640x480)-1

This is a toasted, whole wheat English muffin with egg and cheese. I had to make my 8 year old stop eating so I could get this picture.  She wasn’t very patient for some reason??


DSCN6084 (640x480)-1This is a homemade whole wheat biscuit with a sausage patty made with my homemade breakfast sausage seasoning and a perfect egg!

Related Posts Plugin for WordPress, Blogger...