Huckleberries, a Mountain, and Sasquatch!

We headed up to Mt. Adams early yesterday morning with the goal of finding some huckleberries.

DSCN6064 (480x640)

I was a little ashamed when I realized last week that my almost 11 year old had never been huckleberry picking.  She asked; “What’s a huckleberry?”…  WHAT?!?!  Some of my favorite memories are of camping with my grandma and grandpa near Mt. Adams and picking huckleberries every year.

DSCN6051 (480x640)
Jo picking her first huckleberries with my sister.

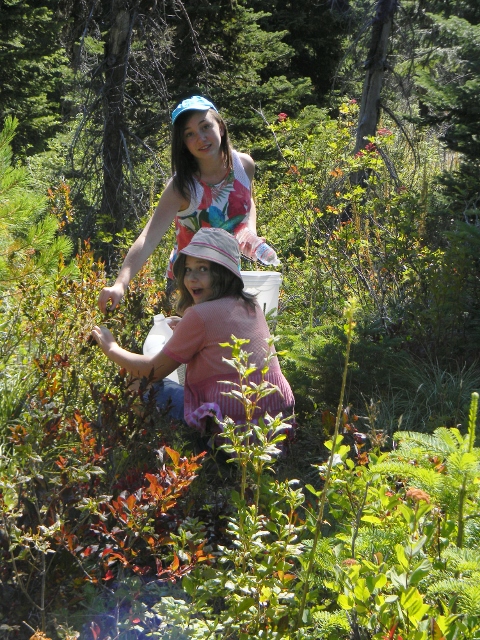
I can now say that my daughters have both been huckleberry picking……sort of.  The actually “picking” part, lasted all of 10 minutes,…  for them anyway.

DSCN6055 (480x640)

When the picking stopped, the whining started….”What time is it?” – “I’m hungry” – “Did we bring something to drink?” – “Can we go back to the van?” – “It’s hot out here” – and,… well, you get the point.

I’m quite sure I NEVER acted like that as a child….at least not while picking huckleberries…..:)

DSCN6075 (640x480)

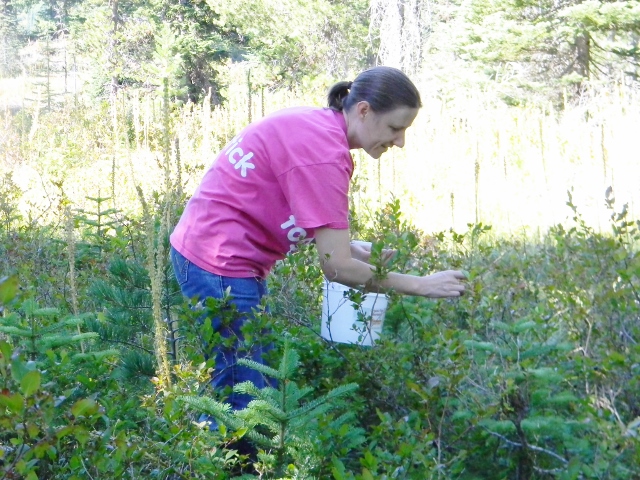
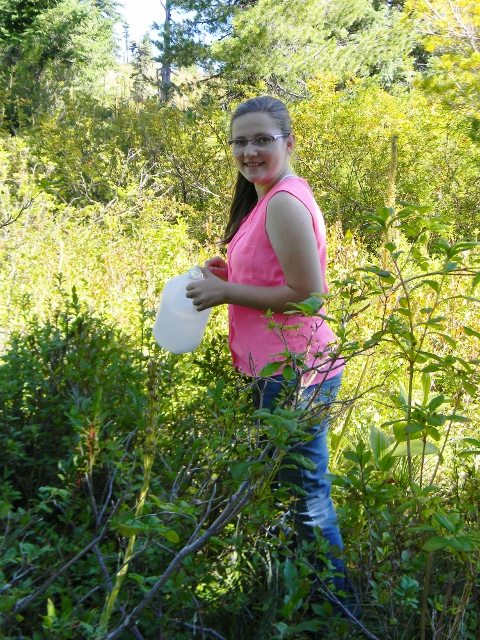
The first place we stopped had a lot of berries!  I really enjoyed myself,… despite all the whining.

DSCN6084 (640x480)

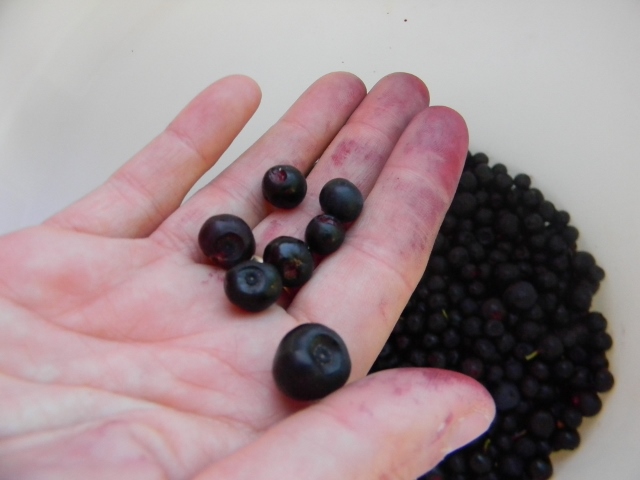
The purple fingers, the sound of berries hitting the bottom of my bucket, and the sweet, earthy smell of sun warmed huckleberries quickly brought back many good childhood memories.

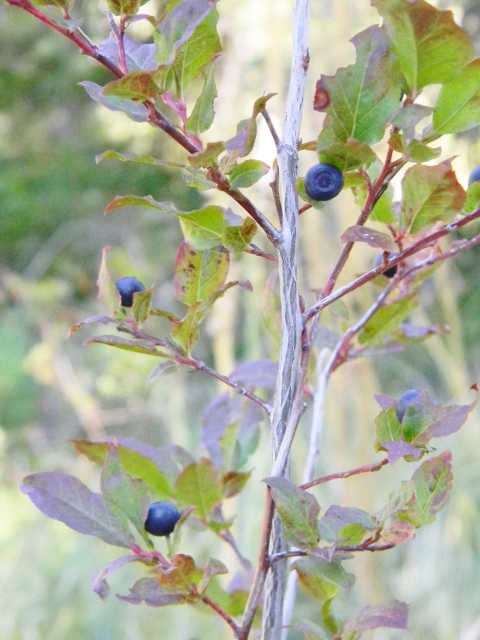
After we ate lunch we moved down the road a bit where we found far less huckleberries, but we did find lots of wild blueberries.

DSCN6092 (640x480)

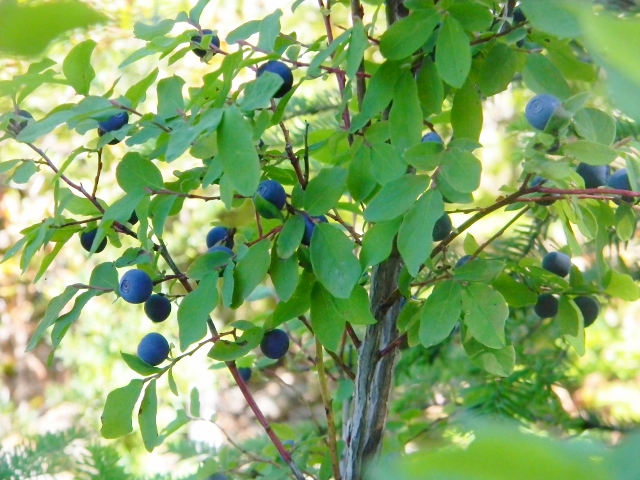
They were beautiful, but they really didn’t taste as good as they looked.  I decided to stick with the huckleberries.

DSCN6105 (640x480)

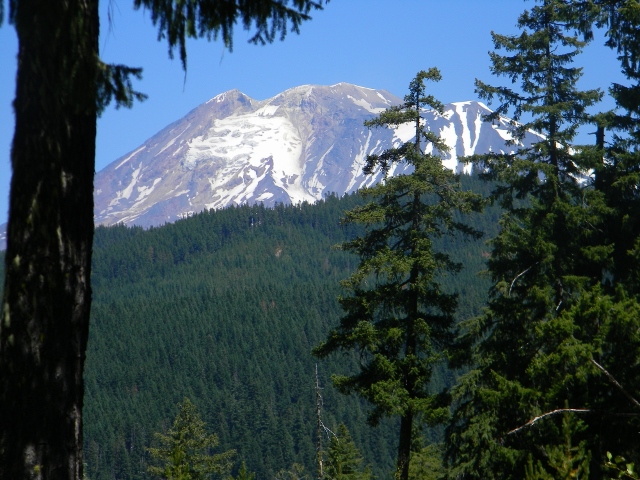
We stopped a few times on the way home so I could take pictures of my favorite mountain.

DSCN6115 (640x480)

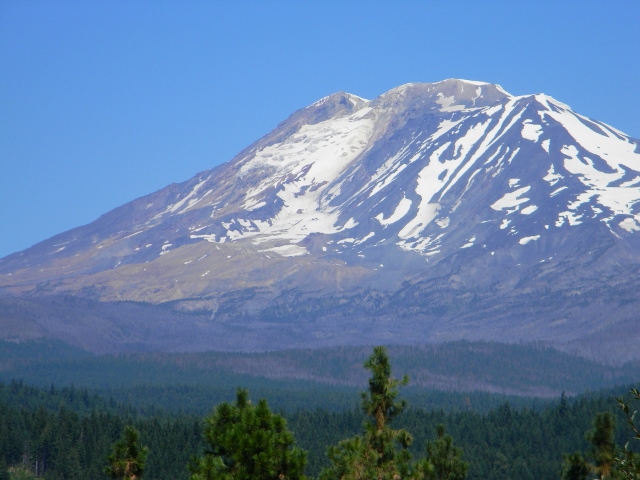
I see this mountain out my living room windows everyday, but rarely get to come this close.  Oh, so beautiful!  Not nearly enough snow left up there after the impossibly mild winter and hot, dry spring and summer we’ve had though.

Guess what else we saw on the way home?

DSCN6121 (480x640)

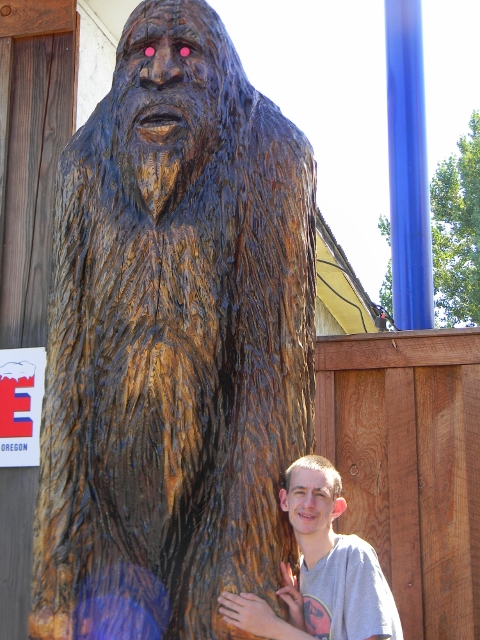
This is my brother Jacob.  He is 25 years old physically, but mentally he’s about 4. (Don’t tell him that though.) Jacob loves SASQUATCH!!!  The entire time we were picking huckleberries, Jacob was stomping around the woods whacking trees with sticks and calling for sasquatch.  Yep,… you read it right.  CALLING for sasquatch!  It’s very funny and cute at first, but after a couple hours it’s just loud and…, well,… loud.  Anyway, after a whole day of searching for big foot he FINALLY found him!  He was soooooo excited, and absolutely loved the creepy red eyes.  He did inform us on the way home that;  That was not a REAL sasquatch, so we need to go back to the mountain so he can search the deepest, darkest woods to find a real one.  As of yet no promises have been made.  😀

What a great day!  I got enough berries to make huckleberry pancakes and a few batches of muffins.  My mom made a pie as soon as she got home.  She’s an overachiever.

Mary’s Super Moist Chocolate Zucchini Bread (With NO Vegetable Oil)

It’s that time of year again, the zucchini is pouring out of the garden.  I love the abundance of this versatile veggie, and have many recipes to use them up.  Zucchini bread has always been a good way to use it up, but this one is a super duper amazing way to use it!  I’m going to freeze lots and lots of zucchini just so I can make this bread all year long. ;D

marys bread

It’s so moist and smooth and sweet and wonderful and it all came about by accident.  Mary is the one that first made this, hence the name: “Mary’s Super Moist Chocolate Zucchini Bread”.  She had a recipe to follow, but we hadn’t been shopping for a while and didn’t have some of the ingredients, so she “improvised”.  We were all pleasantly surprised with the results. 🙂

DSCN5825 (480x640)

This is not only very tasty but healthier than most quick breads too!

Mary's Moist Chocolate Zucchini Bread (With NO Vegetable Oil)
 
This will make 2 loaves.
Author:
Ingredients
  • 2 cups grated zucchini
  • 3 eggs
  • 1 cup pumpkin puree
  • 2 cups of sugar (I use a bit less)
  • 1 stick melted butter (half a cup)
  • 3 teaspoons ground cinnamon
  • ¼ teaspoon baking powder
  • 1 teaspoon baking soda
  • ½ teaspoon salt
  • 3 and ¼ cups all purpose flour
  • ½ cup cocoa powder
Instructions
  1. Grease two loaf pans and preheat oven to 350 degrees.
  2. Mix the first 5 ingredients until well combined.
  3. Add the rest of the ingredients and mix well.
  4. Divide the batter between the 2 loaf pans.
  5. Bake at 350 degrees for 45 min then lower the temp to 300 degrees and bake an additional 15 minutes.
  6. Remove from the loaf pans and cool completely before cutting.

Another great thing about this bread is you have options!  I love options. 🙂

DSCN5863 (480x640)

You can add a 3/4 of a cup of chocolate chips and have “Mary’s Super Moist Double Chocolate Zucchini Bread” (this is my girls favorite).

DSCN5888 (640x480)

Or you could leave out the cocoa powder and have “Mary’s Super Moist Zucchini Bread” and it’s still, oh so good!!

Wait, there’s more!….We made three batches of this last week (6 loaves).  Six loaves for four people is a bit much, so I froze 2 loaves and took them out yesterday for breakfast and took some to our Bible study.  They froze VERY well and I think they might have even tasted better from the freezer!?!? WHAT?

I have noticed that while this bread is delicious still warm from the oven, it’s very crumbly if you don’t let it cool completely first.  Its even easier to cut after being in a zip lock bag over night.  But, it tastes great ANY time. 🙂

A Week Of Photos From The Red Double Wide – 7/25/15

We had a pretty quiet week and very pleasant weather.  Mary had a WODERFUL time at church camp and didn’t want to come home. 🙂  I missed her and am glad she’s back!

Jo had to amuse herself while her sister was gone, so with her dads help she took apart my old banana seat bike that I rode and rode and rode as a kid.  She sanded it and is planning on painting it yellow.  She’s calling it the Minion bike. 😉

DSCN5755 (640x480)We got lots of wonderful tasting apricots (thanks Tom and Cathy) and I spent quite a bit of time drying and freezing them before they went bad.  yum!

DSCN5759 (640x480)

The meat chickens are now being let out everyday, they are hilarious to watch waddle around.

DSCN5743 (640x390)

We had a porcupine visit the tree in the front yard.

DSCN5883 (640x480)

We also had a rattle snake on the road in front of our house and a blue racer in the garden. YUCK!  Those were the unwanted guests, but we ended up the week with some wanted guests and had a bbq with the families from our bible study group!

I’m now getting green beans, cucumbers, zucchini, peas, and parsley out of my garden.  I’m oh so happy with my garden this year!!

Have a blessed week!

Homemade All Natural Insect Spray For Your Garden

This post contains affiliate links.

garden bug spray

Uuug!  I have never had this much trouble with nasty little insects devouring my garden!  At first I thought it was due to my deep straw mulch.  My husband warned me before I put the straw in the garden that it would create the perfect environment for earwigs.  He was absolutely correct!  The little buggers love to hide in the dark, moist straw during the day and then come out and graze on my veggie plants all night!!  But I can’t blame the whole problem on the mulch.  We have earwigs and ants EVERYWHERE this year.  It’s just simply a bad year for bugs.  (Darn it!)  It’s so frustrating to watch all your hard work slowly disappearing!

DSCN5451 (640x480)

They seemed to like the squash, cabbage and kale the best!  I think most of the damage was done by earwigs, but I have also seen aphids and grasshoppers.

I got on-line and looked up MANY different natural and organic bug sprays.  I came up with my own simple spray that REALLY works!  My plants are looking MUCH better!

DSCN5674 (640x480)

This is an early morning picture and has lots of shadows, but I hope you can see the very bug eaten leaves and then the new growth in the center after I sprayed them!  I still lost some of the little plants that were just to far gone by the time I sprayed them but the bigger plants are recovering nicely.

To make this spray I used garlic, an onion, cayenne pepper, peppermint castile soap, peppermint oil and water.

DSCN5264 (480x640)

Start by chopping the cloves from one head of garlic and 1 onion into tiny pieces.  You can use a food processor if you have one.  When you have them all chopped up put them in a pot with 6 cups of water and 1 teaspoon of cayenne pepper powder.  Bring your concoction to a boil then remove it from the heat and let it cool completely.  Strain the liquid into a squirt bottle and add 2 tablespoons of peppermint castile soap and 5 drops of peppermint oil.  Shake it up and you’re ready to spray those nasty pests away.

DSCN5276 (631x640)

Spray early in the morning before the hot sun is out or just before dark.  Be sure to shake well before each use and spray the top and bottom of each leaf.  If you have any left over, store it in the fridge for up to a week.

Homemade - All Natural - Garden - Insect Spray
 
Author:
Ingredients
  • 1 whole head of garlic, peeled and cloves removed
  • 1 good sized onion, peeled
  • 1 teaspoon cayenne pepper
  • 6 cups of water
  • 2 tablespoons peppermint castile soap
  • 5 drops peppermint oil
Instructions
  1. Chop up all the garlic cloves and onion into small pieces.
  2. Put the cayenne pepper, water, chopped onions and garlic into a pot and bring it to a boil.
  3. Remove the pot from the heat and let it cool completely.(over night is good)
  4. Strain cooled liquid into a squirt bottle and add the castile soap and peppermint oil.
  5. Shake well.

I’ve only had to spray my garden twice, but we only had rain once and we don’t water with sprinklers, so you may have to spray more often if the leaves are getting washed off.  Try to avoid spraying directly on the part of the plant you are going to eat.

This post was shared at: Our Simple Homestead Blog Hop

A Week Of Photos From The Red Double Wide – 7/18/2015

Here are a few photos of what we’ve been up to.  The week started off with much cooler temps (finally!) and it even rained just enough to make sweet smells and a little rainbow!

DSCN5595 (640x480)

The temps quickly climbed back up into the 80’s

DSCN5635 (640x480)

What better to do on a hot day than take a cool bath……he LOVES his baths.

DSCN5645 (640x480)

DSCN5628 (480x640)

I’m so excited about all the baby watermelon in my garden!

DSCN5613 (640x480)

We got a big box of fresh peaches from a local orchard.  We made peach cobbler, froze some, and ate the rest.  Oh so good!

DSCN5677 (640x480)

How gross is this!  Unfortunately I’ve seen way more wasps this year than honey bees.

DSCN5686 (640x480)

The meat chickens are now big enough to let free range for a few hours everyday.

DSCN5722 (640x480)

We finally cut down the dead birch tree in our lawn….ok, not WE.  Digger cut it down and the girls hauled off the pieces.  I took pictures and supervised.

DSCN5732 (640x480)

This is Grandpa Clyde, and HIS favorite thing is mowing lawns.  He still comes out every Saturday (at the age of 96!) to help us with ours.

DSCN5733 (640x480)

Mary left today for church camp so we should have a pretty quiet week around here!  Hope you’re all enjoying your summer.


Homemade Beer Battered Onion Rings

This post contains affiliate links.

Here is the onion ring recipe I promised over a month ago!!

I don’t think I need to say much about these lovely golden treats, the pictures say it all!

beer battered onion rings

You will need one large yellow onion sliced into rings.  How big or little they are depends on your preference.

DSCN4944 (480x640)

For the beer batter, start with one cup of beer.  What kind?  Well, that’s a matter of opinion too… I used the cheap stuff cause that’s what we had. 🙂

DSCN4950 (480x640)

Add one cup of all purpose flour to the beer and stir until nice and smooth.  Then add in 2 teaspoons of seasoning salt and mix well.  Here’s a link to my Homemade Seasoning Salt.

DSCN4953 (480x640)

I heat about 2 inches of oil (look at the bottom of this post to see what oil I use and why) in a cast iron pan to 375 degrees on medium high heat.  If you don’t have a cast iron pan I think any pan big enough will work, or better yet you can use a deep fat fryer if you have one.  Dip the onions into the batter and fry them until golden brown on each side.  Drain on a paper towel until cool.

DSCN4964 (480x640)

They are best eaten as soon as they are cool enough to stuff in your mouth.  If they sit too long they get kinda soggy.  Around here that is not a problem!

DSCN4968 (640x480)

5.0 from 1 reviews
Homemade Beer Battered Onion Rings
 
Author:
Ingredients
  • 1 large yellow onion
  • 1 cup of beer
  • 1 cup of flour
  • 2 teaspoons seasoning salt
  • oil for frying
Instructions
  1. Peel the onion and cut it into rings.(set aside)
  2. Batter: Stir the beer and flour together until it's nice and smooth then stir in the seasoning salt until well combined.
  3. Heat about 2 inches of oil in a frying pan on medium high heat to 375 degrees.
  4. Dip each onion ring into the batter then fry in the hot oil until golden brown on each side.
  5. Drain on paper towels until cool enough to eat.

Organic Palm Shortening is my favorite oil for frying foods.  It is colorless and odorless so it doesn’t effect the flavor of your food.  It is also NOT hydrogenated and contains no trans fats!  I don’t fry food very often, but when I do I LOVE this healthier choice of oils.  I also use this shortening for biscuits and pie crusts, and have been nothing but overjoyed with the results!!  If you want to read more about this healthy oil click here.

Does anyone have any other good recipes that use lots of onions?  I planted two raised beds FULL of onions.  Soon I will have more onions than I know what to do with!

This post was shared at: Weekend Pot Luck Simple Saturdays Blog HopOur Simple Homestead Blog Hop

Raising Ranger Broilers (Meat Chickens) – Part One

Two summers ago we raised several Cornish Cross Meat Chickens.  Meat chickens were a brand new adventure for us and even though we lost a couple and taking them to the fair was a disaster, we had fun, and they tasted GREAT!  I blogged about the whole experience and you can read each weeks post starting here.

This year my girls wanted to take meat chickens to the fair again but didn’t want to take Cornish Cross.  I did some research and Ranger Broilers seemed to be the next obvious choice.  They are bred to be a fast growing meat chicken just like the Cornish Cross, but they are good foragers; unlike the Cornish Cross that like to sit in front of the feeder and stuff themselves.  I am excited about comparing these two breeds.

raising ranger broilers

We ordered 15 chicks from Meyer Hatchery and they arrived June 11th.  When we got them home we realized that they had sent us an extra chick.  A few days later, I began to suspect that the extra chick was a Cornish Cross.  A few days after that I was sure of it, now I can compare the two breeds while they grow!!

All 16 chicks were active, cute, and very entertaining.  All of us agree these are the quietest chicks we’ve ever had.
ranger broilers 2 weeks
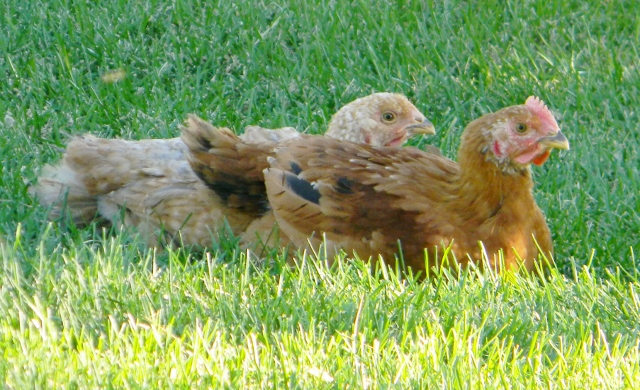
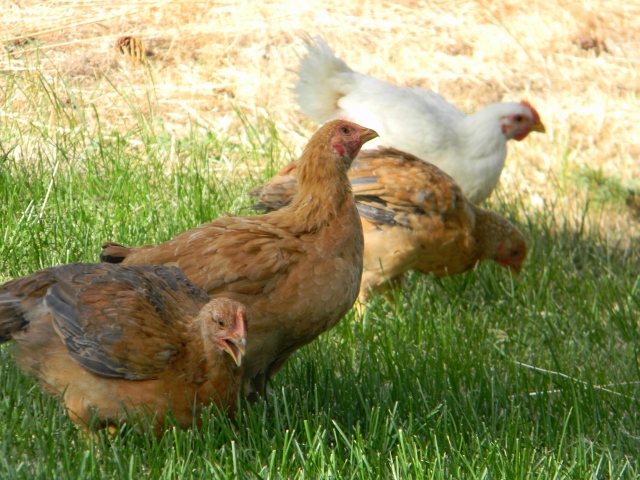
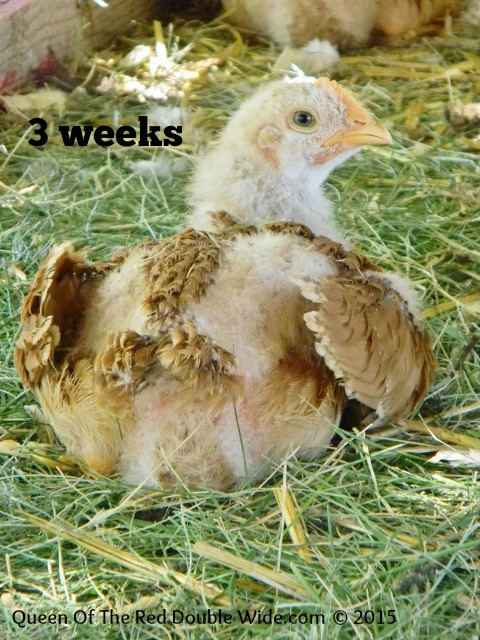
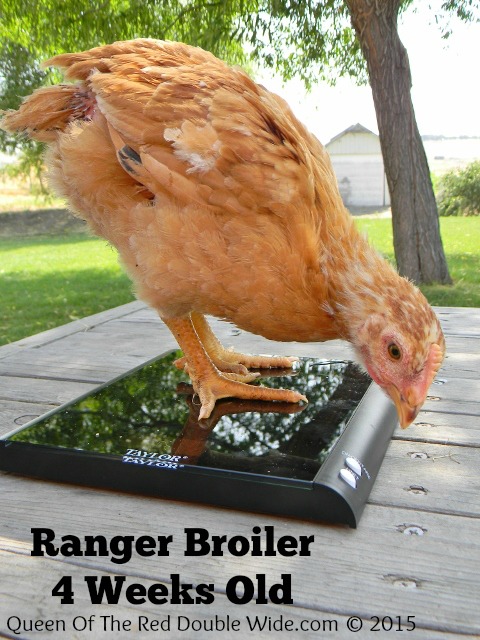
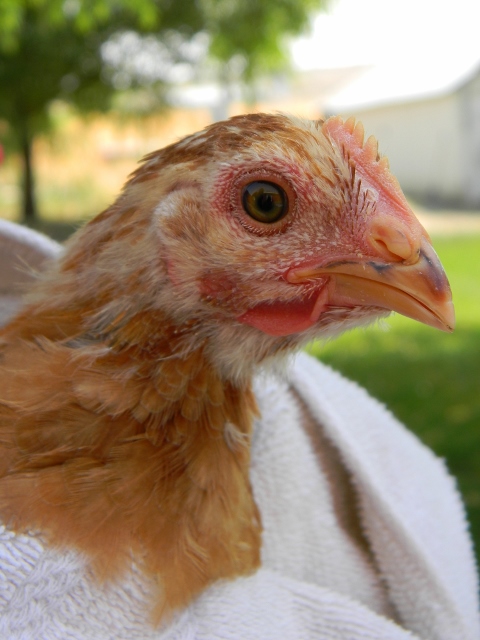
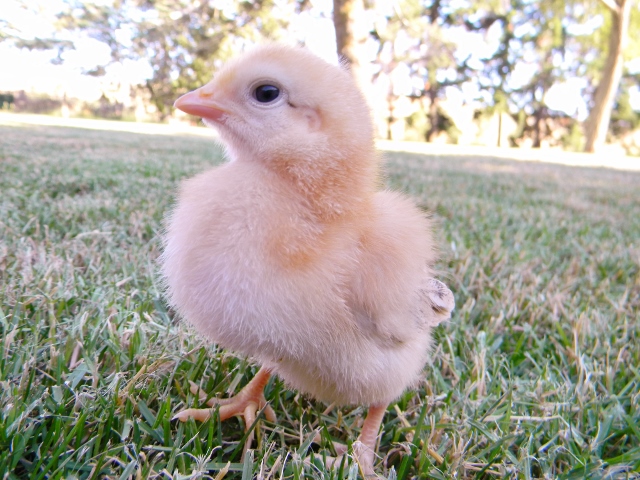
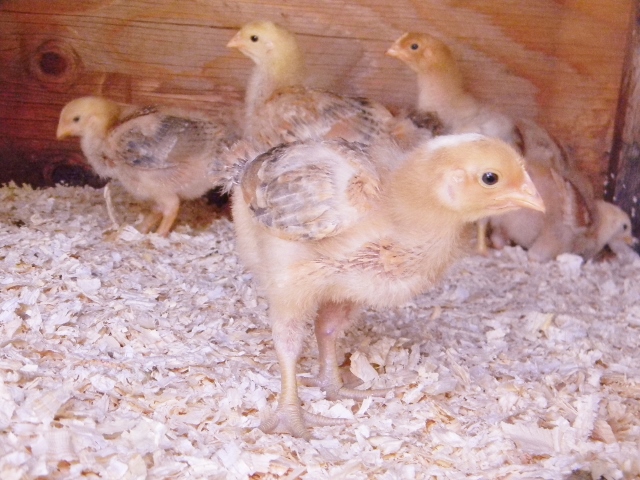
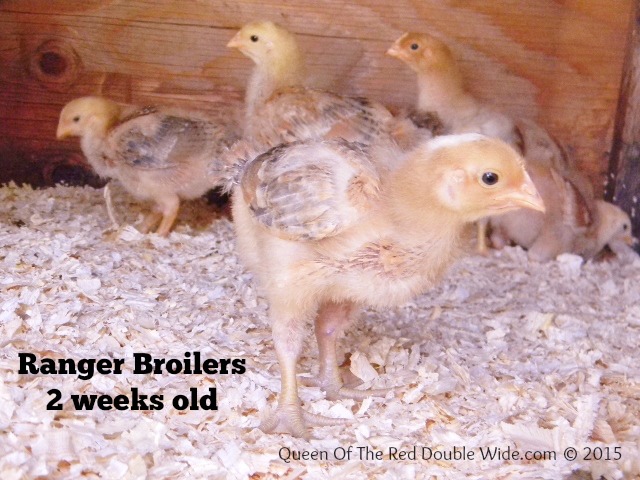
At 2 weeks they are still pretty cute but that doesn’t last for long.
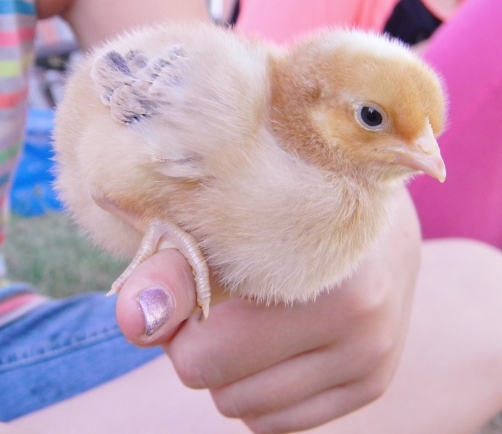
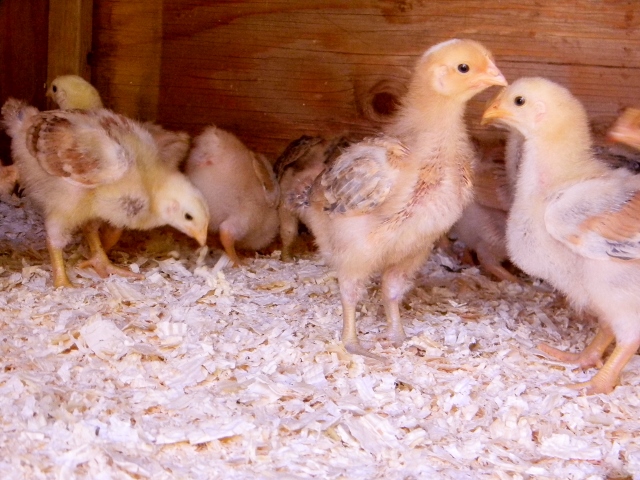
Ranger Broilers 3 weeks

As you can see the Cornish Cross sticks out like a green bean in a fruit salad…..ok, that was bad, but I was trying to come up with something other than “he sticks out like a sore thumb” and well, that’s the only “appropriate” one I could think of.

3 weeks

We weighed them at 4 weeks.

4 weeks

The Ranger broilers weighed in at an average of 2 pounds 6 ounces, and the Cornish Cross weighed 2 pounds 10 ounces.   At 4 weeks they have eaten about 60 lbs. of feed.  As soon as I think they are big enough we will let them out for at least a couple hours every day so they can forage for grass and bugs.  So far, other than growing just a bit slower than the Cornish Cross the only difference between the two breeds is that the Rangers seem to be more curious and friendly.

I’ll post an update in a few weeks and then a final post after we butcher them at the end of August.  Thanks for following along!

This post was shared at: Our Simple Homestead Blog Hop Simple Saturdays Blog Hop


A Week Of Photos From The Red Double Wide – 7/11/15

Now that I have a little more time on my hands, I’ve been taking tons of pictures; so I decided to make weekly post of photos.  Hope you enjoy!

DSCN5298 (640x480)

This enormous toad was hiding under our honeysuckle bush.

DSCN5311 (640x480)

This is his “holy moly it’s hot out here” look.  I only know this because I had the same look on my face.

DSCN5346 (640x480)This is my favorite pic this week……heck, this might be my favorite pic of the year!  The girls got to walk next to the church float in the 4th of July day parade!  Can you spot 5 pieces of candy flying through the air?

DSCN5445 (480x640)

The garden is growing like crazzzy, well at least the parts that the bugs haven’t eaten.  I picked my first zucchini yesterday, it was YUMMY.  🙂

DSCN5443 (640x480)

DSCN5535 (480x640)The meat chickens are growing quickly and are definitely in the ugly stage right now.

Jo collage

After watching some episodes of I Love Lucy, Jo decided to dress up like someone from the 50’s.  Just makes me smile!

The temps have actually swooped down into the 80’s the last couple of days.  After weeks of being in the 100’s it’s a welcome change. 😀

Have a super week everyone!

June 2015 – A Month Of Photos From The Red Double Wide

Holy roasted marshmallows….It’s HOT outside!!

Our temps for the past few weeks have been right around 100 and we don’t see an end in sight.  Down south this might be very normal, but for us Washingtonians this is way out of the norm for June.  Harvest is coming about a month early and the fear of fires is VERY great.  I’m SOOOO glad we have central air and the house is nice and cool. 🙂

About half of my garden is loving this heat and the other half has been eaten by bugs or simply isn’t growing because of the heat.  But, I’m enjoying what is growing and loving the time off from school!

Here’s a few pics of my garden and some other things we’ve got going on around here.

DSCN5101 (640x480)

My tomatoes are doing GREAT!

DSCN5131 (640x480)

We got 16 ranger broilers (meat chickens) for the girls 4-H project.

DSCN5139 (640x480)


DSCN5230 (480x640)

Lettuce

DSCN5216 (640x480)

Corn and sunflowers.

DSCN5222 (640x458)

Watermelon

DSCN5224 (640x480)

Bug eaten squash plant.

DSCN5279 (480x640)Most of the bug damage is from earwigs.  I made earwig traps and some natural bug spray, and I think I’ve slowed them down a bit but they are still destroying lots of baby plants.  🙁

DSCN5233 (480x640)

First baby tomato!

DSCN5249 (480x640)We’ve been eating lots of raspberries. 🙂

DSCN5186 (640x480)

The chicks grew a bunch during June.

DSCN5187 (640x480)

This is what happens when 3 ladies are stuck in the house cause its to hot out and school is out for the summer. 😉

DSCN5254 (640x424)

DSCN5255 (640x480)


DSCN5256 (640x480)DSCN5257 (640x480)


DSCN5258 (640x480)


DSCN5259 (640x480)Happy Fourth Of July!!  Try to stay cool everyone.

Related Posts Plugin for WordPress, Blogger...