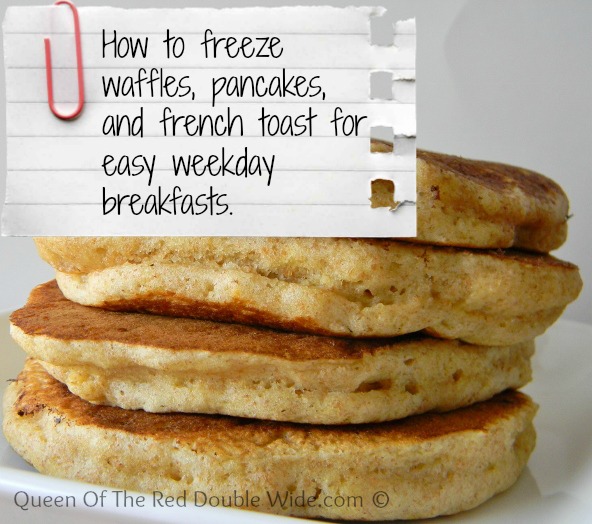
This is the easiest thing EVER. Why have I not been doing this for years!?!? I love easy, yet healthy breakfast foods. The kind that I don’t have to worry about on weekday mornings. Lately when I have the time, I make a HUGE batch of fluffy whole wheat pancakes, or waffles and then freeze whatever is left. When I have bread that’s getting a little old I make french toast and put it in the freezer. (sorry chickens no more stale bread for you)
This is how I do it: Take your cooled off leftover pancakes, waffles, or french toast and layer them on a cookie sheet with parchment paper. (I have gone up to 4 layers) Try to make sure they are not touching so you don’t have to hack them apart.
Place them in the freezer until they are frozen through. The more layers the longer it will take. I just leave mine in over night. When they are frozen through, place them in a dated, resealable, freezer bag and put them back in the freezer.
It’s that easy, and now you have a homemade, fast, healthy breakfast on hand.
To reheat them on those crazy weekday mornings, just pop them in the toaster. You may have to adjust the timing or temperature on your toaster so they have time to thaw out and toast. My girls use the toaster for the waffles, pancakes, and french toast, but if you aren’t into crispy pancakes and french toast you can always microwave them for 1 to 2 minutes or preheat the oven or toaster oven to 350 degrees and bake them for 10 to 15 minutes.
It’s sooooo nice to have yummy, healthy options in the morning that don’t come from a box. 🙂
The beginning of 2014 got off to a rough start. The flu made it’s way through our house and my class room, then once we got rid of that, a nasty cold made it’s rounds too. I THINK we are all on the mend now and maybe I can get a little caught up on EVERYTHING.
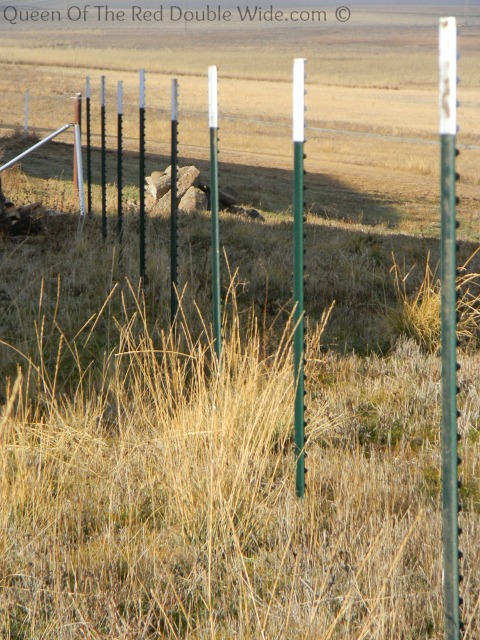
Along with our health, the weather was a bit off too. We started January with very mild temperatures. Mild enough that we were even able to hire Uncle Tom to come and finish building our fence around the barnyard. Building fence in January is a very rare thing around here. Well, for everyone but Uncle Tom…
The fence is now complete and it looks GREAT!
The weather was so unusually mild I was even finding myself wishing for snow and wondering what happened to winter. (I never wish for snow)
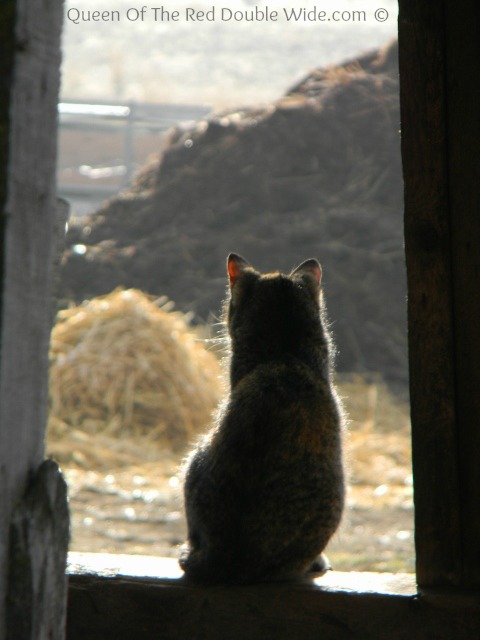
The chickens loved the mild weather; here they are enjoying a nice dust bath.
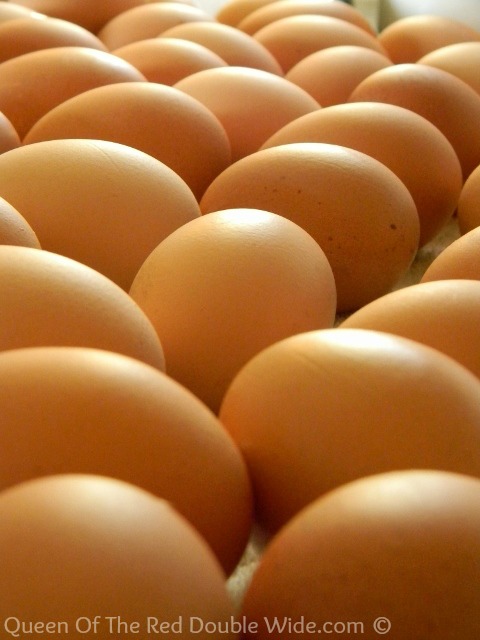
With the addition of a few hours of artificial light in their coop we are still getting PLENTY of eggs this winter.
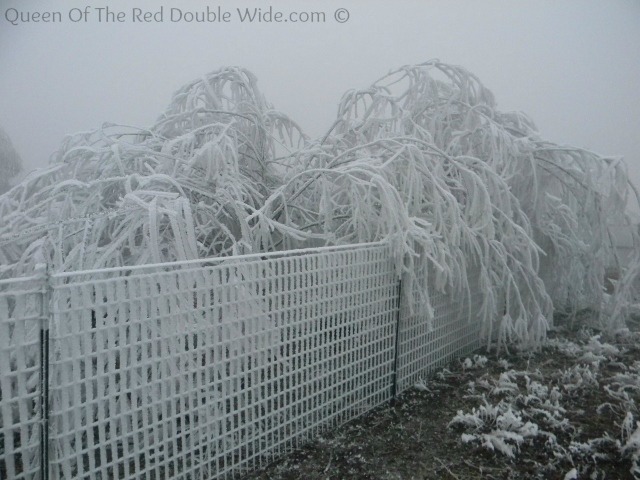
Winter did finally come, but not in the way we were hoping for. Instead of some nice fluffy snow, we got a layer of ice in the form of freezing rain then the freezing fog settled in and stayed awhile. Freezing fog is not a stranger around here, but this stuff was NASTY and it seemed it would never go away.
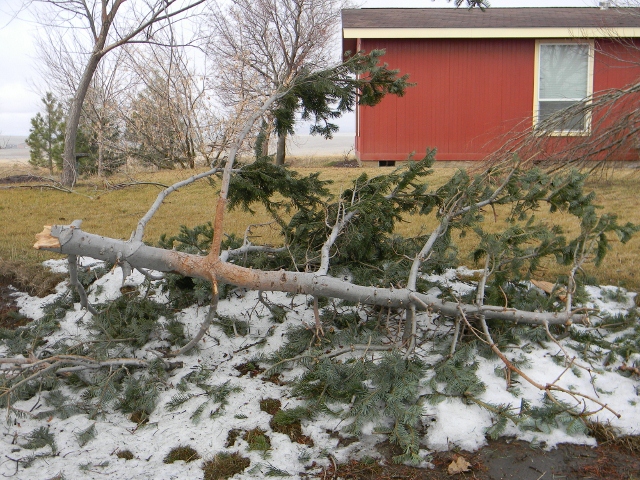
Here is a couple of willow trees laying on our brand new fence. Sure glad Tom finished clipping the wire before all this showed up!
After a few days the trees started snapping, and our drive way turned into an ice skating rink.
After about 2 weeks of this frozen wonderland the fog lifted a bit and we thought the sun was coming……but, not before it dumped another 1/2 inch of freezing rain on us over night. This caused near by power poles to snap and of course many more trees. We lost power and all the local schools were cancelled for the day. I was still recovering from a cold so I took the opportunity to grab a book and curl up under a blanket. After 12 hours of no power, I was reminded of how thankful I am for the little things in life…..like flushing toilets and warm water. The sun did FINALLY come out, and the frost disappeared VERY quickly.
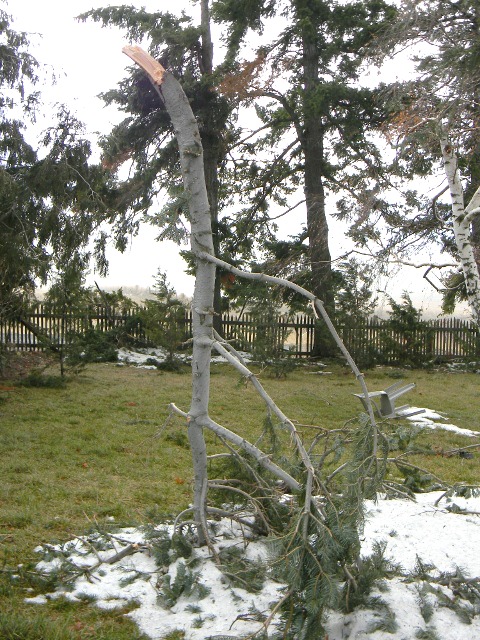
Our poor trees…. 🙁 The image below is of one of the seven tops from our big white fir tree that broke out. Seven tops gives a clue that such heavy hoar frosts have happened before, but we’ve seen nothing like this in the near fifteen years living here. This top drove itself into the somewhat frozen ground well over a foot, and sticks nearly ten feet in the air.
I see a huge bonfire in our near future…..hotdogs anyone?
On a happier note, Digger did some bartering with a good friend of ours and we ended up with a freezer full of grass fed beef! Oh, how we have been enjoying beef, lots of beef! We ended the month by celebrating Little Chefs 11th birthday. What a blessing she is. 🙂
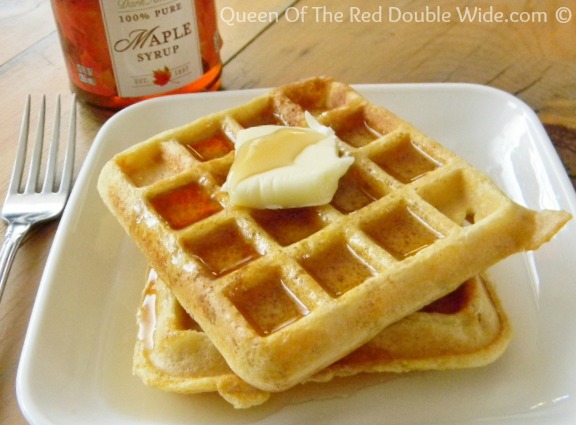
Before a couple weeks ago I had never made waffles from scratch before. In fact I haven’t made waffles at all for about 10 years. I had always used a waffle mix before, but after deciding the mix was to expensive and REALLY time consuming for six people, I put the waffle iron up on the top shelf and forgot about it. Well I tried to forget about it, but the kids would ask every once in a while if we could make waffles and I would distract them with puff pancakes or baked pancakes. ANYTHING but waffles….I even played with the idea of throwing away the waffle iron so I had a good excuse not to make them. (I know, I’m awful!) My poor deprived girls wouldn’t even know what a waffle is if they hadn’t spent the night at grandma’s house 🙂 Anyway, in all my brain wracking trying to come up with healthy, easy breakfasts for those busy week day mornings, waffles came to mind. They aren’t exactly quick, but if I make a quadruple batch on the weekend and freeze them. Tadah!…I have a from scratch breakfast that we can enjoy on the weekdays and still make it out the door by 7:15.
While I said these are not quick for a weekday morning, they are not at all hard to make and the time consuming part is waiting for the waffle iron to do its job.
Start by separating the eggs. Mix together the egg yolks, milk, vanilla, and melted butter. In a separate bowl stir together the flour, baking powder, salt, and sugar. Stir the dry ingredients into the milk mixture, do not over stir.
Now this is the part that makes these light and wonderful! Beat egg whites until they are stiff then fold them into the batter.
Let the batter sit for a few minutes while the waffle iron preheats. Cook the waffles until they are a golden brown.
2 cups whole wheat pastry flour or 1 cup whole wheat and 1 cup all purpose flour (I recommend the pastry flour though)
2 teaspoons baking powder
½ teaspoon salt
2 tablespoons sugar - I use organic sugar or sucanat or you can omit the sugar altogether if you would like.
Instructions
Mix together the egg yolks, milk, melted butter, and vanilla.
In a separate bowl stir the flour, baking powder, salt, and sugar together.
Stir the dry ingredients together with the milk mixture...don't over stir.
Whip the egg whites until they are stiff then fold into the batter.
Let the batter sit for a few minutes while the waffle iron heats up.
Bake waffles as recommend in your waffle maker until golden brown.
3.2.1255
These really are the best!! I’m very glad I dusted off my old waffle iron to experiment (and so are my girls). 😉 We will be making these VERY often to have on hand out of the freezer.
I like how the women folk are always rambling on about how enchanting their little homestead is. Weather it’s half an acre in the burbs, or five hundred in cowboy country, its always the same. Pretty pictures of flowers, kids playing, home cookin’, and cute baby critters… Uhg! Where’s all the mud, dust, blood, sweat, and crappy weather. Anybody want to know what REALLY keeps a homestead steady? Attitude!
I’m not saying this to discourage anyone,… not at all; I’m just saying it’s not always peach fuzz and baby giggles… For example; the Queen and Little Chef are always experimenting with new meals prepared from scratch using all natural ingredients. These ladies know that there are few things finer than a full spread meal that’s been grown and raised on your own land, and most of the time their efforts result in something amazing! When it’s especially brilliant, I’m always amused by the girls grumblings while they have to wait for mom to take a few pics for the blog before they can eat it. I try to explain to them that excellence always comes at a cost, but the consolation is always met with a despondent glare that says “Yea,… whatever dad”. As for me; I’m proud of the accomplishments my ladies make in the kitchen (mostly because I get to eat their achievements!), but once in awhile however,… Well,… let’s just say that not every experiment is blog worthy. I would like to elaborate more on the specific details concerning some of the failed experiments in the kitchen (they always sound dramatic), but I rarely understand what they’re talking about.
Where the kitchen is Grace and Little Chef’s domain, Jo and I spend allot of time in the shop. I suppose I should say that Jo spends most of her time outside, and the shop is the next best thing when the weather turns lousy. When she’s not reading a book, (usually outdoors at the risk of moms’ admonishment) she’s out there building something. It’s like an addiction for her, and I can genuinely appreciate that. Since diapers she’s been manipulating whatever materials she can get her hands on into whatever her mind can conjure. For the most part I’ve always encouraged this ambition, but when she gets into the stocks of materials I need for work and drags them to all corners of the property to build a… a… well,… whatever it is she feels compelled to build right then, I have to reign her in.
The other day Jo came through the shop and left with one of my small hand saws. At the time I was a little distracted helping Uncle Chris put a new timing belt in his pickup. (By helping I mean leaning on the fender and sharing words of encouragement, like: “I think you’re insane for trying to attempt this on your own. You sure you know what you’re doing?” You know,… big brotherly advice. And by the way; thank you youtube!) Anyway,… as I watched Jo depart with my saw I thought, “wait a minute…” and followed her. I found her with several pieces of one inch pvc pipe I keep stockpiled in the barn. (She had in her possession many more short pieces than I’d remembered having) She was busy cutting a piece off when I asked her what she was doing. “I’m making an automatic dog food dispenser.” (Feeding the dogs is one of the chores she shares with Little Chef) She said this as she lifted the piece up to her eye to peer through it. “I’m not sure it’ll work tho’, it might be too small.” I kept my composure long enough to remind her that she needs to ask me before robbing materials from the barn. Yea,… It was a little disappointing for her, but this particular girls’ attitude is rarely defeated, so after returning the supplies as I’d asked she moved on to her next project full stride! Something about the “cat crusaders” (her club) needing a new, secret meeting place I think. (I didn’t want to know what that might entail, so I didn’t ask…)
Notice the piece of one inch pipe at their feet.
I suspect Jo sets a better example in regards to attitude than most of us. Setbacks happen all the time, but are usually a minor thing we quickly move on from a little wiser. On occasion however, the good Lord seems compelled to remind us of what genuine humility is all about. A couple of years ago Grace decided she wanted her garden to be even bigger (Have you seen her garden?!). It was already put near 4,000 square feet, but I didn’t complain while I extended it another 20′ to the east, and full length north to south. This addition roughly added another 2,000. Now,… take a moment to consider just how big your house is. I remember way back when I was a little shaver what my Ma would say every time she’d finish with the vacuum cleaner,… “I’m so glad we can’t afford a bigger house!” She’d let out a tired sigh as she wiped sweat from her brow, (sorry Ma, I meant perspiration) and share her views on how silly it is for rich people to hire servants to maintain a ridiculously vast and expensive home. This concept kinda stuck with me all these years, and while I was tilling the ground far beyond the original footprint of our garden it was on my mind. I gave some thought to the countless hours we (Okay, mostly Grace) spent on hands and knees pulling weeds last year. Where few would care to vacuum 6,000 square feet of carpet, try to imagine weeding that much area! The point and purpose of all this extra space was to provide a greater surplus of vegetables for canning. I get that,… but since this expansion, the only thing Grace managed to can was green beans. ALLOT of green beans… Guess which vegetable of all the vegetables we could ever possibly grow in the garden do I care the least for? Yup! Green beans!!!
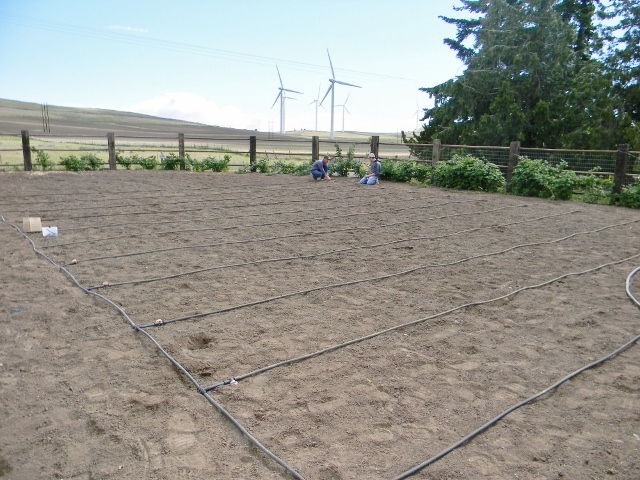
Oh well,… I really can’t say much. Once the irrigation is installed, Grace pretty much takes over maintenance of the garden. I do have to admit tho’; her diligence this year paid off. (that is to say, she worked her butt off!) That was until the late spring rains came… Right up until that point Grace had somehow managed to single-handedly conquer most of the weeds across this generous space, and just a few more days of battle would have enabled the “Queen” to declare ultimate supremacy over the land (well,… this bit of it anyway). I should share some things to consider right about now concerning the value such an arduous conquest would have ordinarily meant. We drip irrigate the rows on 4′ centers allowing us to easily measure and offset each row to ground that had rested the year before. It also gives us more room to weed and harvest, and it usually saves allot of water (we were plagued with irrigation failures this year). Another great advantage to this system is that MOST years, once the moisture comes out of the ground the weeds don’t come back between the rows. We typically just don’t see enough rain again until late fall. You can imagine her dismay when after nearly two weeks of unexpected showers her whole garden turned green with weed sprouts (making all that effort lost and pointless…) Grace bravely redoubled her commitment to purge this particular piece of land from the invasive onslaught of subversive flora as long as she could, but ultimately the allergies she always suffers this late in the season finally won out. (I’m thinking hydroponics may be the way to go, or better yet, aquaponics! Yea,… I like fish.)
To add insult to injury, the area I’d extended the garden into wound up primarily dedicated to melons, squash and gourds, but nothing grew! I don’t mean that the harvest was slight, I mean there was no harvest! The plants were lanky, yellow, and in most cases didn’t even grow beyond the noon shadow of a goat. By late July we knew something was very wrong, (even the weeds struggled) but it took a few more weeks for me to remember what I’d done… (Yup… My fault.) Oh c’mon! If the ground had looked any different from the rest of the garden when I tilled it, it might have occurred to me then; but it looked great! (it still had moisture) As I stood there thinking about what might possibly be the problem, I remembered the go-kart track (Picture a small light bulb briefly illuminating over my head, replaced shortly by a dark storm cloud as I realized what an idiot I am). Years ago I’d stripped the topsoil off this area with a dozer when I was building our first go-kart track. (For the boy’s,… of course.) I’d completely forgotten! Yea,… Ooops!
This is me and big brother racing over the ground that is now the melon patch.
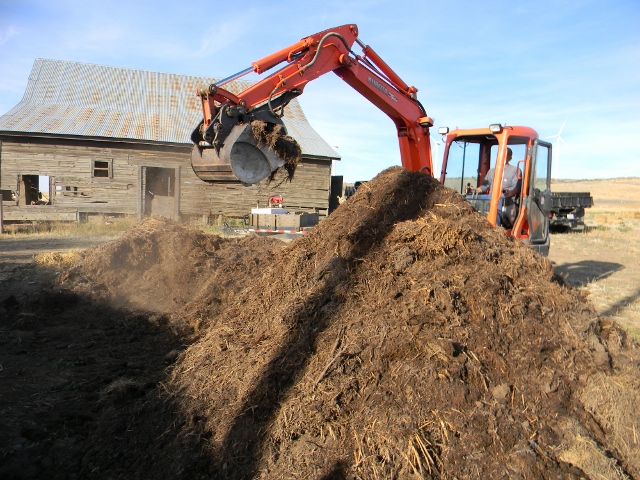
Things tend not to grow so well in subsoil even if it does look good. I’ve been cooking down a large pile of old hay bales into compost all summer, and I’ll till it into the new garden space next spring. That should help…
By chance the potato bin I built wound up on this same piece of ground as well. Given that the bin was filled with good soil mixed with red sand a few inches at a time over several weeks excludes the poor soil from the lousy ‘tater harvest in this case. Even our best soil is still pretty heavy with clay, so despite the liberal application of sand (well over 50%) the lower half of the bin stayed too wet. Another disappointment, but another lesson learned. Next year we’ll use straw with a bit of cured compost, and raise the bin off the ground enough to let it drain better. That should help. The ground we’ve expanded into (the old go-kart track) should improve greatly with liberal amounts of compost tilled in, and I’m also planning on a much improved irrigation system for the whole works.
Yea, we’ve had some setbacks over the years, but despite all the headaches our accomplishments far outweigh the disappointments. Too often the difference between lost time and effort vs. education is attitude. Personally, I’d rather spend a few days every year learning the wrong way to do a thing than spend the thousands it would take to have some professor tell me how to do it their way… How about you?
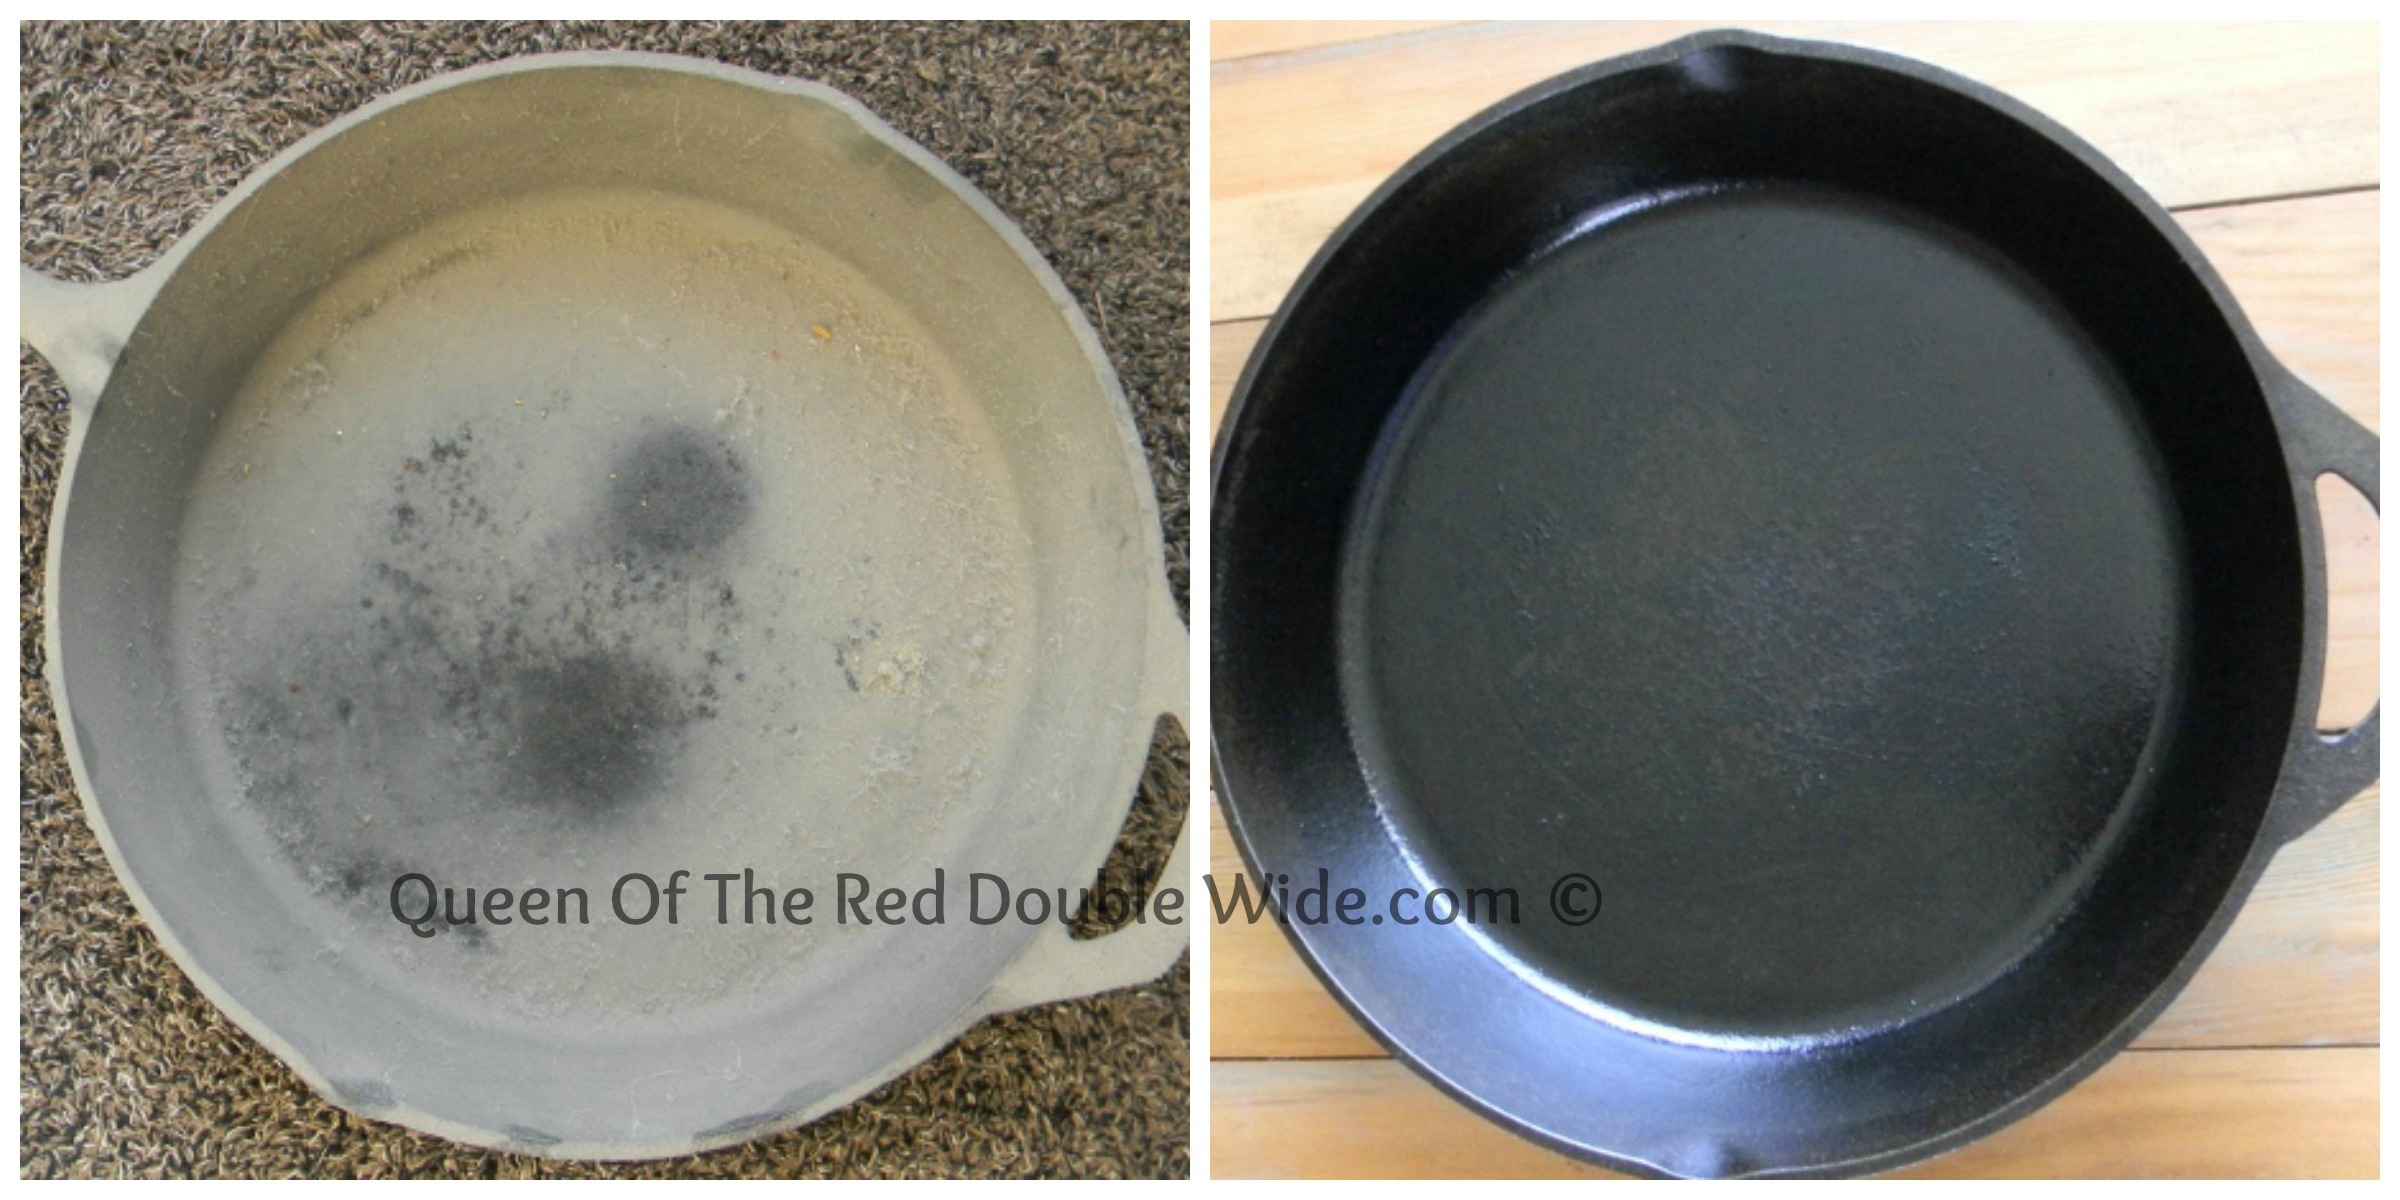
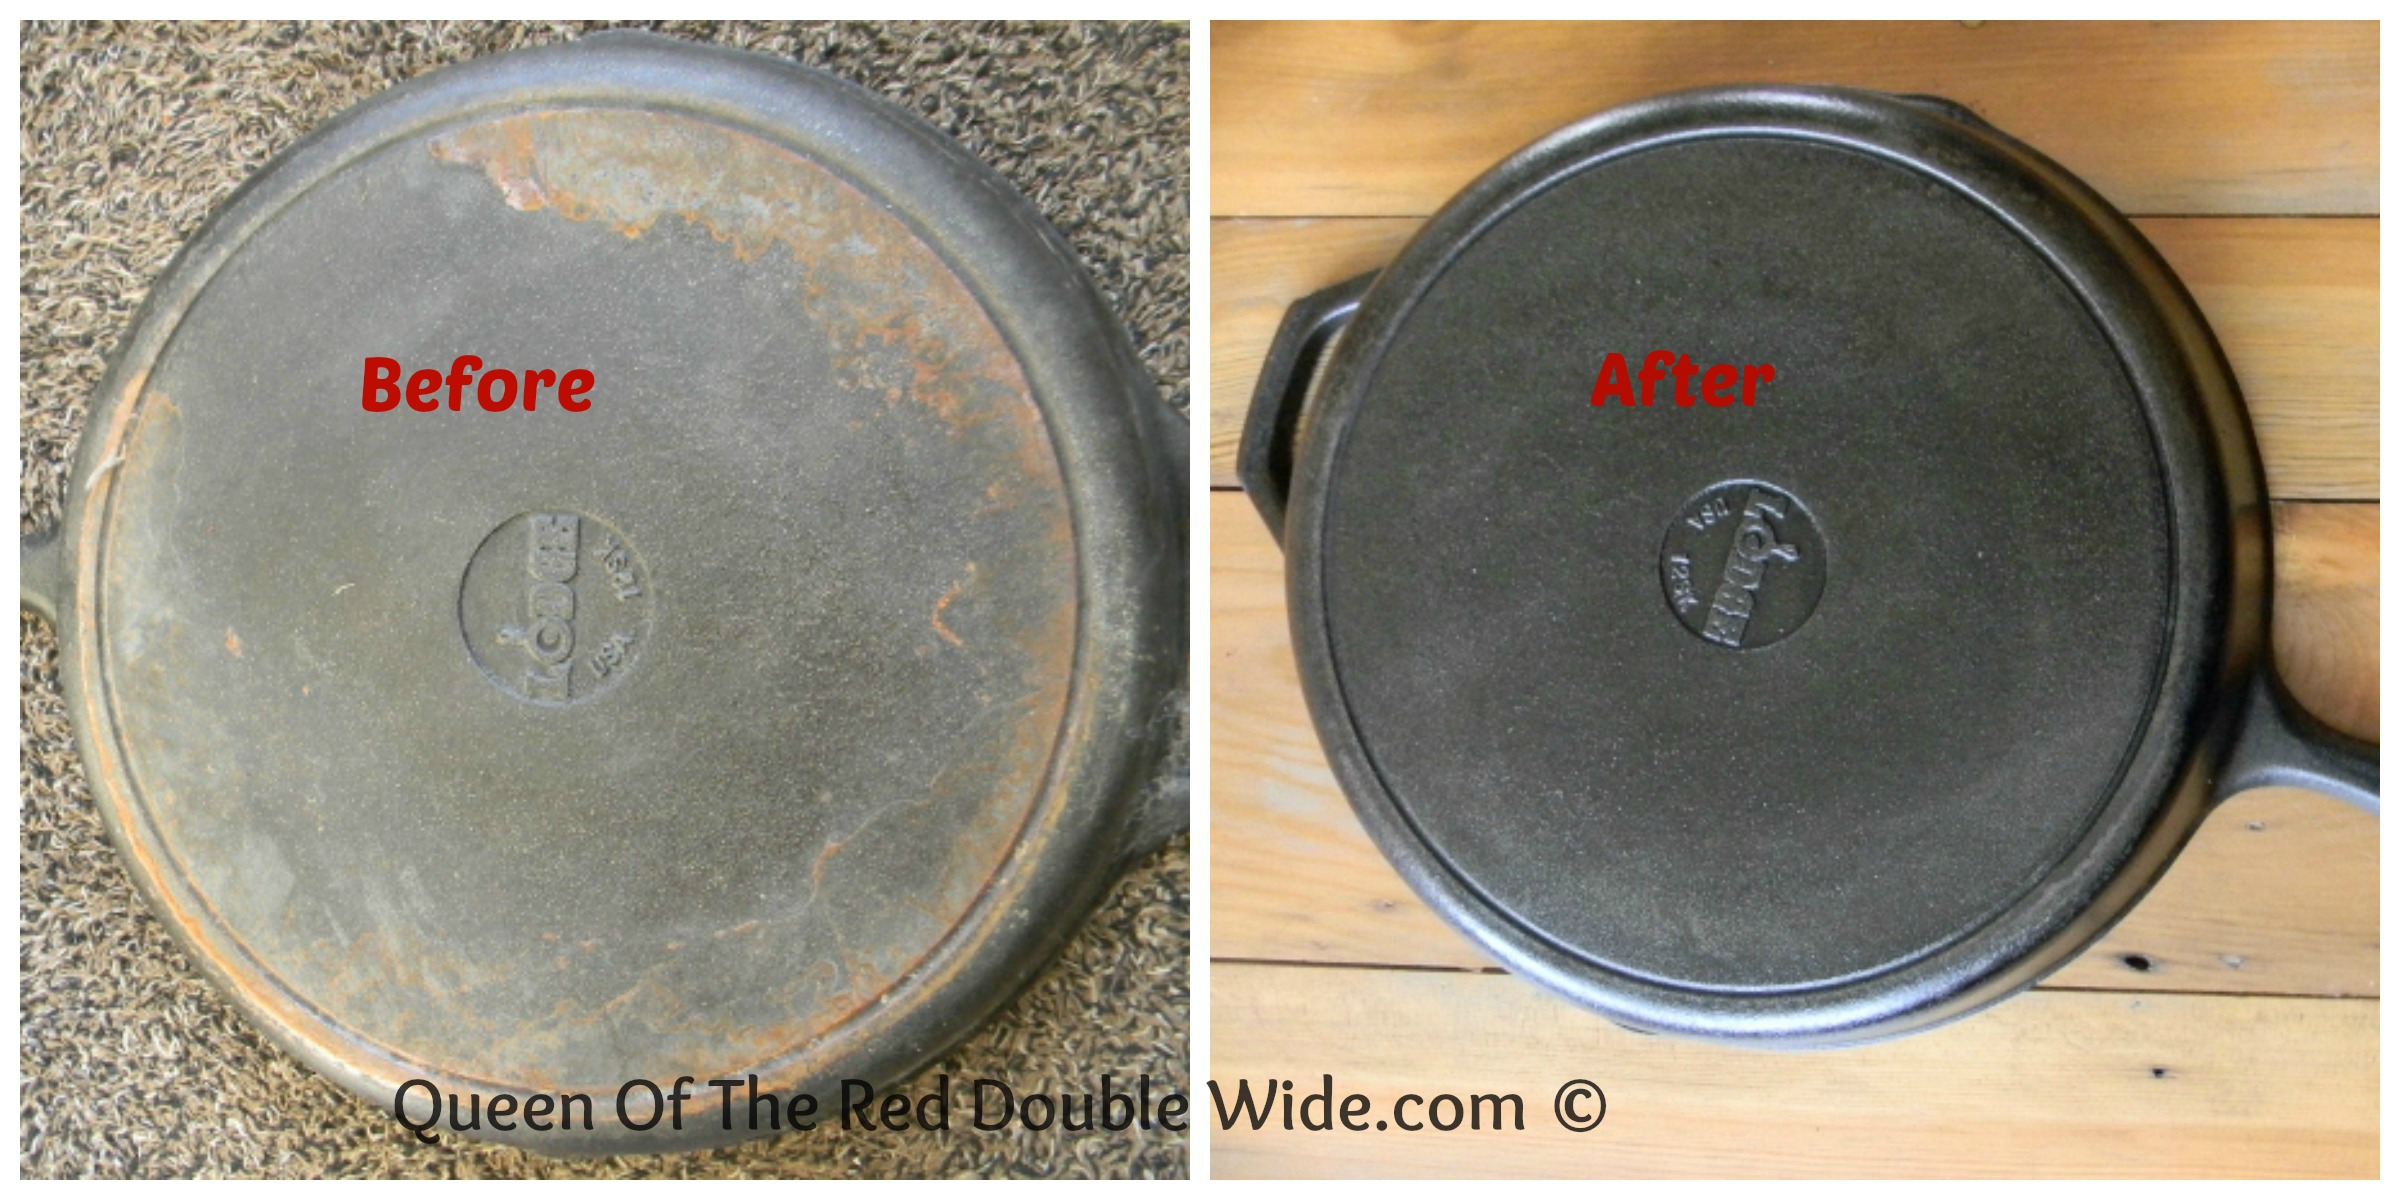
Over Christmas break I had time to do some long over due deep cleaning in the red double wide. I also did some purging and lots of STUFF went out the door, but when I came across my cast iron skillet I decided it was time to re-season it and put it to work. It was a lot dusty and a little rusty. Here are a couple before and after pics.
I had put this poor skillet in hiding shortly after my mom gave it to me….Why, you ask? Well I knew nothing about cast iron and the whole seasoning thing kind of intimidated me. Then, the first thing I attempted to cook was eggs……ya, they didn’t turn out so great!! By not so great, I mean a smoking, smelly, skillet with bits of crunchy black eggs. After that the top shelf in the laundry room seemed like a good home for the cast iron skillet. Recently I have come across some blogging posts about caring for your cast iron and some recipes that work well with it. They made it sound easy enough, so I thought I would give it a try. It made me feel a little better to read that though it’s not impossible, eggs are not the easiest thing to cook in cast iron. 🙂 I have decided to stay away from eggs until I am a more seasoned (haha) cast iron cook!
These biscuits are the first thing I made in my skillet. They turned out GREAT. They are light, flavorful, quick, and my favorite EASY!
Author: Queen Of The Red Double Wide adapted this recipe from crunchyrock.com
Serves: 10
Ingredients
2 cups whole wheat pastry flour
1 tablespoon sugar
3 teaspoons baking powder
½ teaspoon salt
⅛ teaspoon baking soda
¼ cup butter
1¼ cup buttermilk
2 tablespoons melted butter
1 cup flour
Instructions
Preheat the oven to 475 degrees
Stir together the flour, sugar, baking powder, salt, and baking soda in a mixing bowl.
With a pastry blender, or your hands, cut the butter into the flour mixture until the butter is about the size of peas.
Add the buttermilk to the mixture and stir just until combined, then let it sit for a few minutes.
In a separate bowl place the additional 1 cup of flour.
Scoop about ¼ cup of biscuit mixture out and gently toss it in the flour. Lightly shake off excess flour and place it in a greased 10 inch cast iron skillet.
Continue with the other biscuits, you will end up with about 10 biscuits.
Pour the additional 2 tablespoons of melted butter over the biscuits.
Bake for 16-18 minutes.
3.2.1255
Note: This recipe is for a 10 inch skillet and mine is a 12 inch. That’s why the biscuits look so small in the pan. 🙂 If you don’t have a cast iron skillet you can use a cake pan.
This recipe also works using 1 cup of all purpose flour and 1 cup whole wheat flour instead of 2 cups whole wheat pastry flour.
Happy New Year Everyone! Hope you all had a blessed Christmas and are looking forward to an AMAZING 2014!!
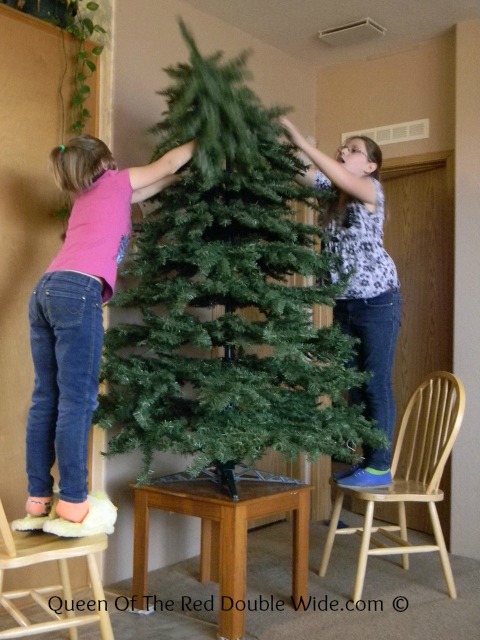
We started off December by decorating. I love that the girls are now big enough to put our ugly, fake, redneckbeautiful, artificial tree together by themselves. They needed a little help from dad when it came to the lights but other than that, it was all them!
Jade came home for an early Christmas and we remembered to get a family picture this time. It’s not the best pic, but it’s all of us. 😀
December was a month of cookies, cookies, fudge, dipped pretzels, almond roca, and more cookies…….I really need to get back to work and away from my kitchen before I can’t button my pants!
This is what happens when you turn your back on the 9 year old with sprinkles in her hand.
Sadly we have received no snow so far this winter. Everything is brown and cold. These are our dormant raspberry bushes.
This goofy dog locked himself in the garden….he’s looking a bit worried. 😉
Digger hauled this home the day before Christmas Eve. It was his Christmas present to himself! As you can see he has LOTS of work to do on it.
We are praising God for a 2013 that was full of change and challenges and praying for a healthy, productive, and happy 2014.
These might possibly be my favorite Christmas cookies. They are so DELICIOUS but the best part is the absolutely wonderful aroma that fills my house while they cook. A Christmas candle or Scentsy Pot can’t even touch the Christmasy (is that a word?) smell from these cookies! My sister told me about this recipe a few years back and I have made them every year since.
The secret to these amazing cookies is Andes Peppermint Crunch Baking Chips.
These things are creamy, melt in your mouth, goodness! Add them into a cookie with oatmeal and coconut and…….WOW! Or you could just upend the bag into your mouth, that would work too.
Using an electric mixer, cream the butter, brown sugar, and granulated sugar.
Beat in the egg and vanilla extract.
On low speed, add baking soda, salt and flour. Mix completely.
Stir in oats, coconut, and peppermint chips.
Measure 1-2 Tablespoons (depending on how big you want them) of dough and place round balls on a cookie sheet, 2 inches apart.
Press lightly on each ball to flatten a little and sprinkle some of the remaining chips on top of each cookie.
Bake at 300 degrees for 10 to 15 min.
This made about 30 cookies.
3.2.1255
Note: It is a little tricky to figure out when these are done. I check on them at 10 minutes and don’t take them out until they are a little brown around the edges. After they come out of the oven if you let them rest on the cookie sheet for a few minutes they will stiffen up a bit and be much easier to lay on a cooling rack.
This recipe was adapted from tootsie.com. I am in no way being compensated for saying these things about these baking chips, I just think they are delicious and Christmasy!
‘Twas the night before Christmas and all through the homestead,
Not a creature was stirring, they’d all been well fed.
Digger was comfy half asleep in his chair,
While sounds of Duck Dynasty filled the air.
The kids laid out cookies for Santa with care,
Then brushed at their teeth and combed their hair.
My day was done so I snuggled into bed,
As visions of chickens danced through my head…..
Okay, That’s enough of that!
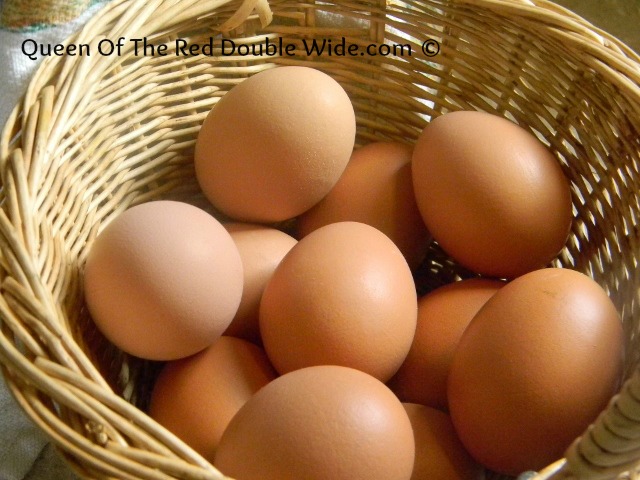
I’m not lying though…..I really do have visions of chickens dancing through my head! Recently I have received a couple chicken catalogs in the mail and even though the weather outside is frightful, I’m dreaming of a green spring and dozens of baby chicks in the brooder! Ho hum, soooo many choices and so little coop space. 😕 We have 12 laying hens right now and even with the nasty, cold weather they are still giving us 8 to 10 eggs a day! I really should be content with that…..right? Well, I am for now but there’s nothing wrong with planning ahead, making a wish list and saving money for more chicken coops. 😉 Right now we have one breed, they are all Golden Sex Links……
I’m thinking we need a little more color introduced to our flock. Some Barred Rock, Black Australorp, and Columbian Wyndotte are my favorite picks of very good egg layers. While these will add color to my flock, they will not add color to my egg basket.
Not that there is anything wrong with big brown eggs, I love my big brown eggs, but a little variety would be nice. This is my frivolous wish list of colorful egg layers. A Blue Ameraucana will lay blue eggs, an Olive Egger will lay green eggs. White Leghorns will lay lots of white eggs and Blue Copper Marans will lay beautiful dark chocolate colored eggs. I also promised the girls they could pick out a couple Bantams, and of course I want to raise meat birds again (not sure what breed yet). There you have it, my complete wish list! Like I said, all I need want now is more chicken coops. 😉
Have you made your chicken wish list yet? Are you also in need of more coop space? A word of caution to those of you wanna be chicken owners……chickens are addictive!
Meyer Hatchery and Murray McMurray Hatchery have great sites that you can browse through, and learn lots about different breeds of chickens. I have ordered from both hatcheries with VERY good results. Now is the time to pre-order to make sure you get the breeds you want delivered when you want them. Just make sure the breeds you are picking are conducive to your climate!
Merry Christmas Everyone! Be grateful for what you have, but remember there’s nothing wrong with a little wish list. 😀
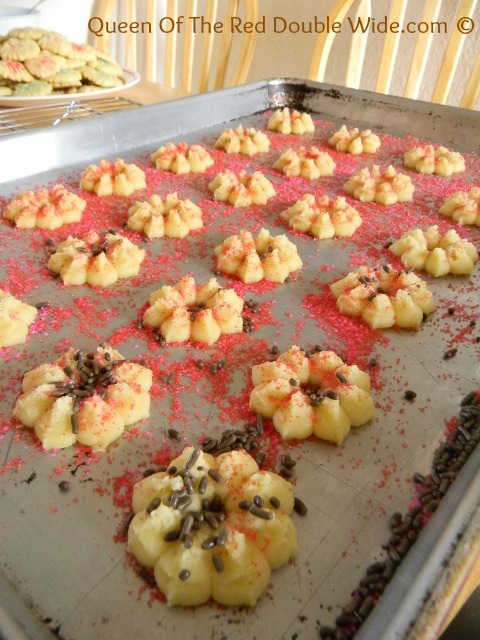
A few years ago I inherited my grandma’s cookie press, and now it’s a tradition to make these cookies every December.
I think she would be so pleased to know that her great grand daughters are using her cookie press. 🙂
These are a lot of fun, especially for kids and the recipe is really simple. Picking what shape of cookie to make and getting a little crazy with the sprinkles are the best parts….well and eating them too. 😉
Mix butter, sugar, egg, salt, and vanilla thoroughly. Add flour and blend well. Following the directions for your cookie press, force the dough through the press onto an ungreased baking sheet in desired shapes. Sprinkle with holiday sprinkles. Bake at 400 degrees for 6 to 9 minutes.
 This is how I do it: Take your cooled off leftover pancakes, waffles, or french toast and layer them on a cookie sheet with parchment paper. (I have gone up to 4 layers) Try to make sure they are not touching so you don’t have to hack them apart.
 Place them in the freezer until they are frozen through. The more layers the longer it will take. I just leave mine in over night. When they are frozen through, place them in a dated, resealable, freezer bag and put them back in the freezer.
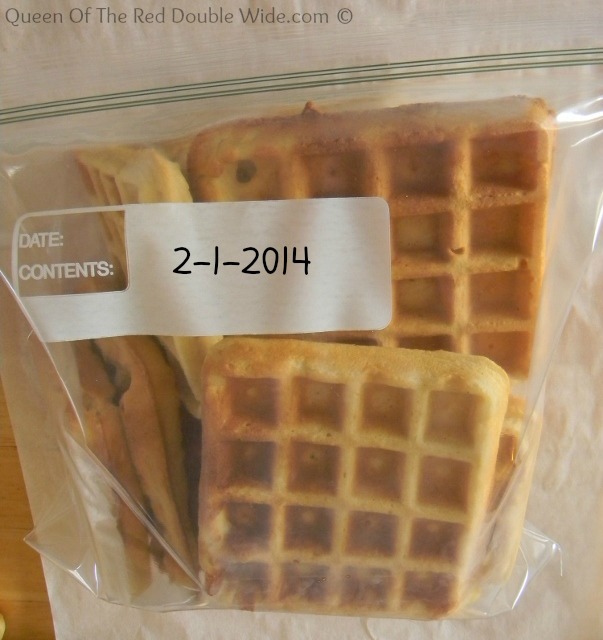 It’s that easy, and now you have a homemade, fast, healthy breakfast on hand.